

Like most other software, Windows has continually grown over the years, adding more features that eventually lead to a bigger size. Windows 10 was originally supported on devices with up to 20GB of storage, but now you need at least 64GB for Windows 11. This also applies to installation files. A few years ago, a 4GB flash drive was enough to hold a Windows ISO (it used to be less), but these days, 8GB is the minimum required by Microsoft.
But what if we told you that you can make your Windows ISO much smaller and remove all the stuff you don’t need? Thanks to the work of XDA Senior Member jenneh, it’s relatively easy to create a lightweight Windows ISO that’s more suitable for you. The developer has put a lot of work into making the experience a little less daunting for new users, and hopefully it will make it easier for anyone to build their own Windows ISO.
What will you need
There are only a few things you really need to create your Windows 11 ISO:
- Windows 11 ISO standard: You need an existing Windows 11 ISO file which will be the basis for the modifications you are going to make. You can Download it from the Microsoft website.
- Modwin: Program developed by Jannah is a Senior Member of XDA To make it easier to modify the Windows ISO file. Although not technically required, this will ease most of the pain of this process, so we highly recommend it.
How to make your own Windows ISO
We have divided this process into several sections. For our example, we’re using a Windows 11 Standard Multi-Version 22H2 ISO, but this should work on Windows 10 as well.
Selecting the sources and installation of the WIM file
First, you will need to upload a WIM file to modify it. The WIM file contains all the necessary Windows installation files, and is contained in an ISO file. It could also be an ESD file depending on which ISO you have, but MODWIN will work with either.
- Download Modwin from GitHub and run the installer. You may see a Windows SmartScreen prompt, so click More information and then Run anyway.
- The files will be extracted to A: modwin.

- Take your existing ISO file and double-click it to mount it as a virtual drive, which should open automatically.
- Copy the contents of this virtual drive to a file A: MODWIN ISO Folder.
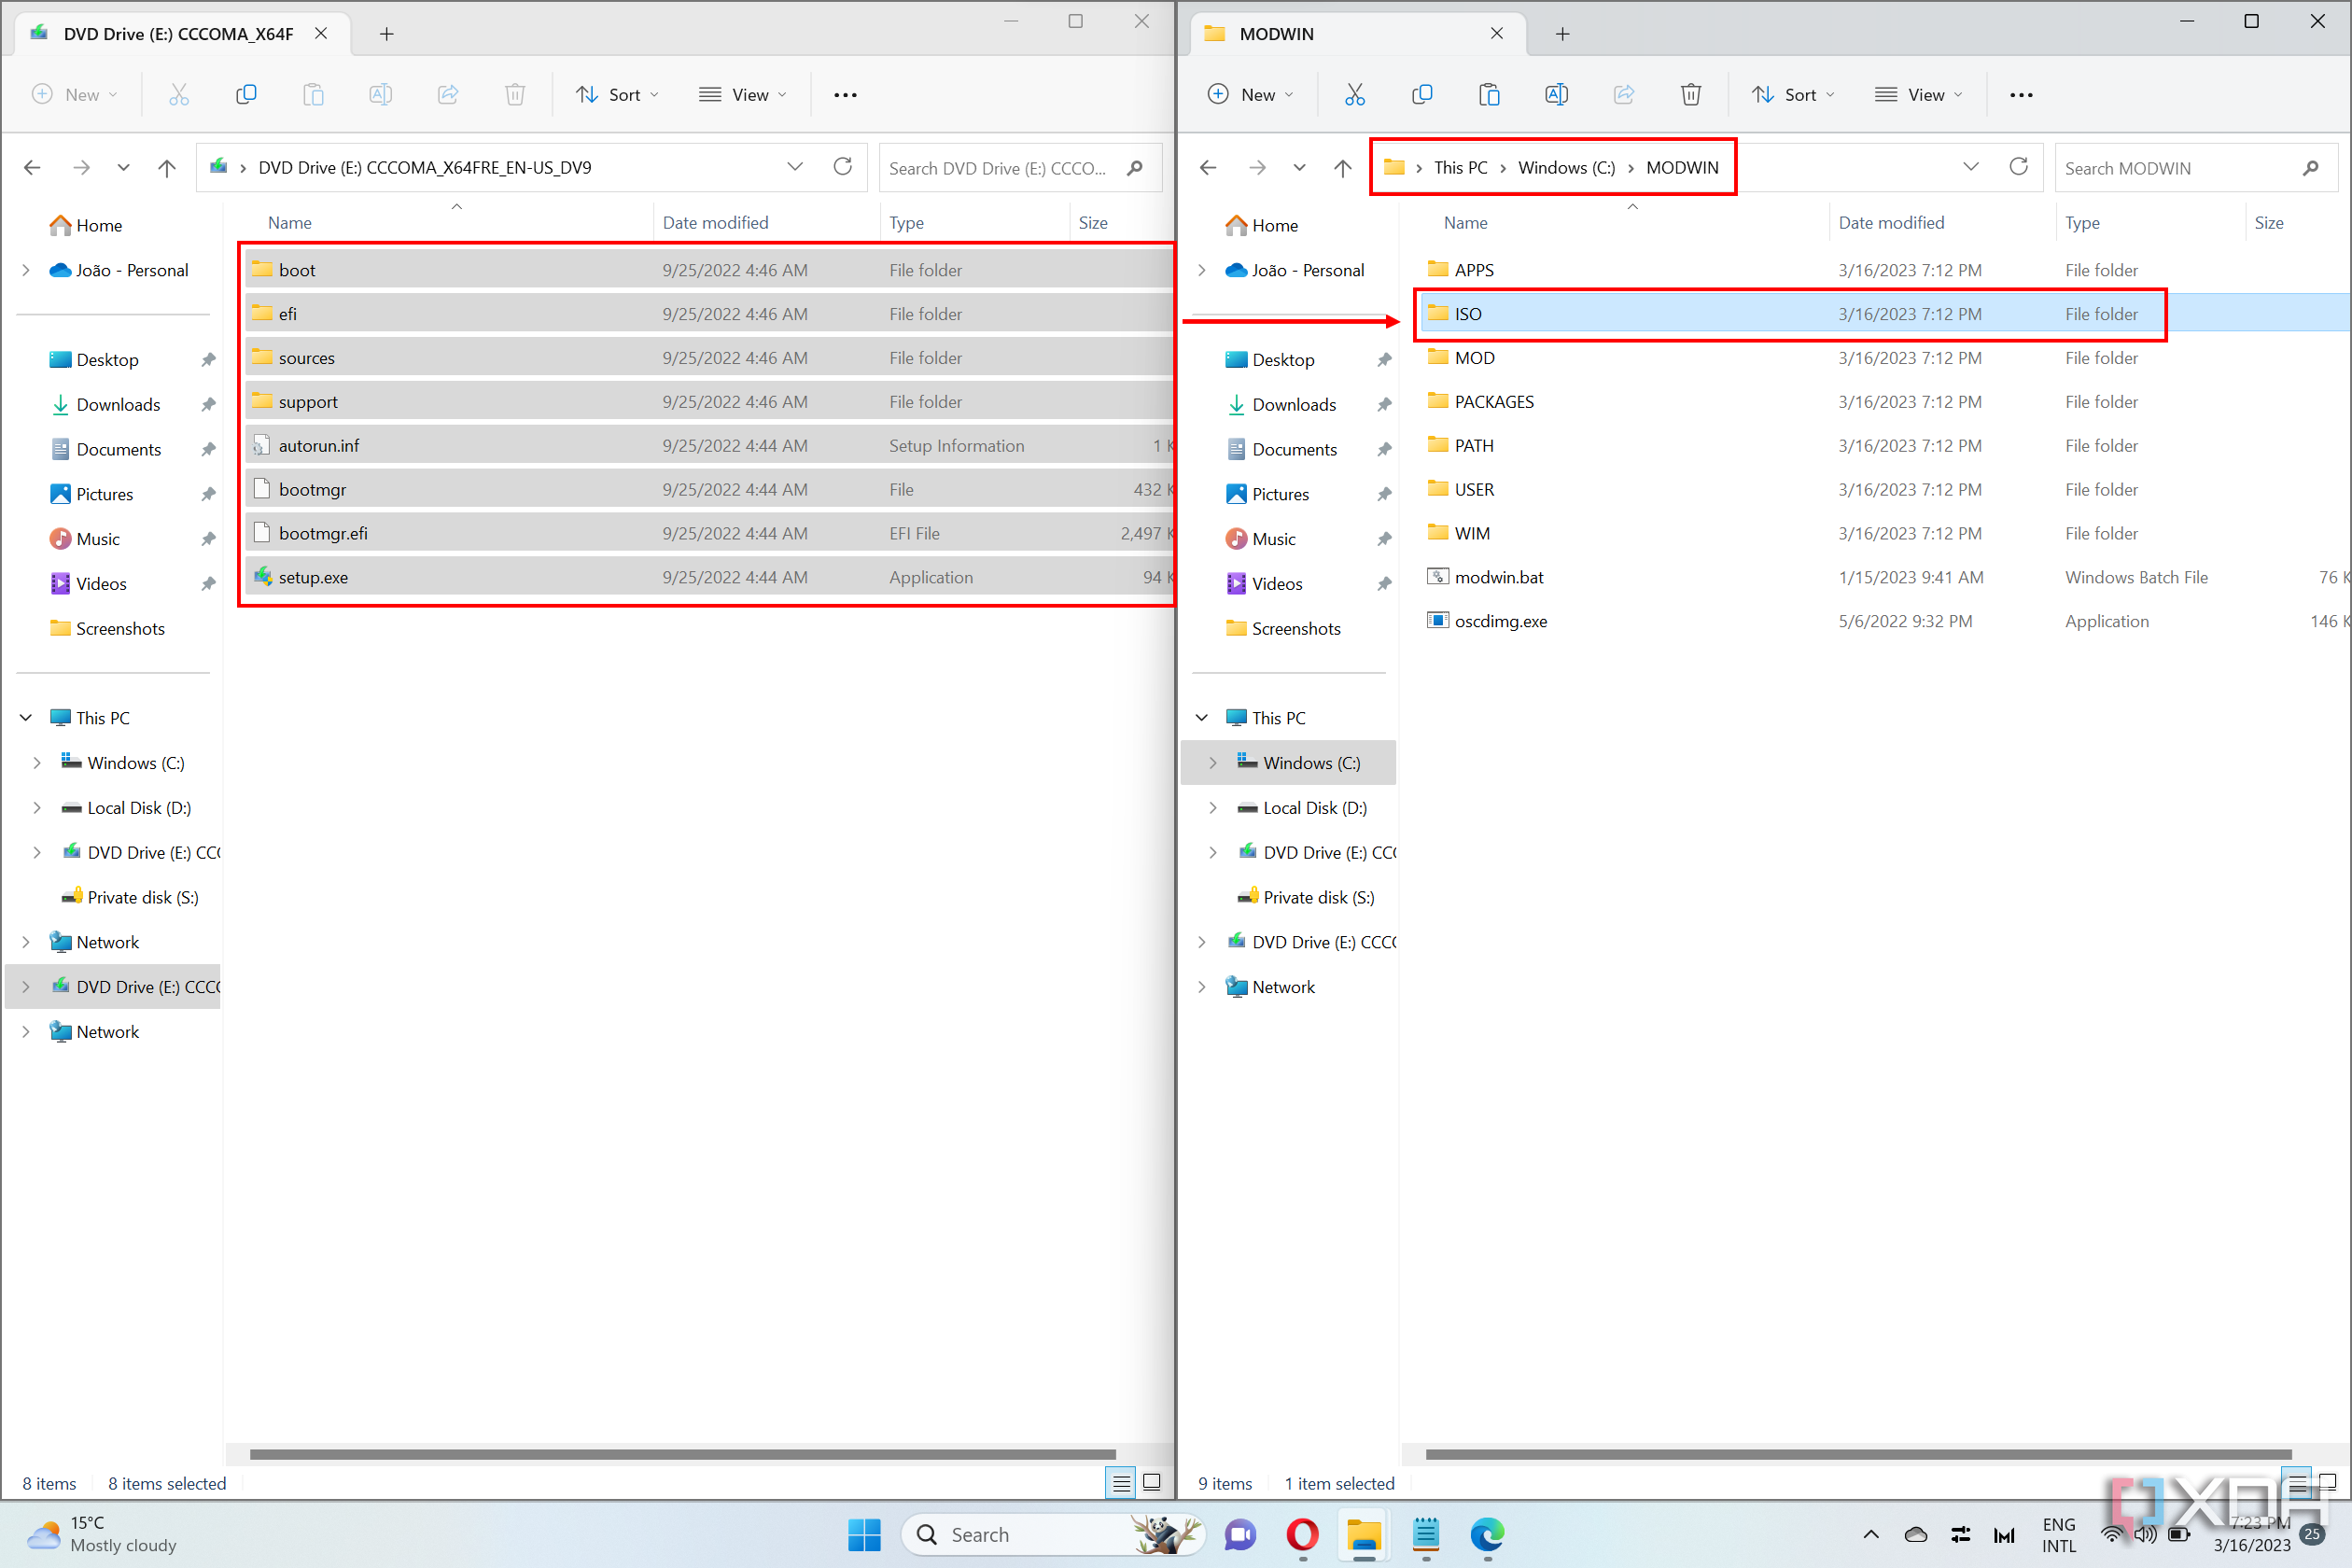
- Go to the home page A: modwin folder and run modwin. bat.
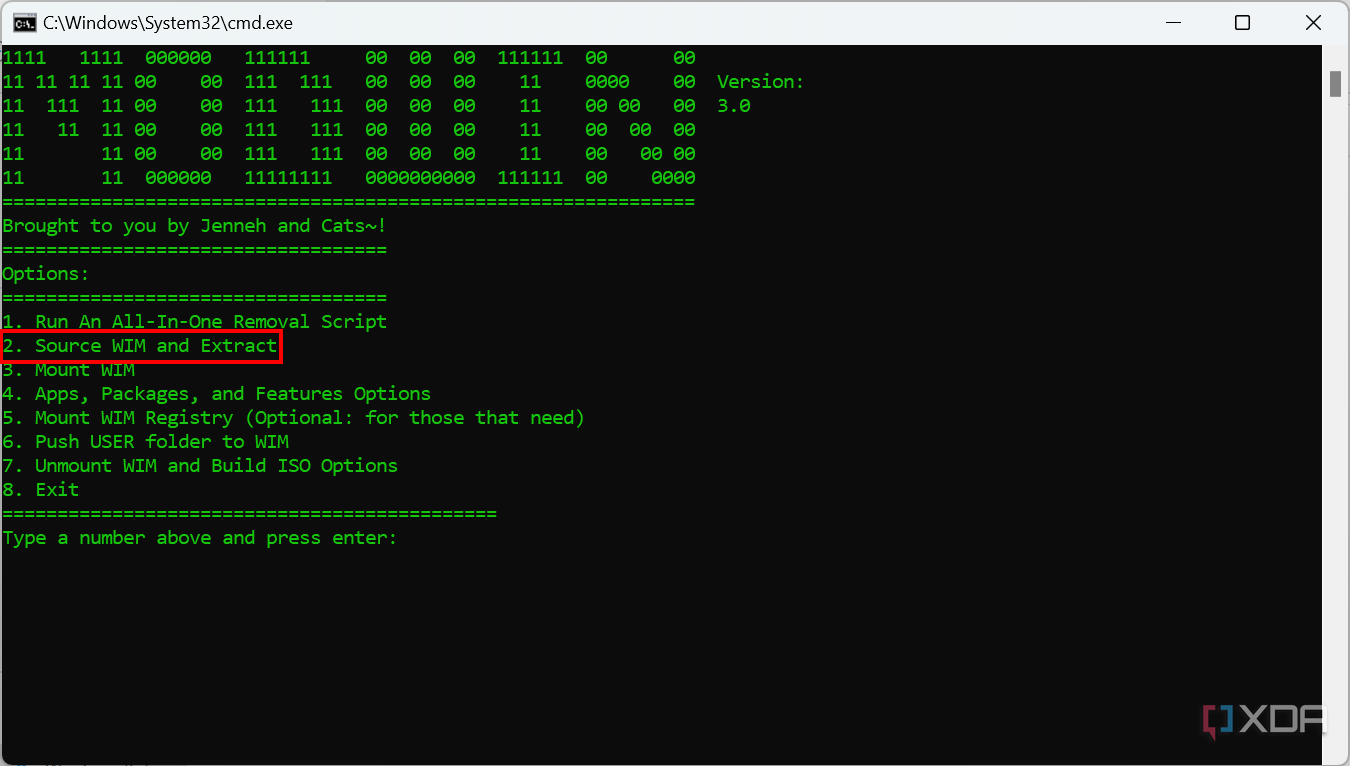
- This will open a command prompt with a few options to choose from. There are two main types:
- Option 1 It is an all-in-one removal script, which means that it will remove all applications, packages, and features that are not necessary for Windows to function at a basic level. This option is not recommended for most people.
- Option 2 It lets you modify the ISO to remove apps and features of your choice. The remaining options are actually steps in the same process. This is the option we recommend choosing.
- The program will ask you to choose if your ISO file contains a WIM file or ESD file.
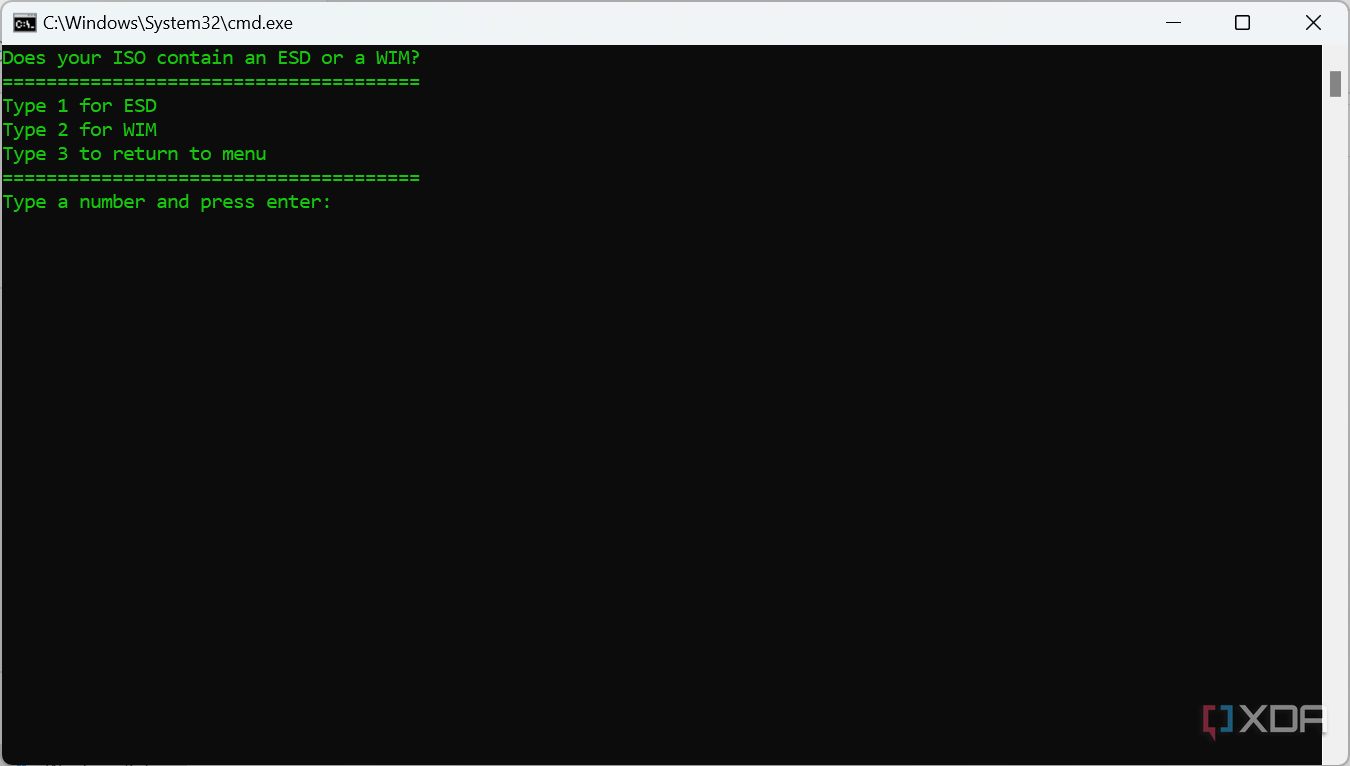
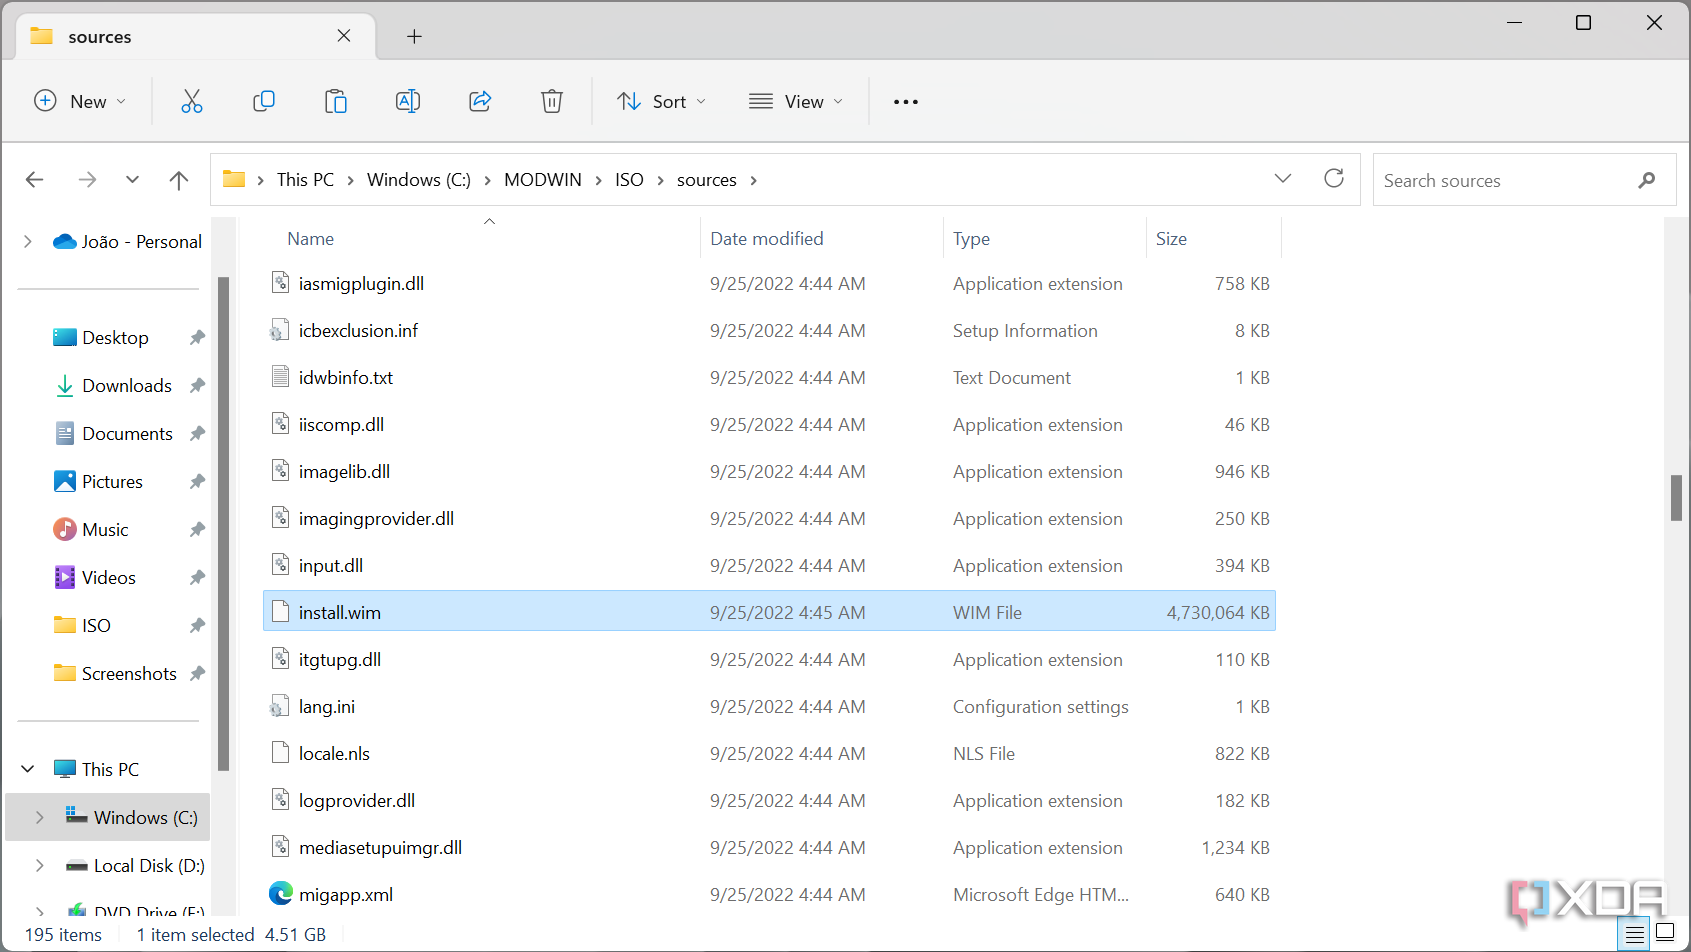
- Use File Explorer to navigate to A: MODWIN ISO Sources and find a file called install. wim or install. esd. NB: Modern versions of Windows should have a install. wim file if you’re using an official Microsoft ISO as a base.
- Return to the Command Prompt window and enter the number corresponding to the file format you see.
- You will see a list of all versions of Windows that are included in the file you selected.
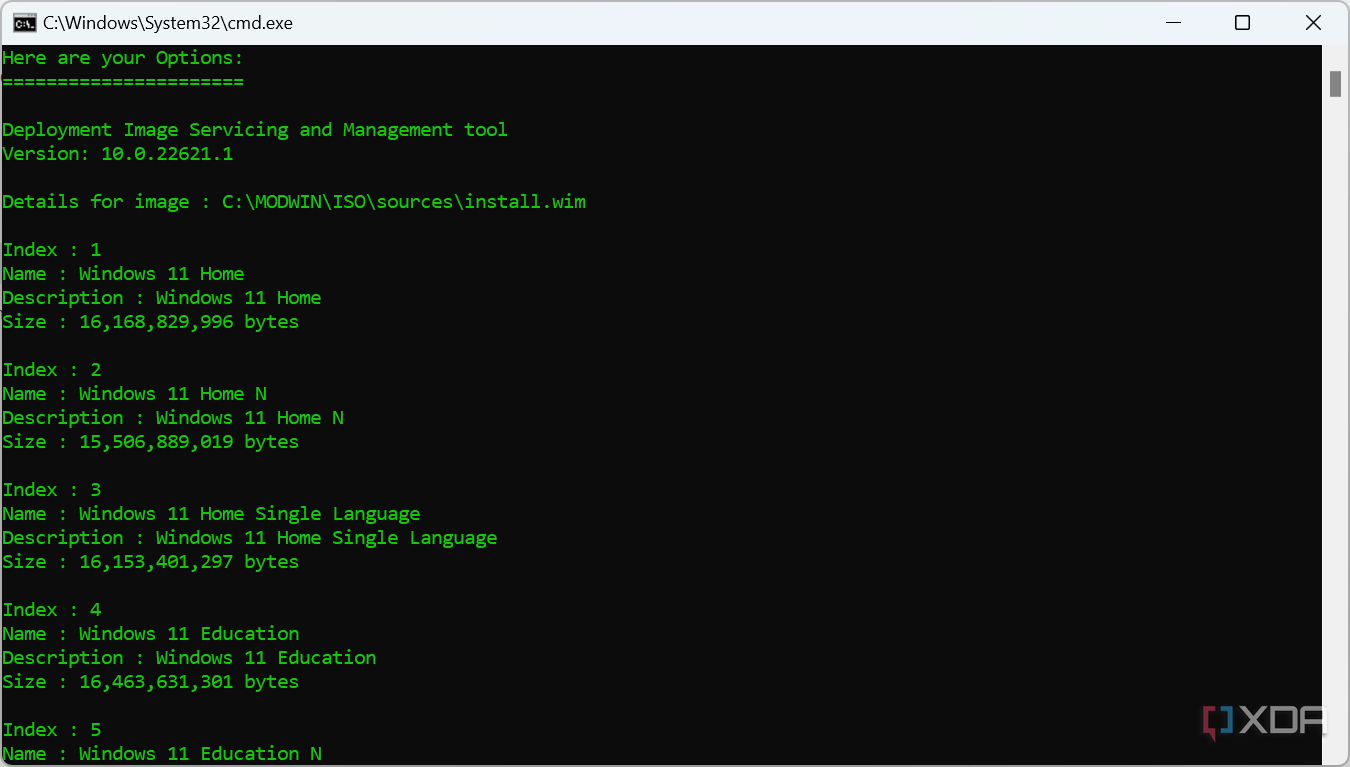
- entrance index The number corresponding to the version of Windows you want (you’ll need a license for it) and press Enters twice.
- The program will start extracting the WIM file.
- When the process finishes, you will see a confirmation message.
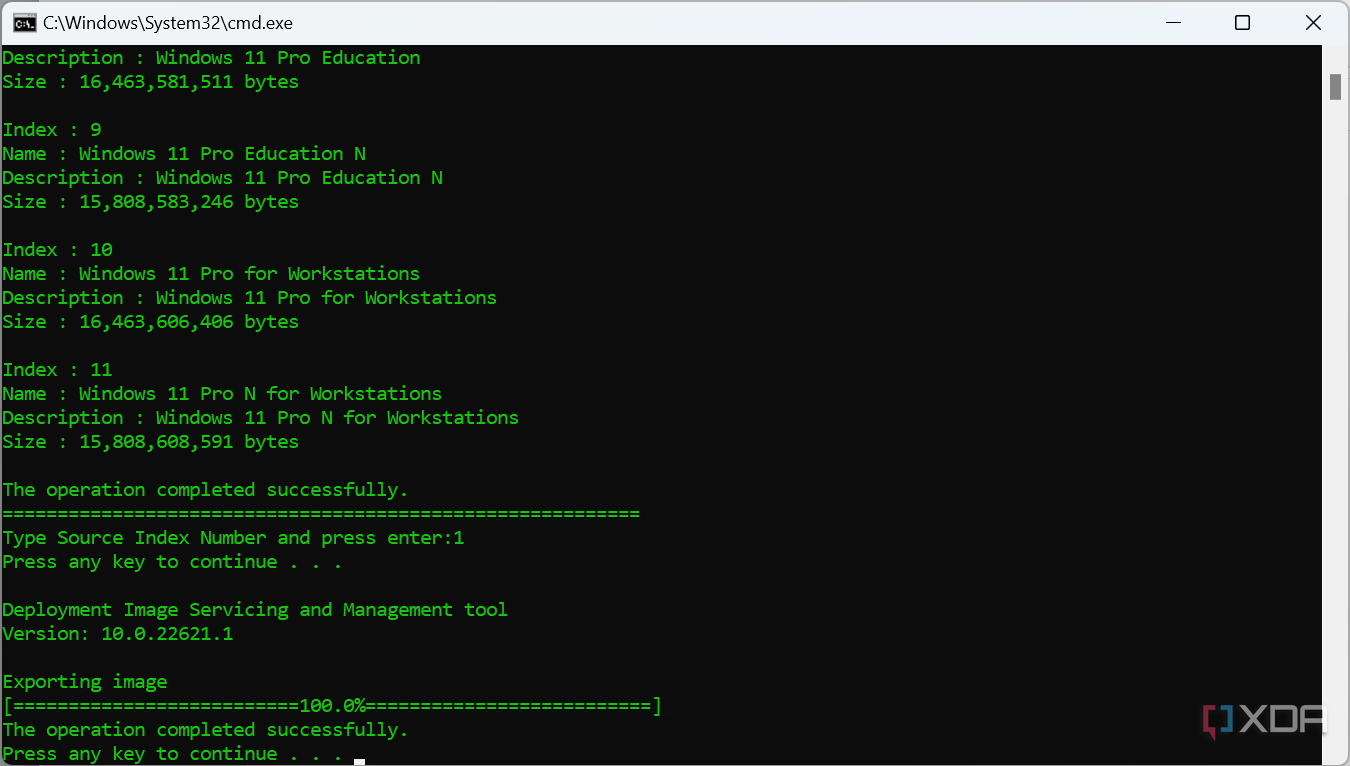
- He presses Enters to return to the main menu screen.
- Now, we are going to select the option 3. Mount WIM. Enters 3 and press Enters.
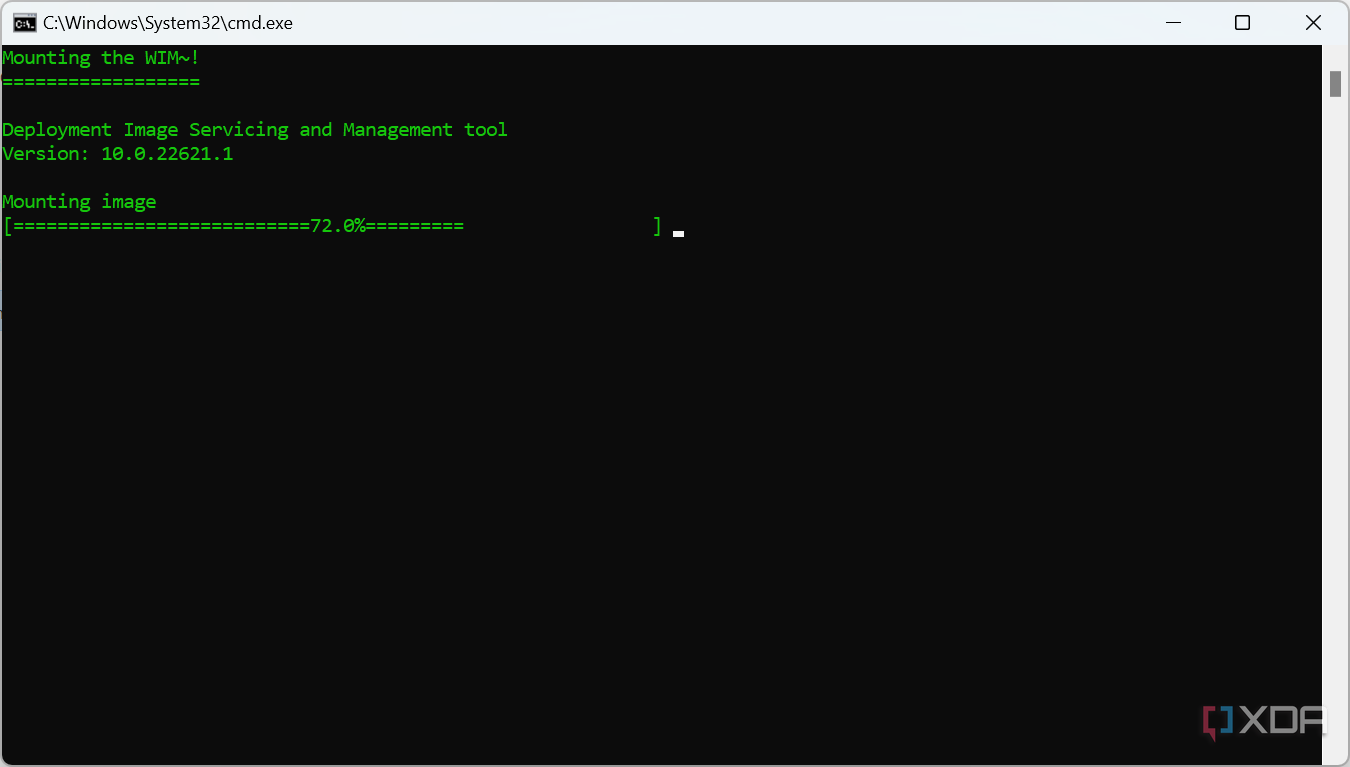
- Wait for the process to finish and you will be taken back to the main menu. Leave the app open.


Remove apps and features from the ISO
Now that WIM is installed, it’s ready to be modified. You should see all files within a file A: MODWIN PATH Folder. Don’t touch the files! The next step is to choose the apps you want to remove from your Windows installation. So, follow these steps:
- From the MODWIN main menu, select the option 4. Applications, Packages and Features Options.
- You have a few options for the things you can remove or modify:
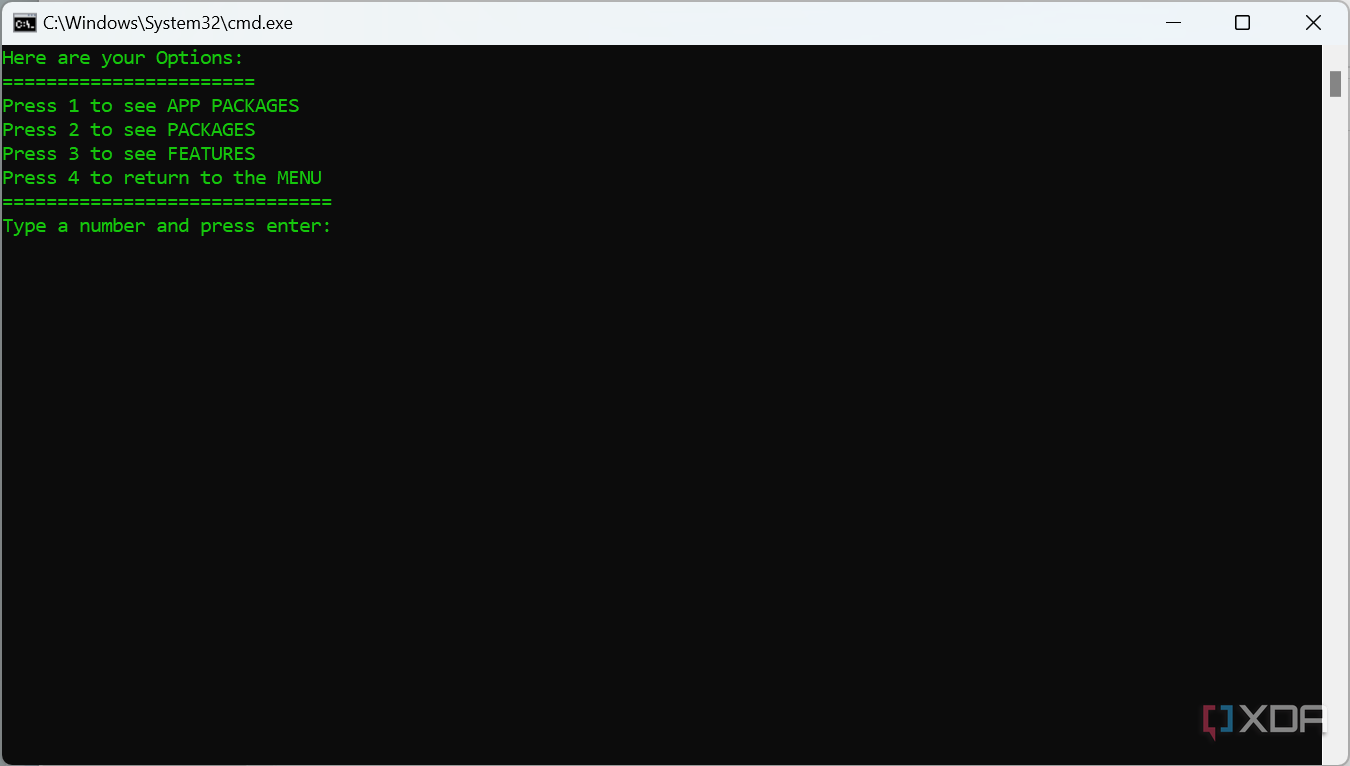
- Application packages: Refers to parts of Windows that are apps on the Microsoft Store, such as the Weather app, Xbox, Phone Link, and so on.
- Packages: It includes some basic drivers for basic functionality (such as networking) and some Windows features such as WordPad.
- Features: Includes optional Windows features, such as Hyper-V.
- If you want to see which apps you want to disable, tap on 1 and hit Enters.
- You will see a list of application packages that are included with your Windows installation. Some of the names may not be entirely accurate to the user-friendly name, such as microsoft.windows connections applications package, which refers to the Mail, Calendar, and People apps. However, most applications should be easy to identify.
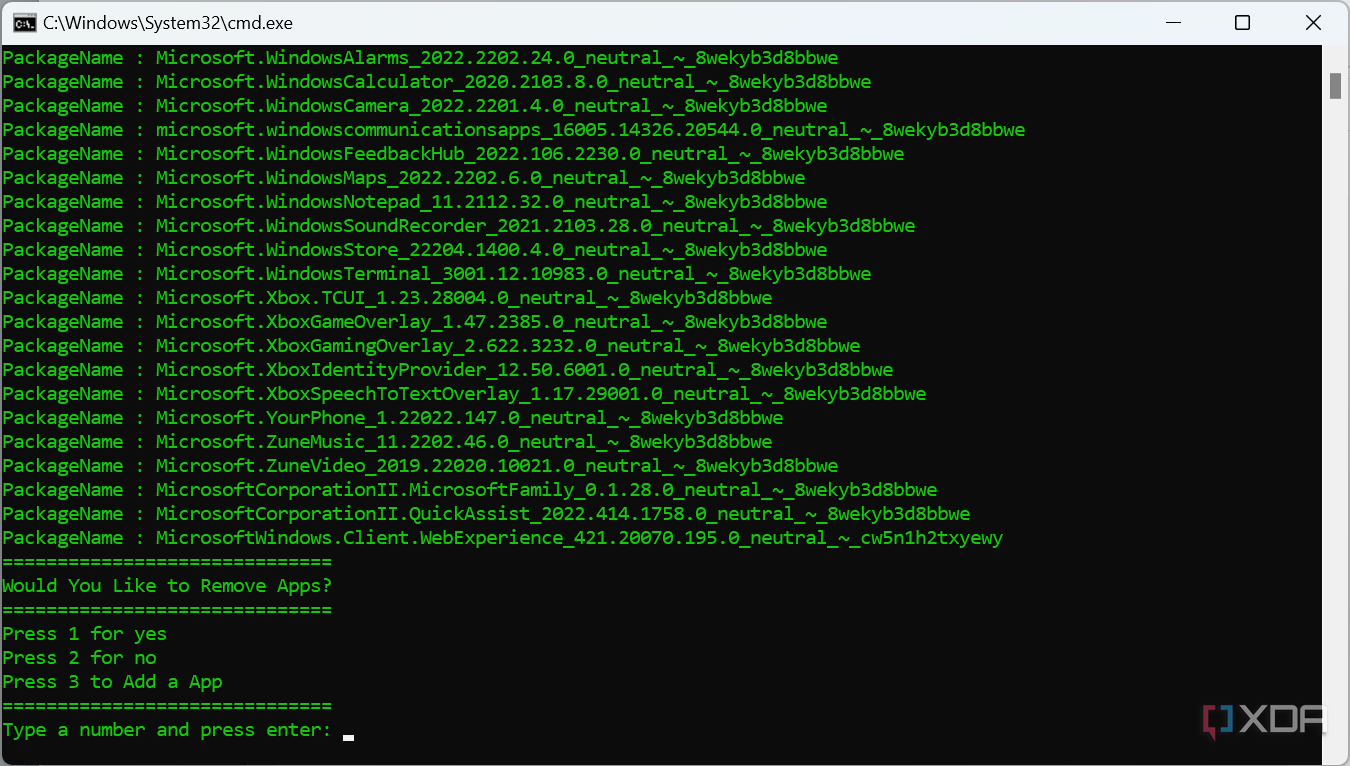
- If you want to remove any of the apps, tap 1 and hit Enters.
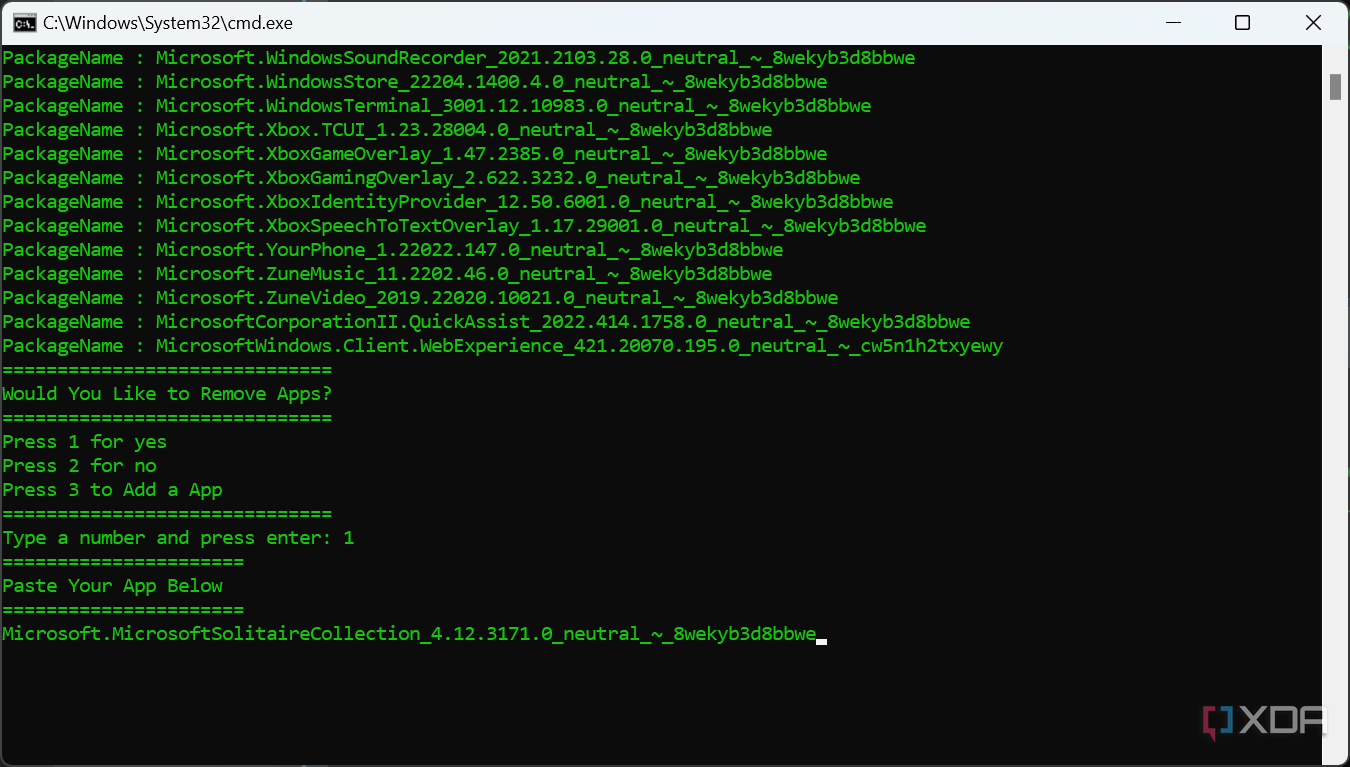
- Copy the name of the application or package you want to remove, paste it into the command field, and hit Enters. You can double-click the name to select it more quickly.
Not every app is necessarily safe to remove. Make sure you know what apps you are removing before doing so.
- He presses Entersand you’ll be back in step 5. Repeat for any other apps you want to remove.
- If you have removed all the apps you want, tap on 2 and hit Enters to return to the main menu.
- To remove packages as well, choose the option 4 Again, then the option 2 (See step 2 above).
- This works the same way as removing application packages. He presses 1 If you want to remove the package you see in the list. Again, it may not be safe to remove some of these things. Only remove things that you know for sure you don’t need.
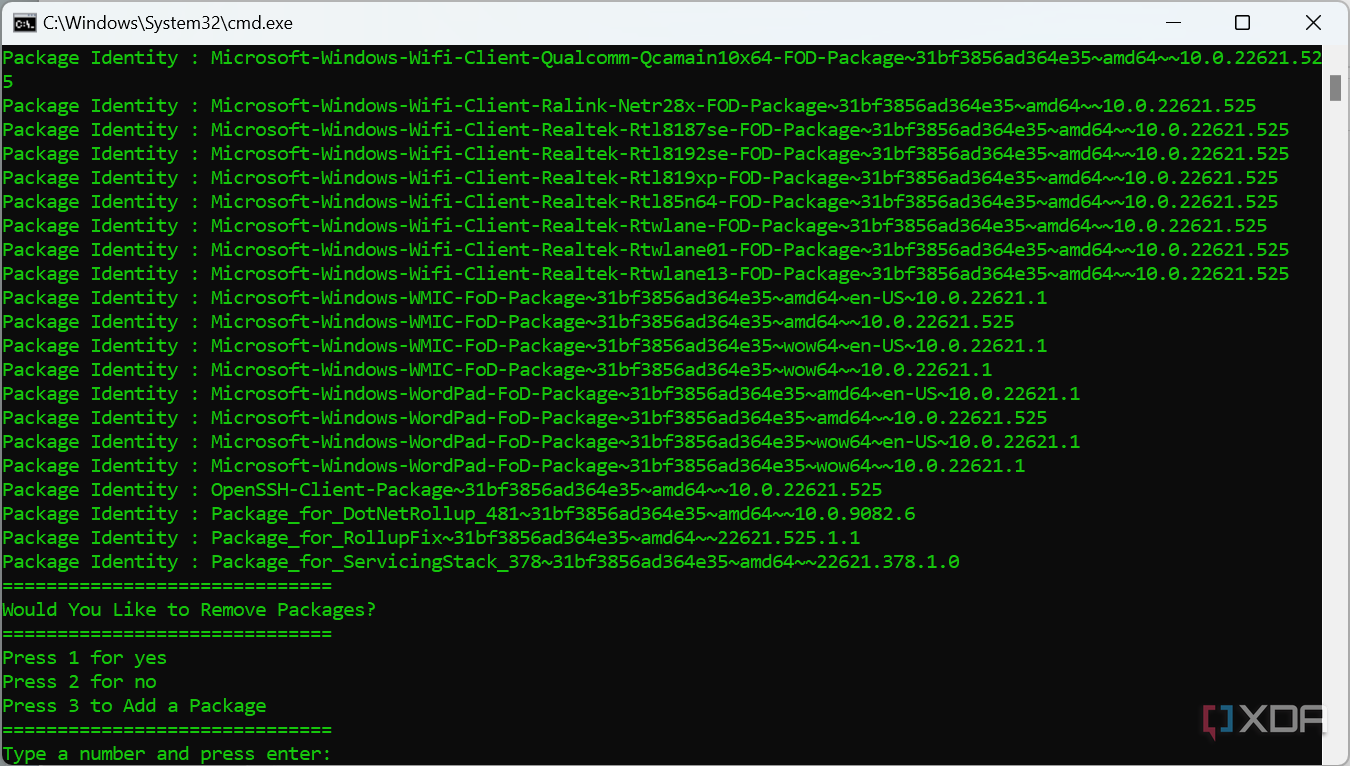
- Copy the name of the package you want to remove, paste it into the input field, and hit Enters.
- Repeat the process if you want to remove more packages, or 2 to return to the main menu.
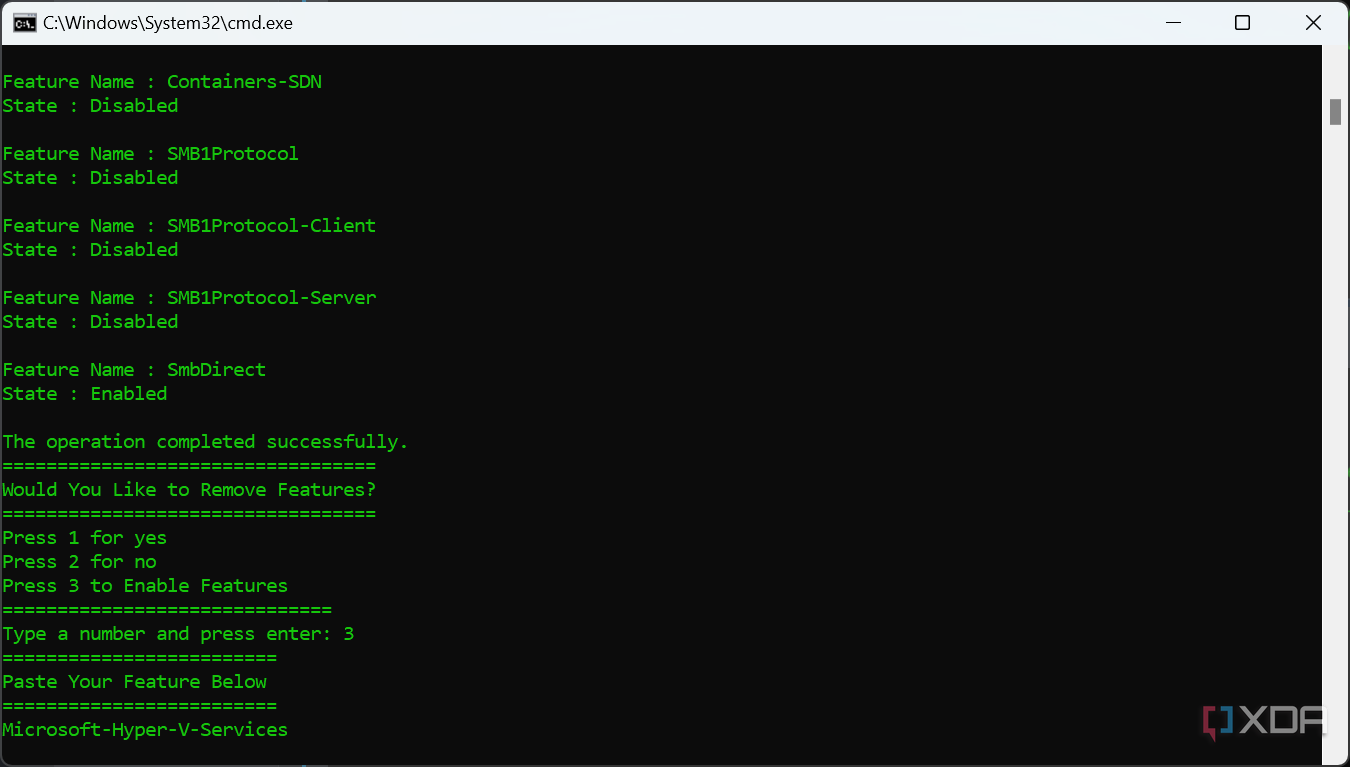
- Finally, you can repeat the process to get the features. He chooses 4 from the main menu, then press 3 to see a list of optional features.
- This time, you will see a list of some features that are enabled and some that are disabled.
- Again, you can press 1 To remove a feature or 2 To return. You can also enable features that are disabled by pressing 3. This can come in handy if you want features like Hyper-V enabled out of the box.
- Once you’ve made the changes you want, press Enters to return to the main menu.


Now, you are ready to export your ISO file. There are two more options that are not necessary here. Option 5 installs the WIM registry (only for users who really need it), and Option 6 lets you push files from the USER folder in A: modwin in an ISO, so your Windows installation will include any files you might need. We’ll skip that and go straight to exporting the new ISO.
export iso
Now that you’ve made your adjustments, just follow these steps to export your new ISO file:
- From the main menu, choose the option 7. Unmount the WIM and build ISO options.
- The simplest way to do this is to choose the option 1which will save your changes, clean all temporary files, and create a new ISO file.
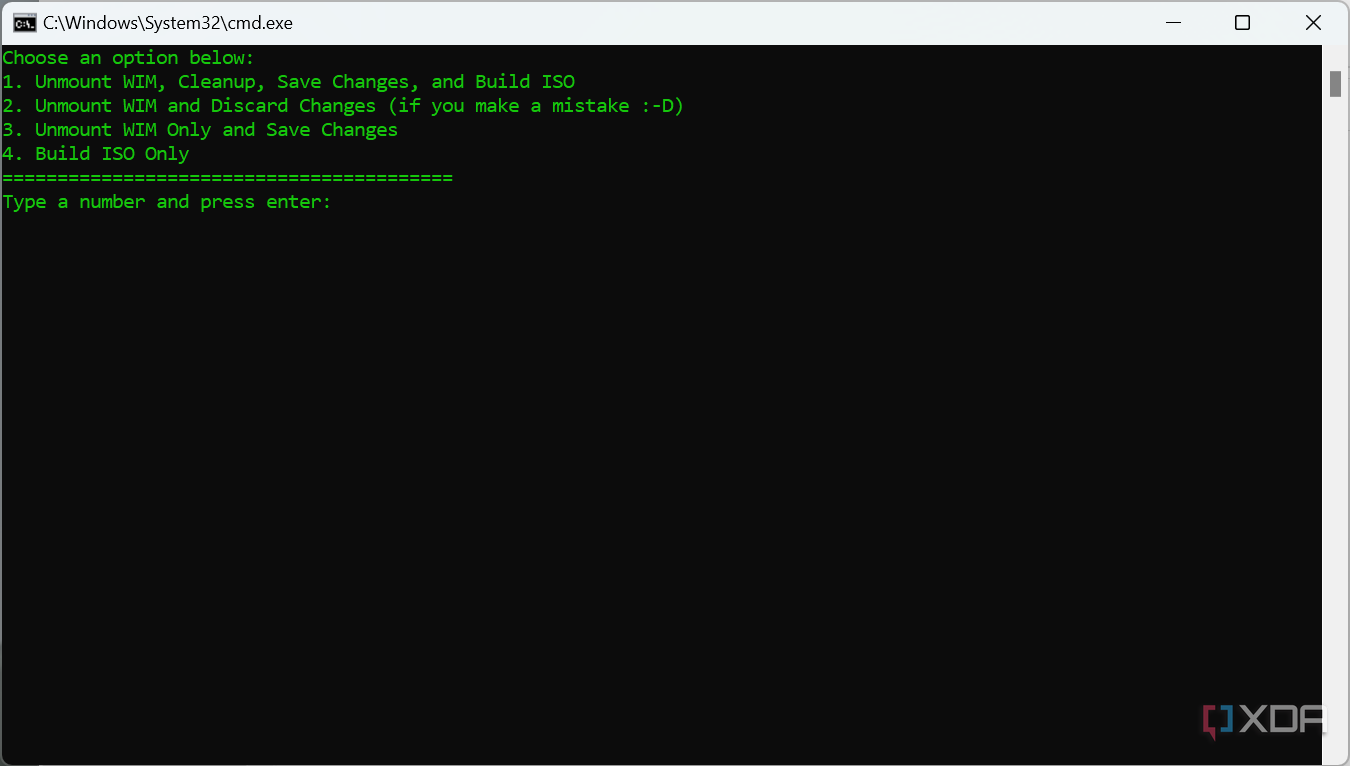
You can also use option 2 to discard any changes you made if you made any mistakes in the process. Then you can start over with the modifications.
- MODWIN will start saving the changes and unloading the WIM file.
- Choose whether to compress the WIM file into the ESD format. This will result in a smaller ISO file, but it will take longer. He presses 1 to compress the file or 2 to leave it as a standard WIM file.

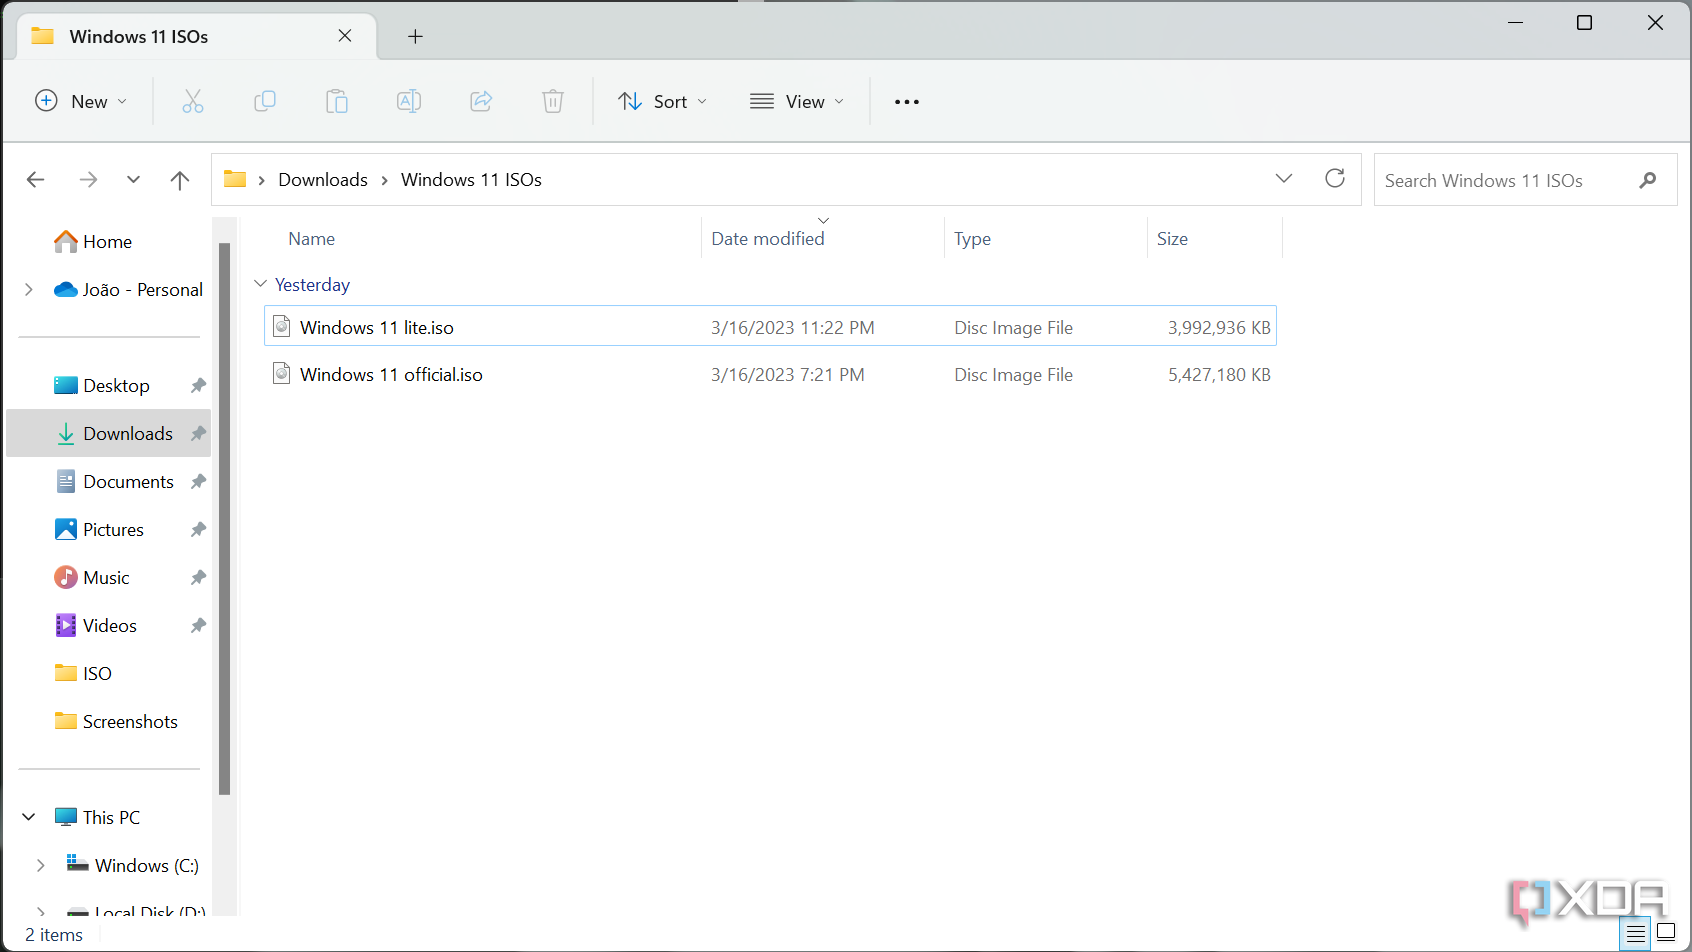
- Wait for the process to finish, and your new ISO file will appear in A: MODWIN MOD Folder. If you compare it to the official ISO, you will see that it is noticeably smaller. We chose to compress the WIM file to the ESD format here and only disabled one application package; The final size will vary based on the changes you make.


You are now ready to install Windows 11 using your new ISO. Keep in mind that your computer cannot be connected to the Internet when you run the Windows installer, otherwise it will download updates from Microsoft and roll back your changes.
You can use a program like Rufus to mount the ISO to a flash drive and do a clean install of Windows. You can check our guide on how to install Windows 11 for more instructions on that.
Thanks to Senior XDA Member Jenneh for the excellent work developing this tool and providing the original guidance. Check out the commission guide here.
[ad_2]


