

There’s a good chance that if you’ve just bought a new laptop or off-the-shelf computer, you may have noticed that when you search in File Explorer, there are two drives listed, even if only one is mentioned on the spec sheet. This is because, every so often, computer manufacturers create partitions—virtual partitions for a storage drive that act as individual drives themselves. There are good reasons for wanting to have partitions on your computer, but for many, splitting your internal storage into two drives may not make sense. If you fall into this latter camp, we’re here to show you how to delete a drive partition in Windows 11 so you can make your storage full again.
Should you delete your partitions?
As we said above, there are some pros and cons to having more than one partition on your drive, and one of the first big benefits is that it makes reinstalling the operating system much easier. Since you can keep your personal files on a separate “drive,” reinstalling Windows shouldn’t delete any of your data, and if any damage is done to your operating system files, you can get back to working order more easily. Multiple partitions are also necessary if you want to dual boot Windows and another operating system, for example. It’s also easier to back up your personal data if it’s stored on a separate drive, since you don’t have to carefully select the folders you want to back up.

However, having a separate partition won’t help you if the drive itself starts to fail. After all, the physical drive is the same for both partitions, so if it starts to crash, both partitions will suffer the same thing. Having multiple partitions can also create more confusion when it comes to managing your files and knowing where everything is stored, plus having those partitions can eat up some of your total storage space (although this should be a very small amount) .
At the end of the day, it’s a matter of preference, but for most users, there’s no need for two partitions, and consolidating your data into one drive might make things a little easier. So how do you do that?
How to delete an unnecessary partition in Windows 11
Before deleting the partition, make sure that no important data is currently stored on it, or make sure that you back it up to a different drive. You can copy it to another partition on your drive that you plan to keep, or you may need an external drive to do so. Also, make sure you delete the correct partition to avoid data loss.
Deleting a partition is actually a relatively simple process once you know what you’re doing, but it’s important that you do it. Any mistake here can lead to huge data losses, so follow these steps carefully:
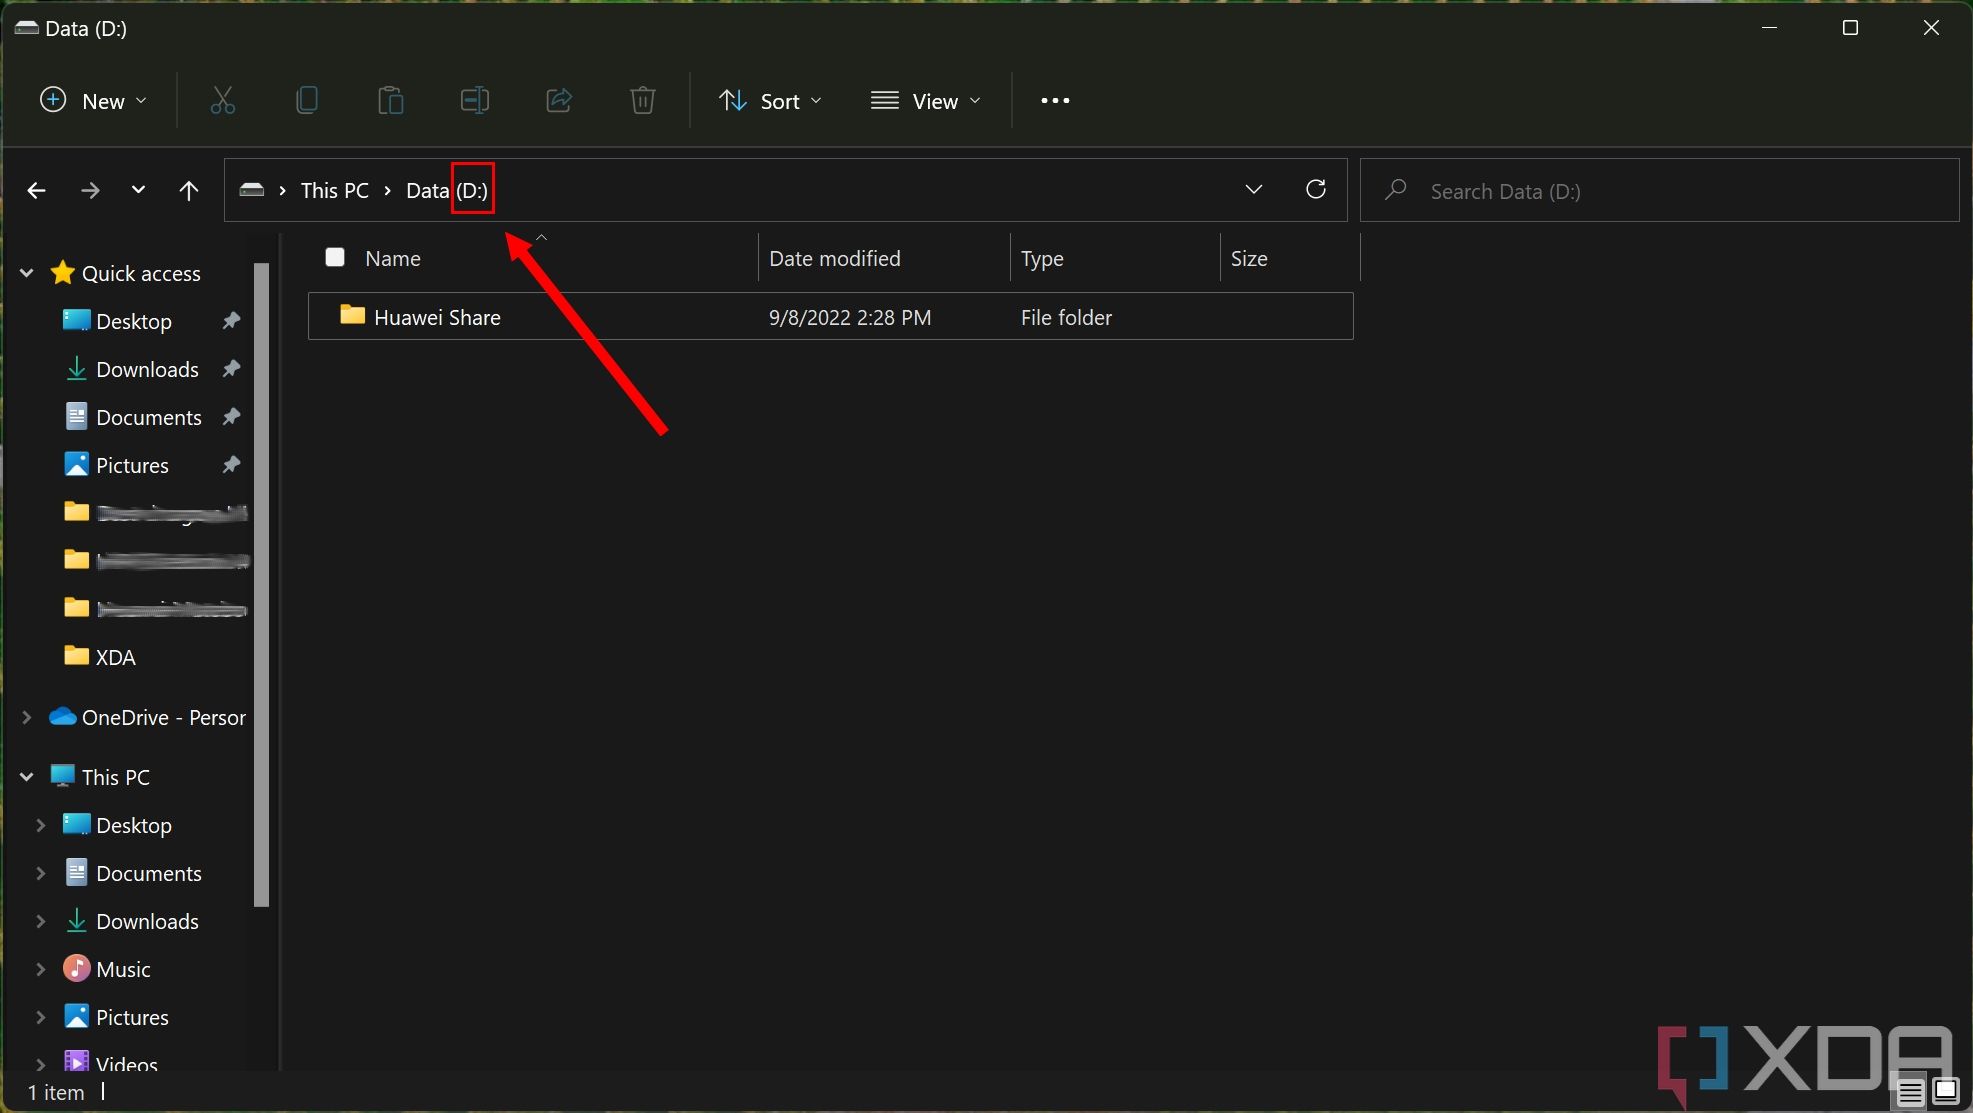
- Start by finding the drive letter for the partition you want to delete in File Explorer. On most laptops sold with a pre-partitioned drive this should be Dr, but make sure you know what it is in your particular case. Make sure that the partition is empty or that the data on it has been backed up.
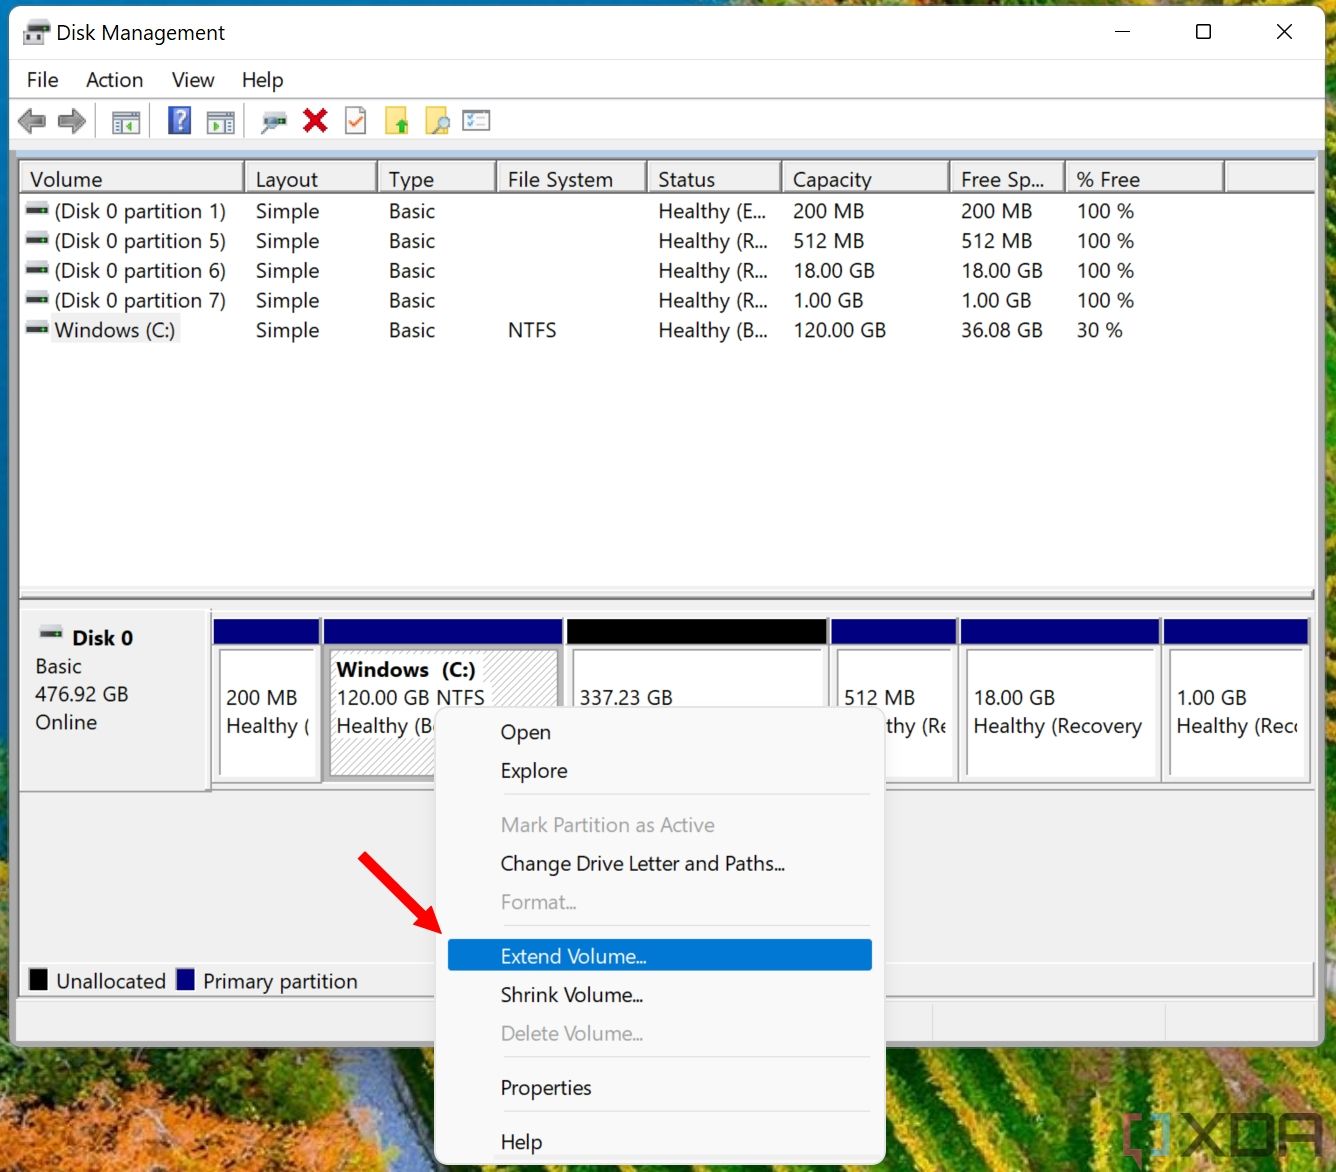
- Right-click the Start button on the taskbar and select Disk management from the context menu.
- Here, you will see a list of all the drives and their partitions. You will notice a lot of partitions that are not even listed in File Explorer, which are system essential partitions that you should not touch. Find the partition containing the drive letter you want to delete.
If you want to extend an existing partition, make sure that the partition you want to extend is on the left side of the partition you want to delete. Otherwise, it will not be possible and deleting your partition will not be beneficial.
- Right-click on the partition and select Delete the volume.
- Windows will warn you that deleting the partition will delete all data on it. Again, make sure to back up any necessary data, then tap yes.
- The deleted partition will now be listed as Not allocated.

Unallocated space means that the space on the physical drive is not attached to any virtual drive and therefore cannot be used in its current state. Of course, you’ll probably want to fix that.
How to extend your main partition
The natural step to take is to extend your main partition to the unallocated space. However, this is only possible if the partition you want to extend is on the left side of the Unallocated space. If not, your only option is to create a partition again, but we’ll get to that later. If you want to expand the main partition, here’s what you need to do:
- In Disk Management, right-click the partition you want to extend, then choose expand the size.
- click next one In the wizard that appears, you will be asked to choose the amount of space you want to add to the partition. By default, Windows will automatically add all available unallocated space to the right of the partition you’re extending, but you can reduce it to add only the space you deem necessary.
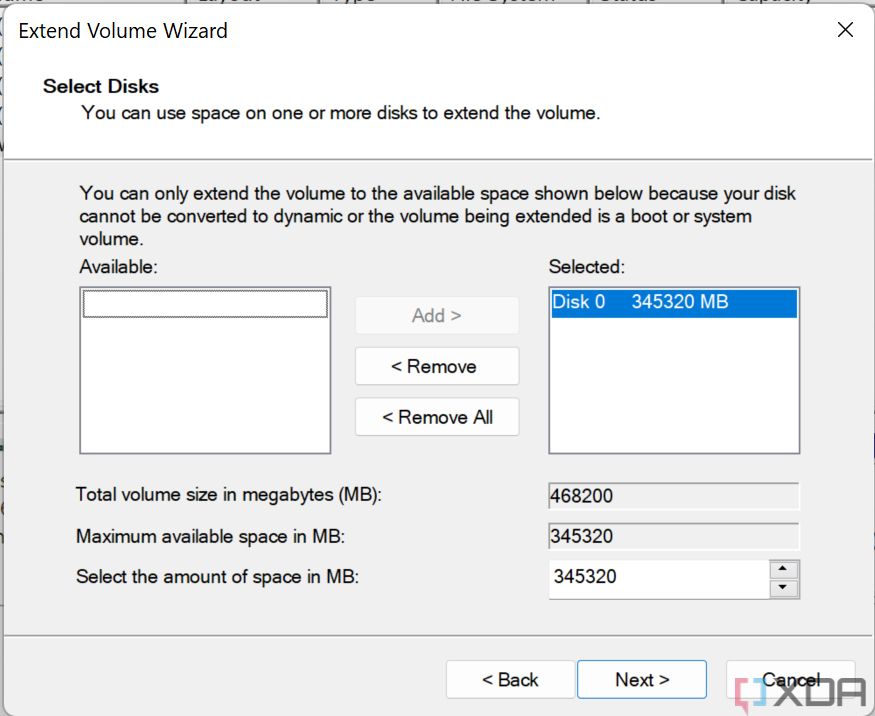
- click ending.


The main partition will now use the space that was in a separate partition, and your computer should be ready to go.
How to create a new section
If your goal is simply to expand the size of the main partition and create a second, smaller partition, you can follow the steps above to only extend the main partition up to a point. Then, you can create a new partition in whatever space you have left by following these steps:
- In Disk Management, right-click on the unallocated space where you want to create the new drive and choose Simple new size.
- click next one in the wizard, then choose how much storage you want for the drive. By default, the entire unallocated space will be selected.
- Next, you’ll choose whether to assign a drive letter or drive path to the new partition. If the goal is to dual boot another OS, you’ll probably want to choose a drive letter, but it can be any letter you want. click next one.
- Finally, you will have to format the partition to be usable. By default, it will be formatted to NTFS. You can also choose the volume label, which is the name the partition will appear as. Other settings should be fine with the default options. click next one once again.
- click ending.
You should now have a new drive where your Unallocated space was, and also the size you want it to be.
That’s all you need to know about deleting a drive partition and why you might want to. As mentioned, having multiple partitions is useful if you want to dual boot two systems, but if you want a simpler solution and don’t need maximum performance, you can also run different operating systems in a virtual machine (VM) on Windows 11. This way, you don’t need to Multiple partitions and it will probably be easier to manage your files.
[ad_2]


