

Putting together a new computer and wondering how to install Windows 11? Here is a guide to help you install Windows on any computer without an operating system.

Building a new computer can be fun, albeit a somewhat daunting process if you’re doing it for the first time. Even if you run into some challenges, it’s usually worth the feeling of turning it on for the first time knowing you have a (probably) faster experience waiting for you…that is, until you realize you still have to install an operating system, such as Windows 11, and that’s what we’re here to help you with. .
Installing Windows 11 on a new PC isn’t particularly difficult, as long as you make sure your PC meets the system requirements. Really, the only thing you might be missing is TPM 2.0 support, which not many motherboards included until recently, but you’ll likely be just fine. However, the process takes some time and you will have to use some tools that you may not be familiar with. However, we’ll walk you through the process of installing Windows 11 on a brand new device, although this can also be used if you just want to do a clean install of the operating system on a PC you already have. Let’s get started.
There are three things you’ll need to install Windows 11: an internet connection, a blank USB flash drive that’s at least 8GB in size, and a separate computer that’s already working.
If you’ve got all of that figured out, you can start by creating installation media for your new computer. Here’s how:
- go to the Windows 11 download page And look for a section called Create Windows 11 installation media. tap on Download now button below it.
- Once the file has finished downloading, run it and click Acceptance.
- You will be asked to choose the language you want Windows 11 to be in. By default, they will match your current system, but you can change them if you need to. click next one.
- The installation media can be either an ISO file or a flash drive, but only a flash drive will work if you’re on a new PC. Choose USB flash drive and click next one.
- Next, you will see a list of all USB drives connected to your computer. Because This process will delete all data on the driveWe recommend that you disconnect everything except the drive you plan to use to avoid any errors. Select the correct drive and click next one.
- Windows 11 will start downloading and the files will be transferred to the flash drive. Once this is done, your flash drive will be ready to be used as installation media.
Use Rufus to create a bootable USB drive
While the above process should work for just about everyone, you probably won’t have access to a USB flash drive and an internet connection at the same time, or maybe you want to bypass some Windows 11 system requirements. Rufus is a great piece of software that can It helps with these two things. Here’s what to do:
- Follow the above process, but instead of selecting USB flash driveChoose ISO file when prompted. Alternatively, ISO files are available for direct download on the Windows 11 download page.
- Download Rufus from the official site.
- Plug your USB flash drive into your computer and run Rufus. Just like before, it’s best to disconnect any other drives, because this process deletes all data on the drive you select. Choose the appropriate drive at the top of the window.
- tap on Determination near the top and choose the ISO file you downloaded earlier.
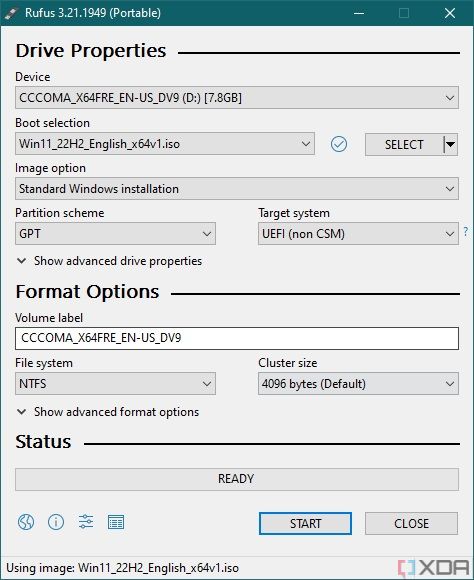
- Some default settings will be selected, which you will not need to change. click Start near the bottom of the window.
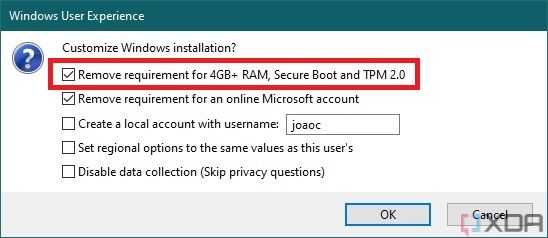
- You’ll see a series of options, in a popup, but you don’t need to change anything here. By default, Rufus will disable compatibility checks so you can install Windows 11 on computers that don’t meet all the requirements. click yes.
- Rufus will start transferring the installation files to the flash drive. Make sure to leave it plugged in until it’s finished.


You will now have Windows 11 installation media, which you can plug into your new PC to start the installation.
Install Windows 11 on your computer
Once you have the installation media ready to go, it’s time to install Windows 11 on your computer. Here’s what you need to do:
- Plug the USB drive into the computer where you want to install Windows 11 and turn on the computer.
- Since there is no boot drive inside the PC, it should boot from a USB flash drive by default.
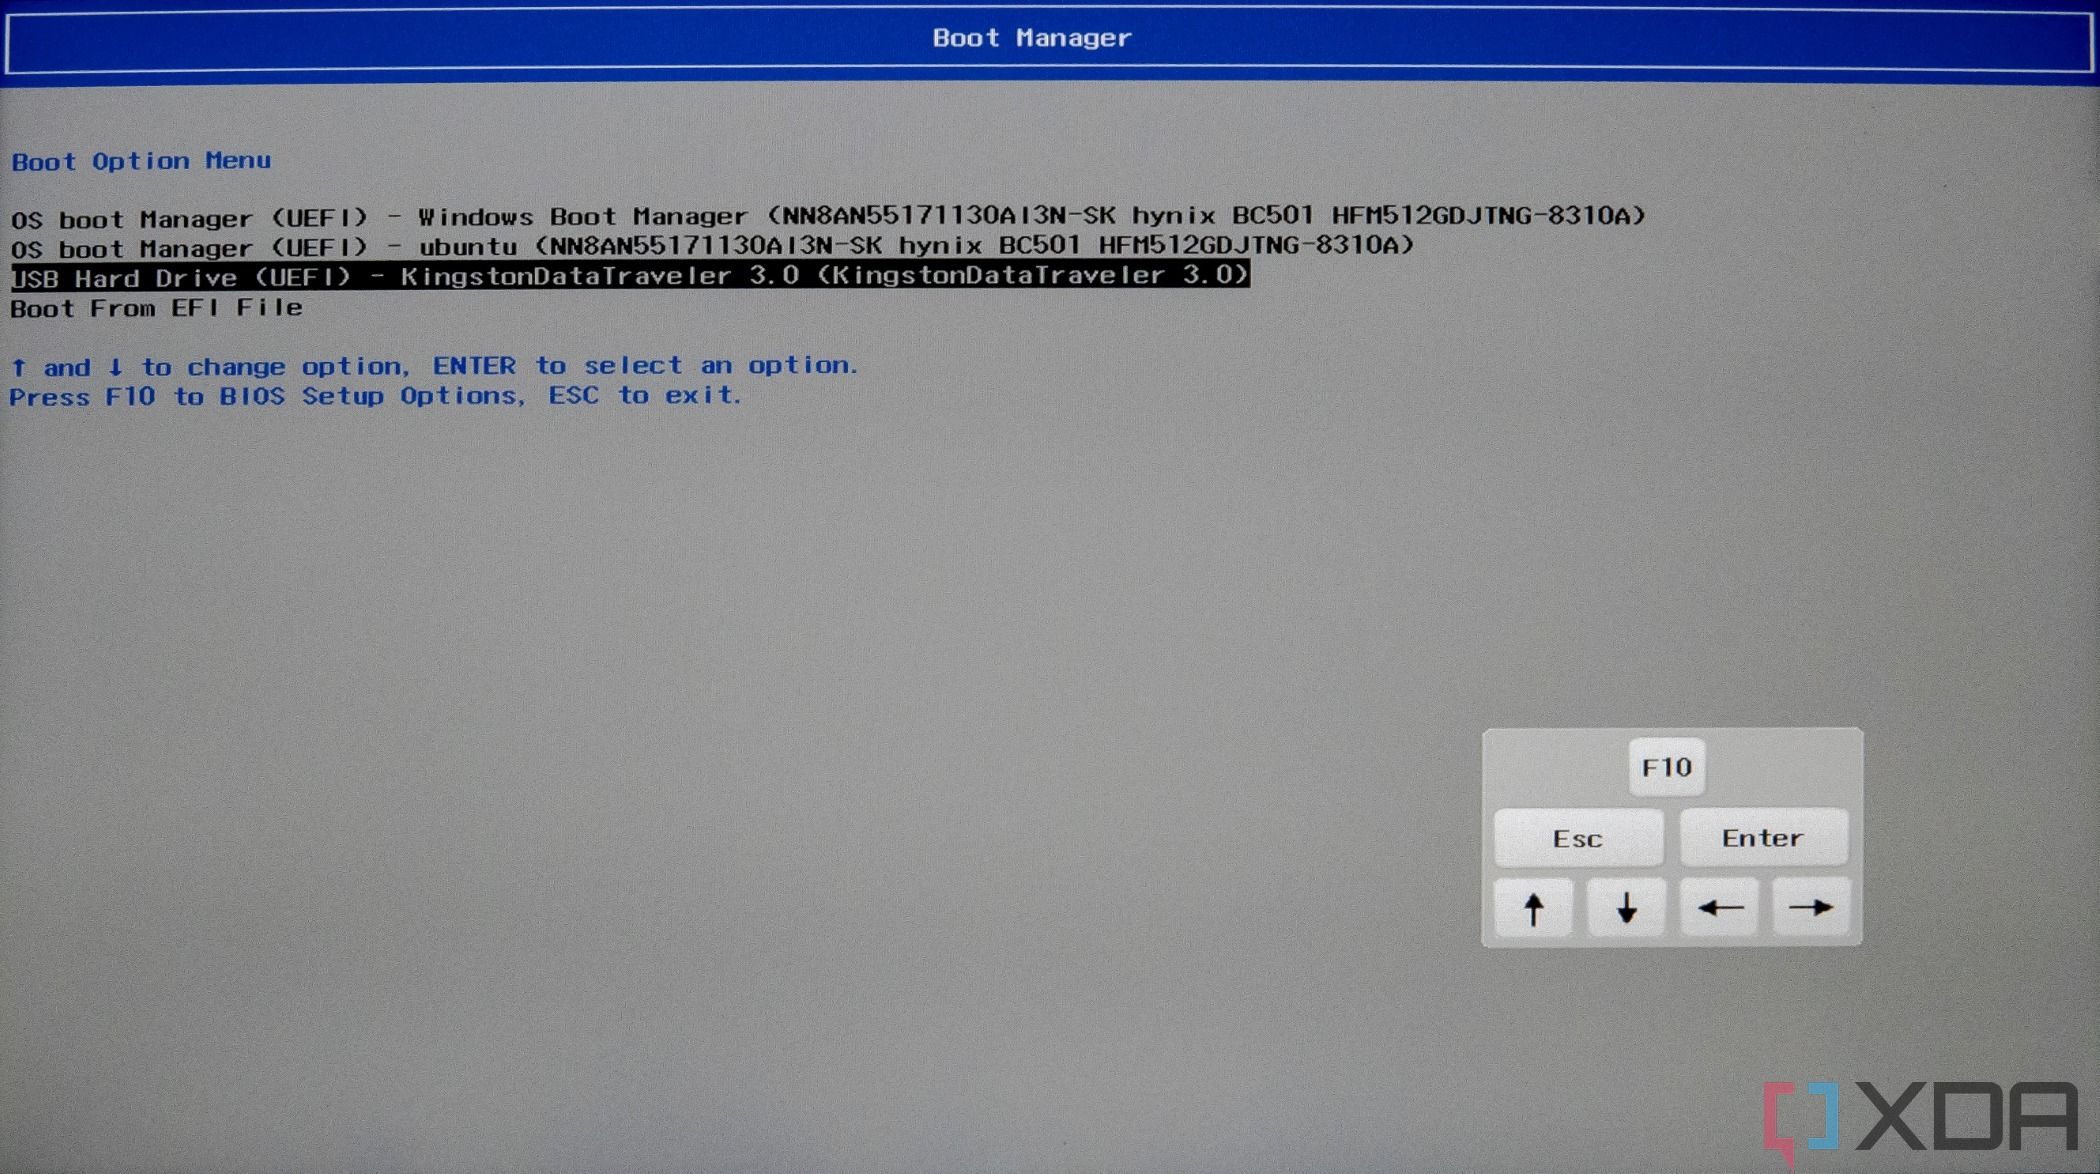
- If that doesn’t work, you may need to press ExitAnd F1And F11And F12 or any other key on the keyboard during boot. The exact key will vary depending on the brand of your motherboard, so you’ll need to refer to your manufacturer’s instructions to open the boot menu, or you may need to go into your BIOS settings.
- If your motherboard has a boot menu, you should be able to see a list of available drives to boot from, and you’ll need to choose your flash drive from the list. Otherwise, go to the BIOS to find the boot options and move the flash drive to the top of the list of boot devices.
- Once you boot from the flash drive, you will be asked to choose a language, region, and keyboard layout. click next oneand then Install now on the next screen.
- You will be asked for a product key to activate Windows. You were supposed to buy a license, but if you want to enter your product key later, you can click I don’t have a product key. If you have one, enter it and click next one.
- If you haven’t entered a product key, you’ll be asked to choose which edition of Windows 11 you want to install. It will most likely be either Windows 11 Home or Pro, but you’ll want to choose the correct edition so your product key will work properly later on. click next one.
- Accept the license agreement.
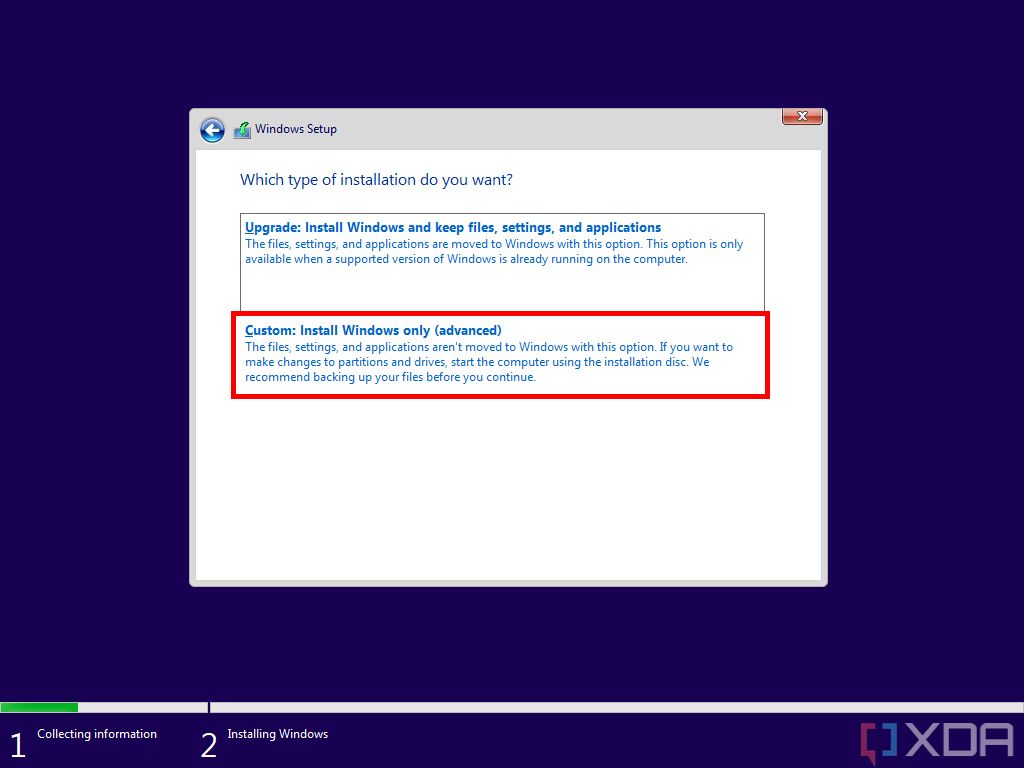
- On the next screen, tap Custom: Install Windows Only (Advanced).
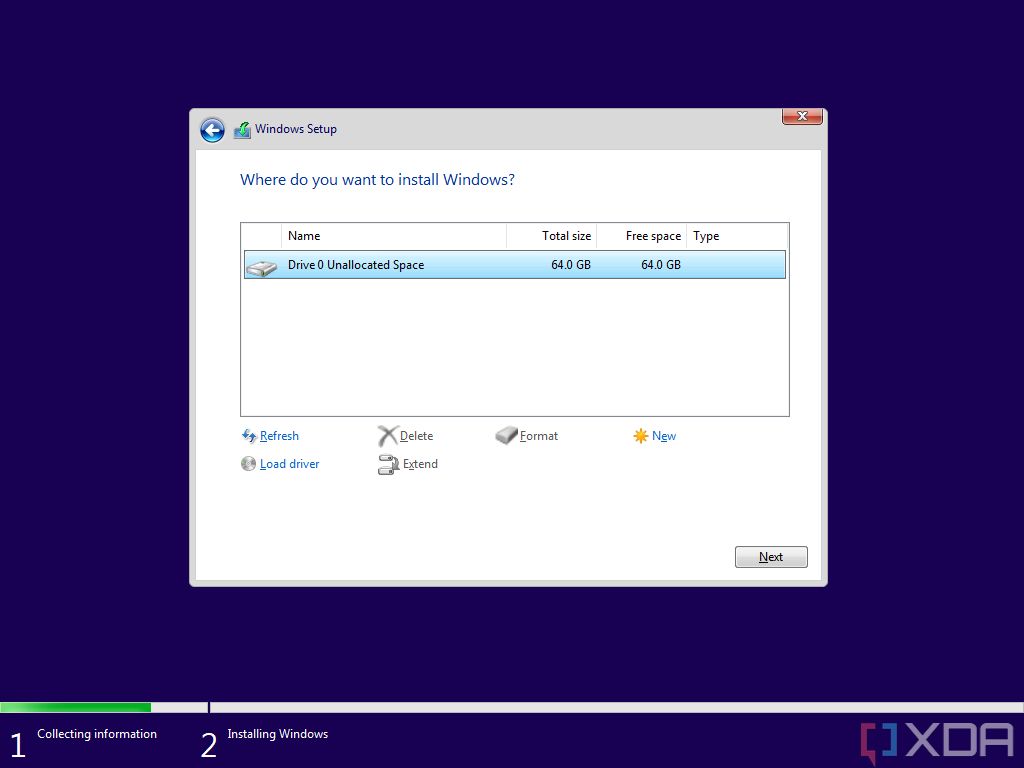
- You should see a list of drives on your computer, and you can choose where you want to install Windows 11. You can also create multiple partitions if you want, but otherwise just select the drive and click next one.
- Windows 11 will now start installing, so wait for it to finish.


Once the installation is done, you will be guided through the Windows 11 Ready Experience (OOBE). This is the same thing you’d see on a brand new laptop or after a computer reset, and it should be easy to understand. If you’re interested in learning more about this part of the experience, you can check out this guide.
That’s all you need to know about installing Windows 11 on a new PC you just built. This process has remained mostly unchanged for many years, so you should be familiar if you’ve done it before. Of course, things get more complicated if you want to dual boot Windows 11 and Linux, for example.
[ad_2]


