

Lenovo’s new premium laptop has great specs and a premium design, but what if you want to upgrade it in the future? There are some limitations.
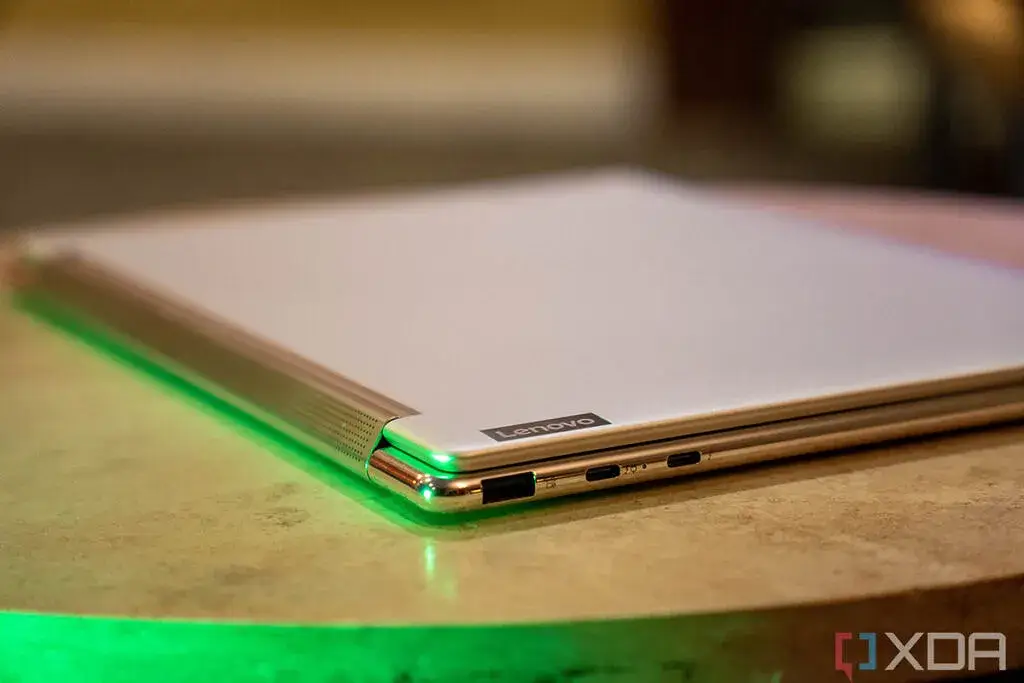
Lenovo Yoga 9i (2022) shares the same design with the 2023 model
The 2022 Lenovo Yoga 9i was one of the best laptops we used last year, and the company is following that up with a relatively minor update for 2023. Aside from upgrading the processor to the latest 13th-generation model, the laptop is pretty much the same as before. So what does that mean for your ability to promote it internally? If you want to upgrade the RAM or storage on the Lenovo Yoga 9i (2023), you’ll run into some limitations. Only the storage capacity is upgradeable.
You cannot upgrade the RAM on the Lenovo Yoga 9i (2023)
Like many premium Ultrabooks, the Lenovo Yoga 9i comes with built-in RAM, which means it’s soldered to the motherboard. You cannot replace or upgrade the RAM because there is no easy way to remove or add more RAM.
Out of the box, the Lenovo Yoga 9i comes with 16GB of RAM, and at least at launch, that’s pretty much the only option you get. It should suffice for the vast majority of users, even years into the future, and you’ll be able to multitask and run all kinds of applications without any issues. Even if there are other options, we recommend 16GB for most people.
How to upgrade storage on Lenovo Yoga 9i (2023)
Unlike the RAM, you can upgrade the storage on the Lenovo Yoga 9i. You can configure the laptop with an SSD of up to 1TB, and it comes in either an M.2 2242 or M.2 2280 form factor, which means you can buy a standard SSD to replace it.
If you want to upgrade, you’ll first need to make sure your data is backed up to a different drive (or a cloud service like OneDrive) and then create Windows 11 installation media by following the steps in our guide to installing Windows 11.
What will you need
To upgrade your SSD, you’ll also need some tools, as well as a replacement SSD for your laptop. A good option is the iFixit Essential Electronics Toolkit, which includes tools such as a screwdriver and pliers to make opening the laptop easier. You may also need an antistatic wrist strap, which prevents electrostatic discharge while working inside your laptop.
-
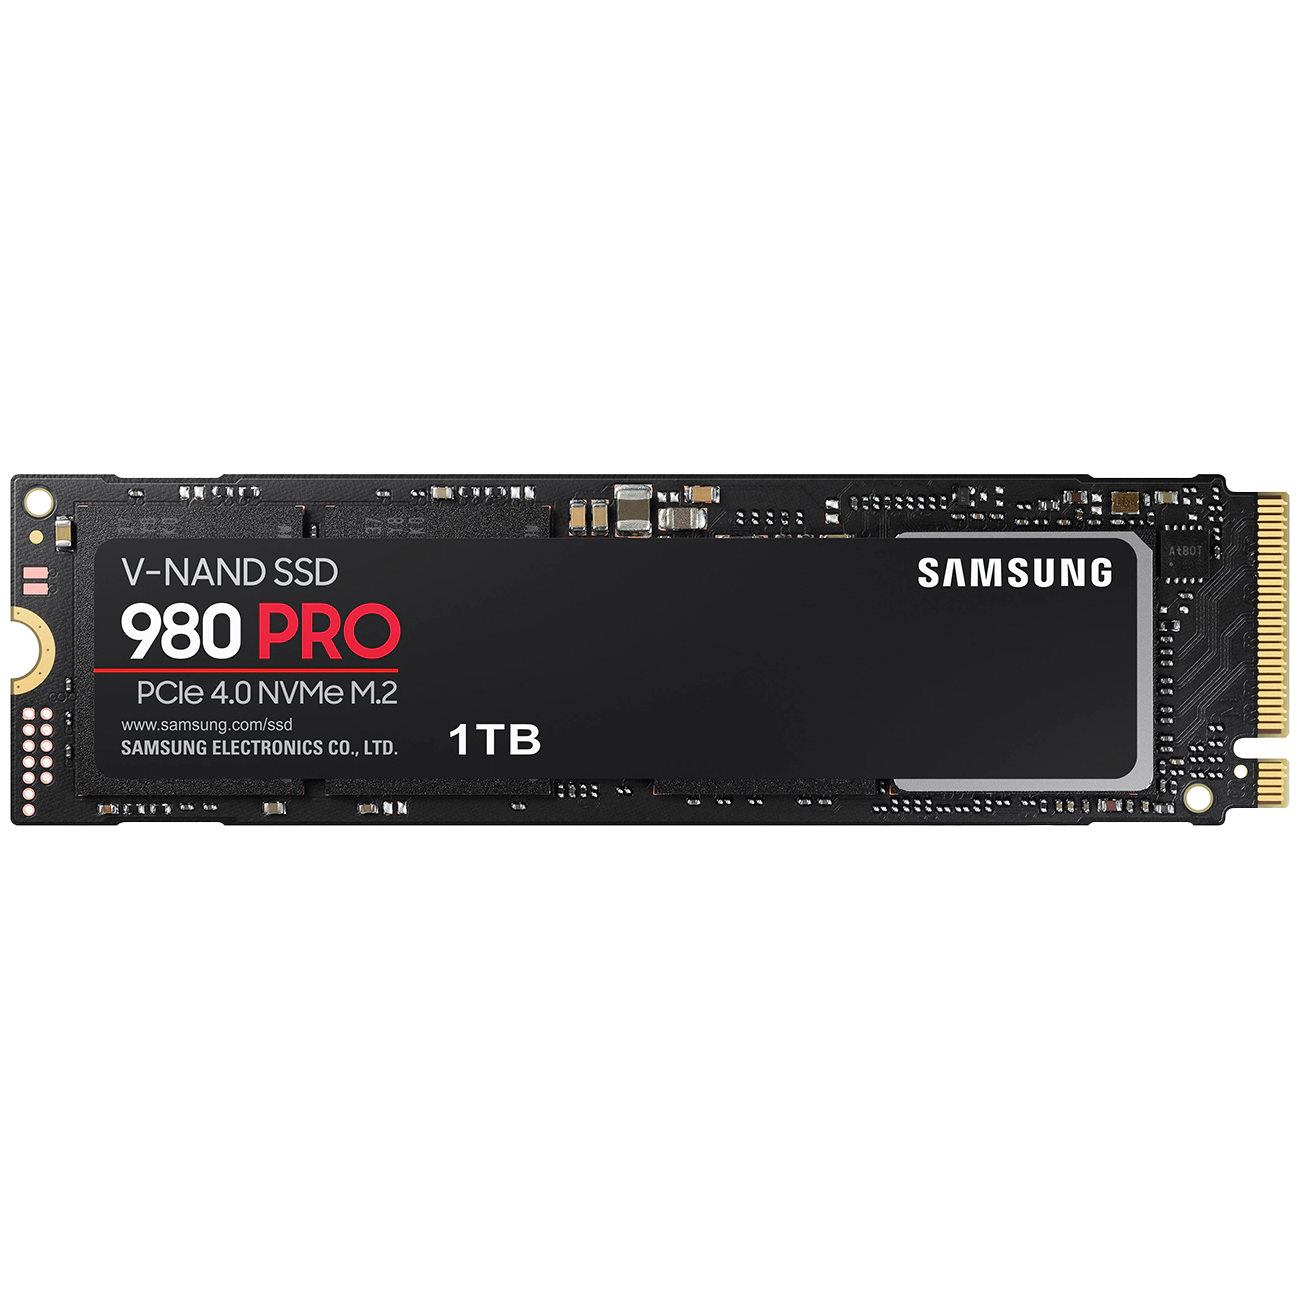
Samsung 980 Pro
The Samsung 980 Pro is one of the best SSDs in the market, and you can get it at a decent discount nowadays, which makes it an even better deal. It supports speeds of up to 7000MB/s read and 5100MB/s write.
-
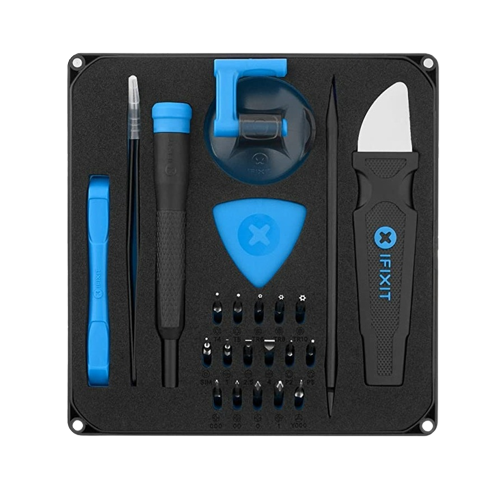
iFixit’s Essential Electronics Toolkit
iFixit Essential Electronics kits include all the essential tools you need to open your laptop and other electronics for repair.
-

iFixit Antistatic Wrist Strap
The iFixit anti-static wrist strap can help discharge static electricity from your body, preventing damage to your laptop while working inside.


How to replace the SSD inside the Lenovo Yoga 9i (2023)
Once you have all the equipment, and have backed up your data, follow these steps to remove the old SSD and install a new one:
- Turn off your computer and let it cool down for a few minutes.
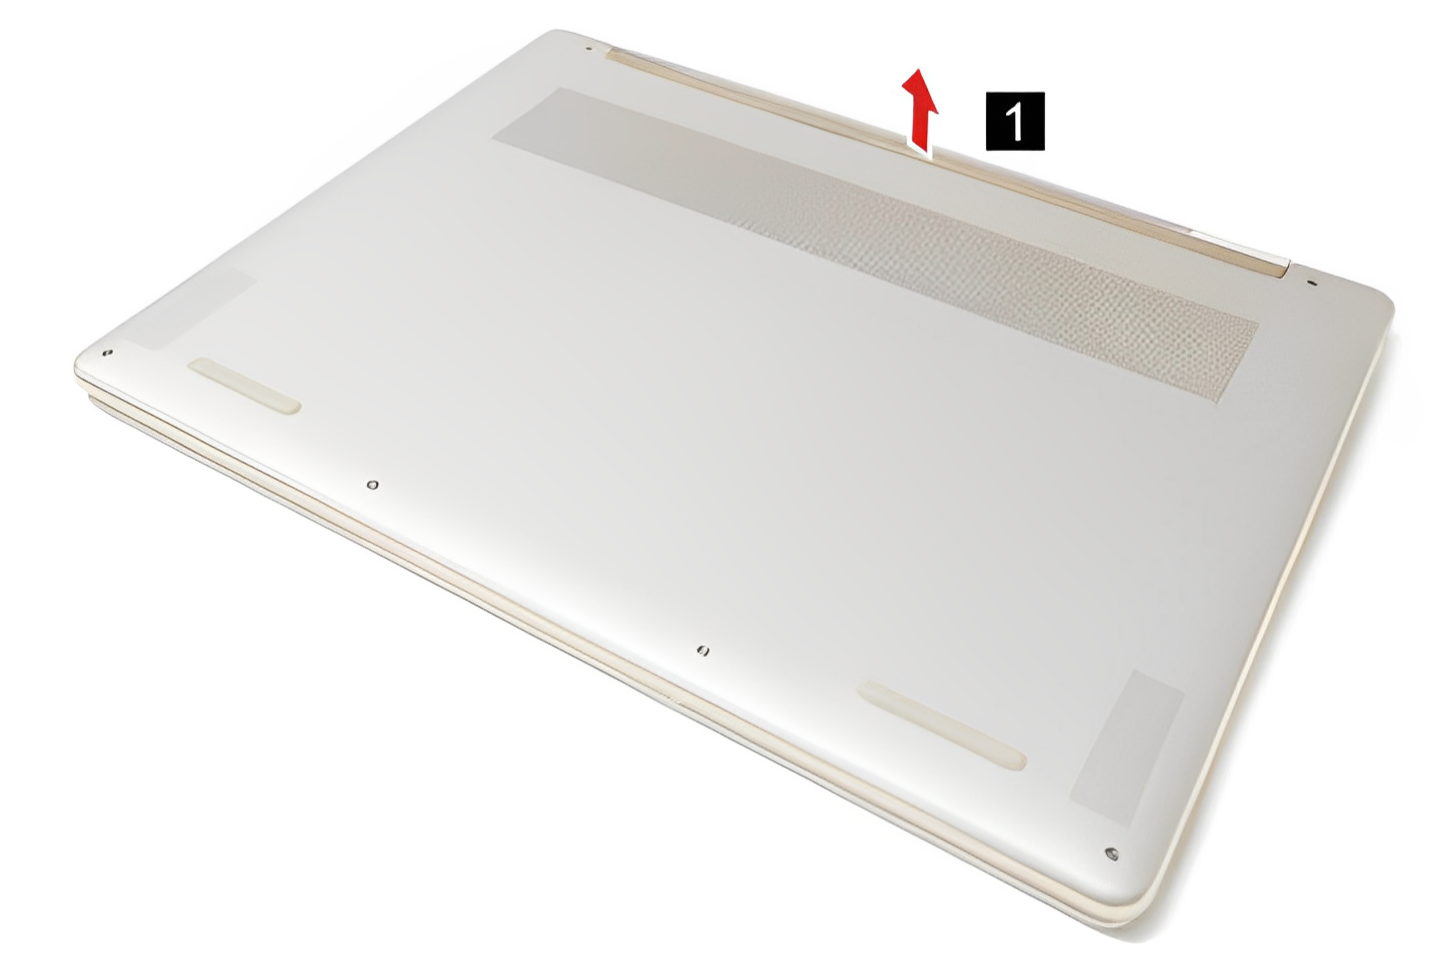
- Place the laptop upside down with the hinge facing away from you.
- use staring tool To raise the ends of the wide rubber feet next to the hinge.
- remove the Rubber feet completely.
- There are nine screws to hold the base cover in place, and three different dimensions for them. Remove them and trace each group to reassemble:
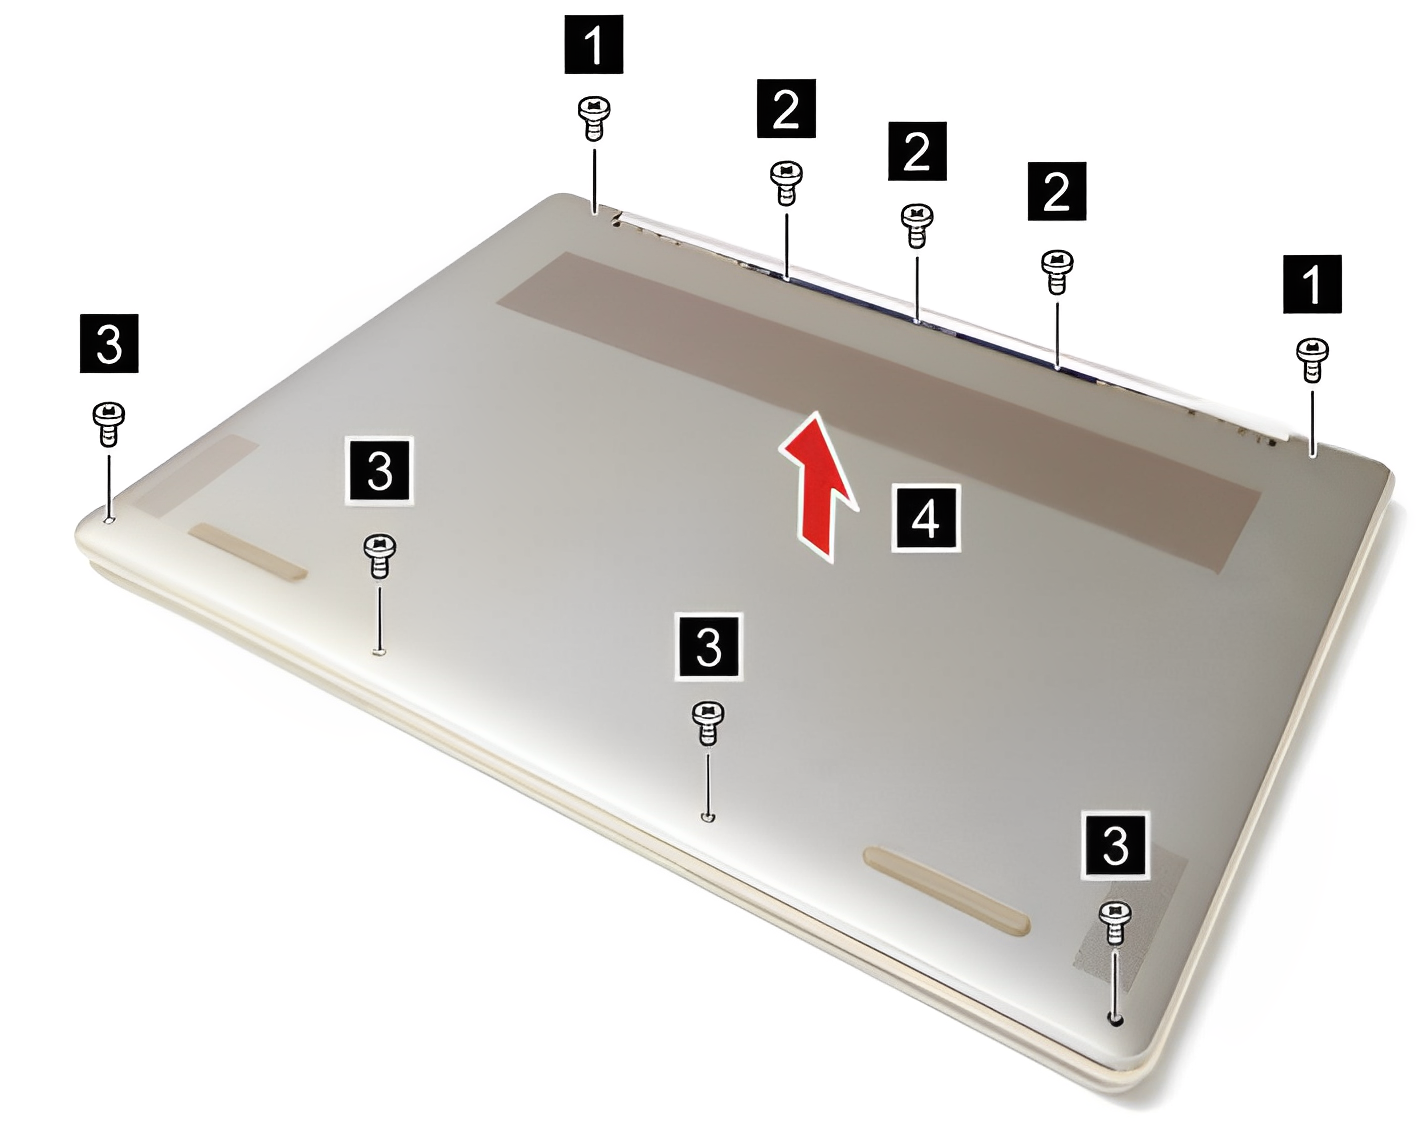
- The two screws in the upper corners, near the hinge (M2 x L7.6)
- The three screws on the bottom of the rubber base (M1.6 x L2.9)
- The four screws along the bottom edge (M2 x L2.6)
- Use the pry tool to edit a file Base cover and remove it.
- unplug battery cable from the motherboard using your fingernail or a plastic tool to detach the connector. Do not pull the cable.
- The SSD is located on the right side of the laptop, just above the battery. Remove the screw on the right side of the SSD. NB: On some models, you may see a smaller M.2 2242 SSD with a bracket, while others will have a longer M.2 2280 SSD.
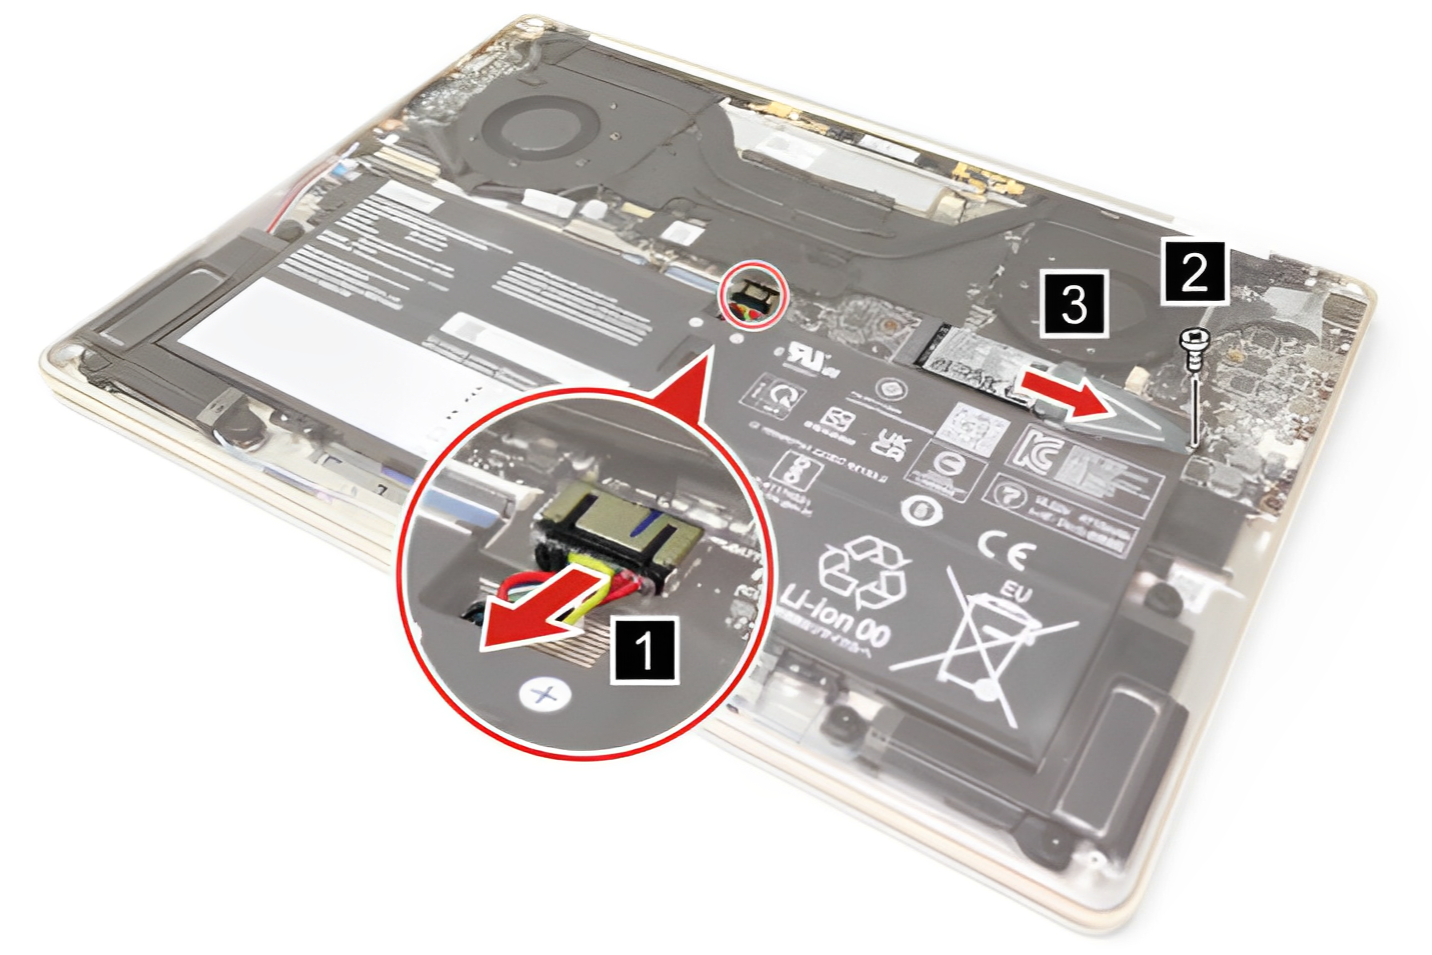
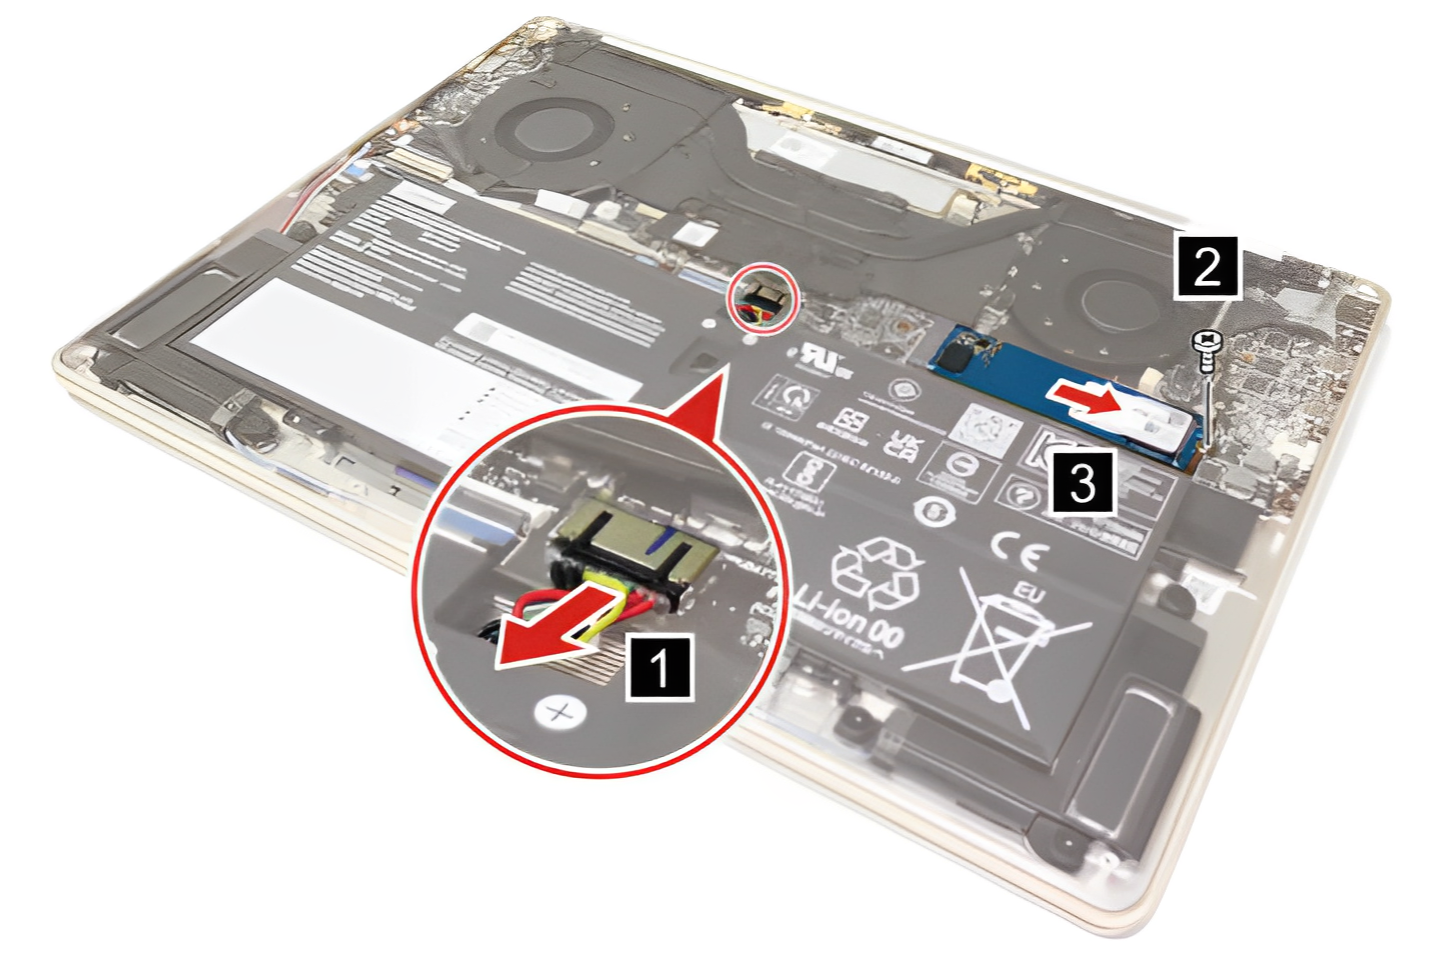
- pull the SSD off at a slight 45 degree angle.
- enter the The new SSD In the same position as the old one, aligning the notch in the connector with the notch in the slot.
- Screw the right side of the SSD to secure it in place. Be careful to avoid excessive stress as it may damage components.
- Reconnect battery cable.
- Install the bottom cover in the original position, making sure that it is fully seated in place.
- Reinsert the nine screws into the correct positions, as described in Step 4.
- Reinsert the rubber feet near the hinge.


You should now be ready to start setting up your computer with your new SSD. You’ll need to install Windows 11 again to use the PC, using the guide we linked above. After that you should be fine.
That’s it for upgrading the SSD on the Lenovo Yoga 9i. It’s not a terribly complicated process, though it does require some tools and knowledge. Still, it’s a way to save money and get more out of one of Lenovo’s best laptops ever. If you prefer owning a laptop that also has upgradeable RAM, gaming laptops are usually your best bet.

Lenovo Yoga 9i (2023)
The 2023 Lenovo Yoga 9i comes with powerful Intel processors and plenty of RAM, though you won’t be able to upgrade it. There is also up to a 1TB SSD, which can be upgraded later.
[ad_2]


