Everyone comes to their personal computing situations in different ways. For me, as a lifelong Windows user with a powerful primary laptop who needs a secondary laptop that’s lightweight and fast, I gravitated towards the Chromebook. But whether you’re a seasoned veteran of this platform or another and have brought a Chromebook into your life, you may be looking for ways to tailor the experience to your needs and habits — we’ve got some tips for that.
Keyboard and trackpad tips
Using ChromeOS requires a bit of mixed intuition—we’re talking about your desktop or laptop and your phone—and that goes for navigating programs.
The Chromebook’s keyboard and trackpad experience follows a freestyle jazz feel, if you will. You’ll probably first notice that the Launcher key—or the Search key if your device is a bit older (equivalent to the Windows key or the Option key in the bottom row)—is where Caps Lock would be. You might also be surprised at the top row of hotkeys that take over the function keys. And you’ll be especially confused when clicking around if you’re trying to right-click.
Here’s a little cheat sheet on how to get around:
- Right-click: Use two fingers to tap or click on the trackpad.
- scroll: Use two fingers to scroll up and down on the trackpad.
- behind and in front of: If you are browsing Chrome, use two fingers to swipe left and go back to the page or swipe right to go forward the page
- Take care If you are scrolling horizontally. Once you hit the left or right border of the page, you will launch the back and front shortcut target.
- Chrome switch tabs: Use three fingers to scroll left and right between Chrome tabs.
- Switch windows: Use three fingers and swipe up to get to the overview, which groups all windows into one view. Swiping down will take you to the last open window.
- Caps lock: Press Launcher / Search (⌾ or 🔍) + Alt to turn it on or off. You’ll know the feature is on if you see a modified caret icon below in the shelf (what Windows calls the taskbar).
- screenshots: You may have a dedicated screenshot key (⧇) that takes you to a rich screenshot interface, but if you’re just looking for a shortcut to take a full screenshot, press Ctrl + Show windows (□ǁ).
- F keys (function keys): This can be deceiving. Press and hold the Launcher/Search key and then press the top row shortcut key corresponding to the F number you want. If you want F2, press the second hotkey (usually either → or ↻). However, there are a few things worth noting about this:
- Ordination Excludes Launcher / Search + Esc – This is a custom shortcut that displays the ChromeOS task manager.
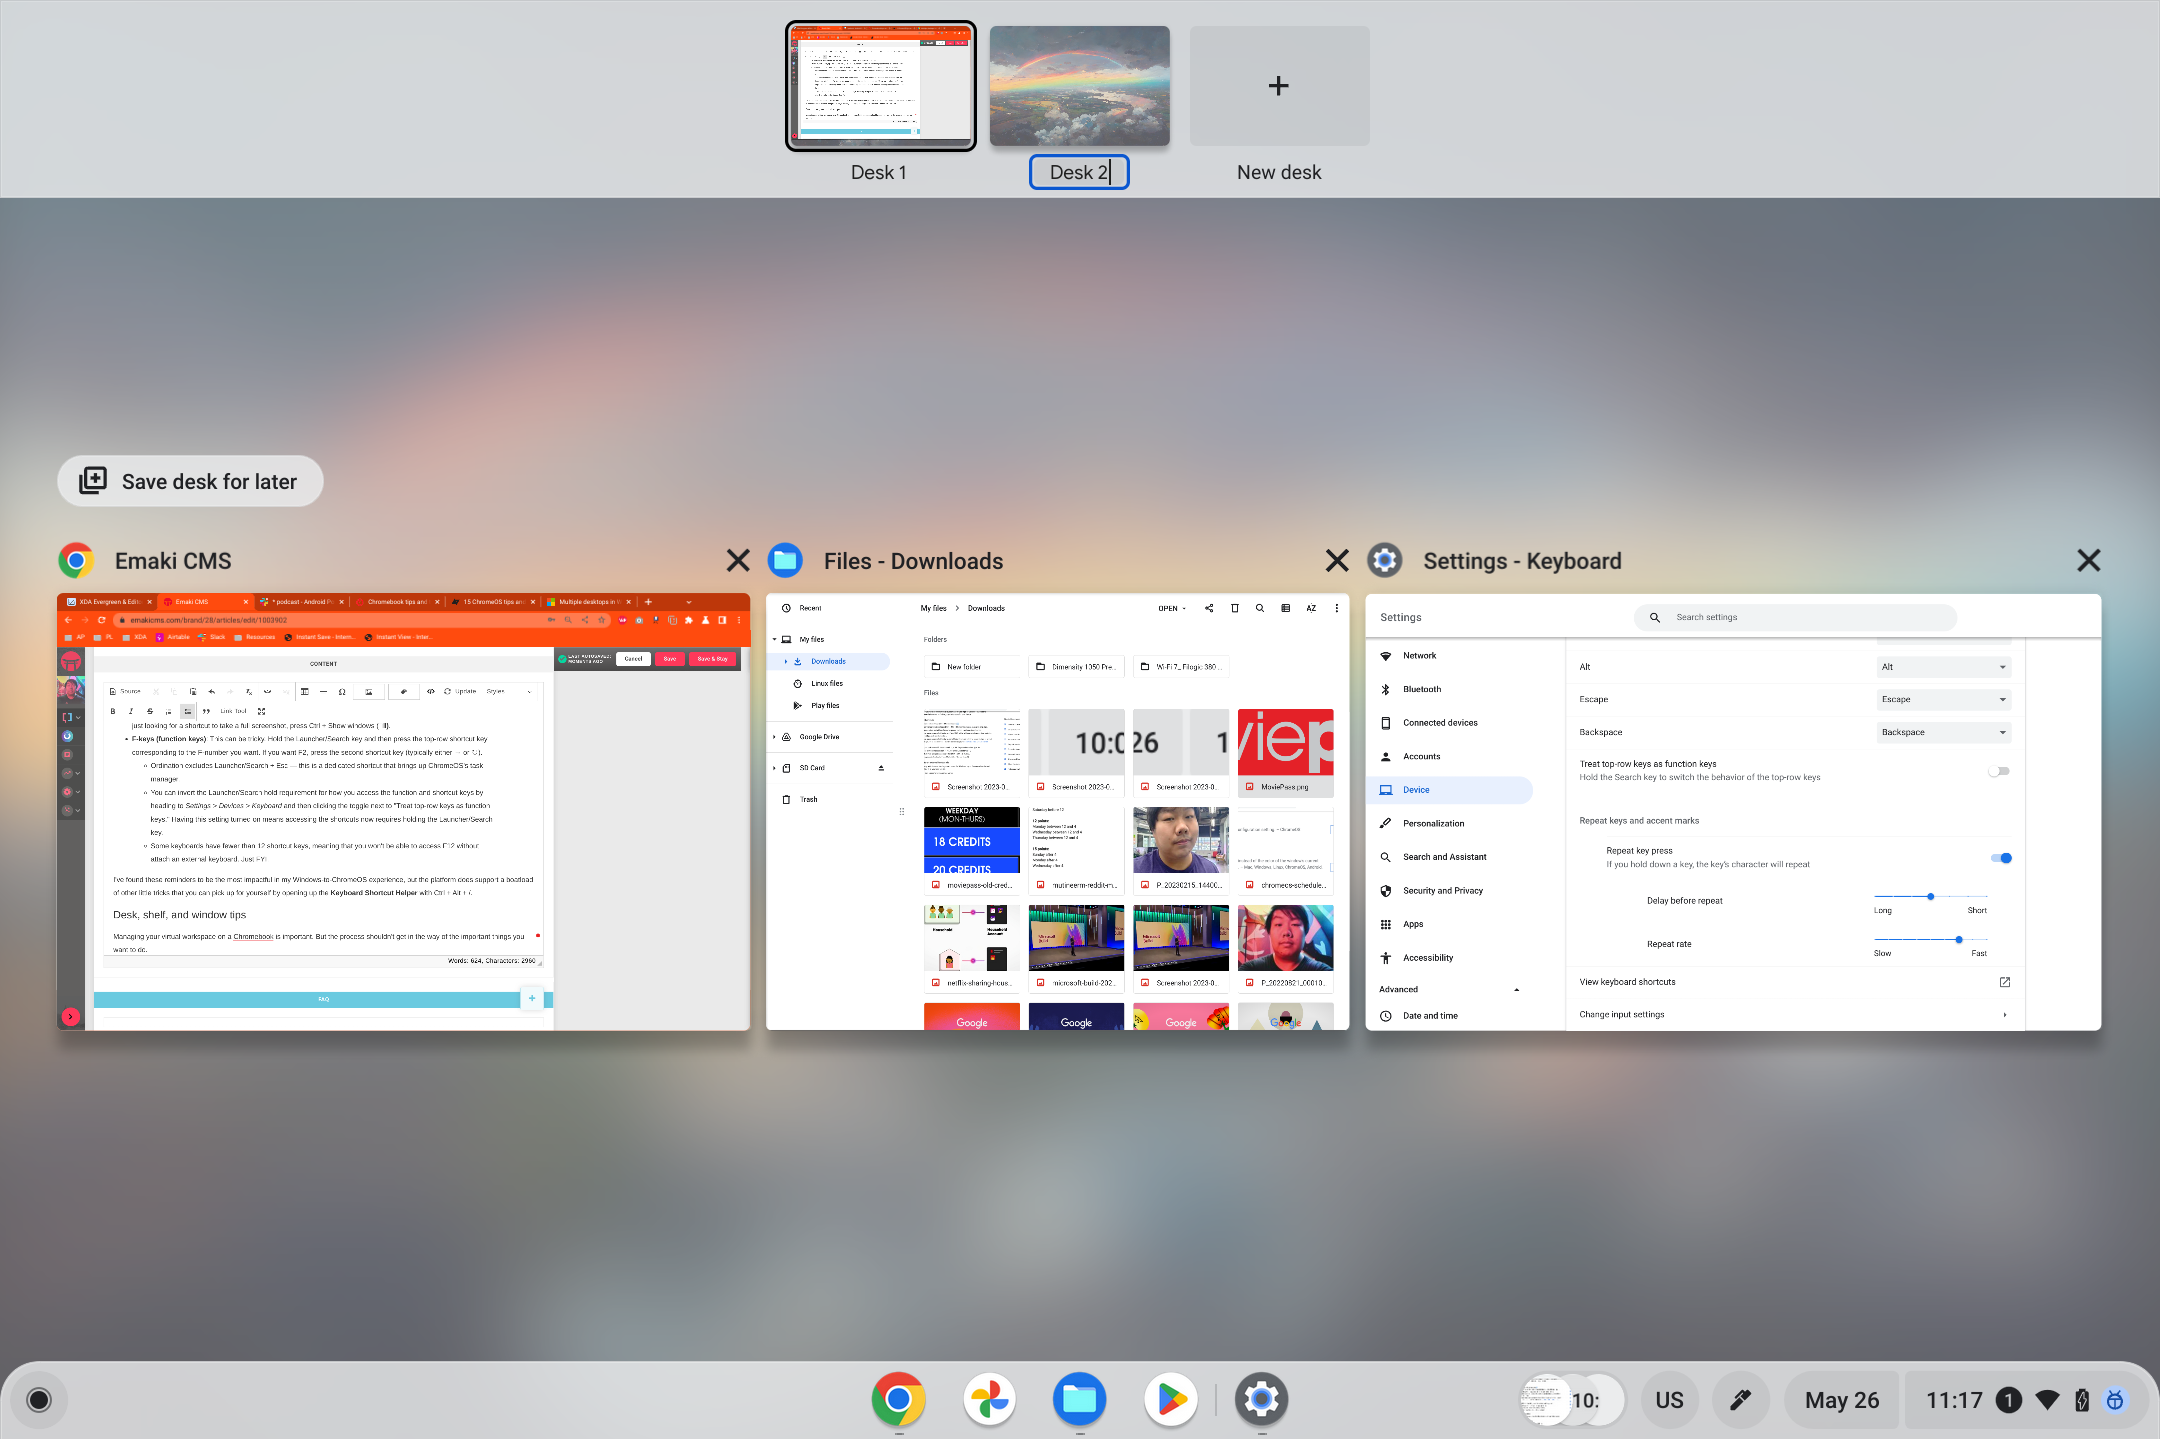
- You can reverse the launcher persistence/search requirements for how to access the function and hotkeys by heading to Settings > Devices > Keyboard Then you click the switch next to Treat the top row keys as function keys. Turning this setting on means that accessing Shortcuts now requires pressing the Launcher/Search key.
- Some keyboards have fewer than 12 shortcut keys, which means you won’t be able to get to F12 without connecting an external keyboard.
- Reset keyboard/trackpad functions: If you don’t like how some parts of the navigation experience work, you can change them by heading to Settings > Devices Then choose the following submenus:
- The touchpad: There are toggles for tap, tap-drag, touchpad scroll speed, and others depending on the device.
- keyboard: You can toggle the functions of the Launcher/Search, Ctrl, Alt, Esc and Backspace keys as well as toggle access to the top row function key.
I’ve found these reminders to be the most impactful in my experience from Windows to ChromeOS, but the platform actually supports plenty of other little tricks you can pick up on your own by opening Keyboard shortcut helper Using Ctrl + Alt + / (forward slash). XDA also has additional tips on how to configure settings on your Chromebook.
Launcher, window, and desktop tips
It’s important to manage the virtual workspace on your Chromebook. But the process shouldn’t get in the way of the important things you want to do.
- offices: If you use virtual desktops to run your work, you can do that on ChromeOS as well. With three fingers, swipe up to get to the overview. At the top of the screen, you will see a bar for virtual offices. You can add, close and switch between them. You also have the option to save your current desk for later – this desk can be closed to save computing resources in the meantime.
- Docking windows or split screen: Click and drag the top part of the window to the left or right edges of the screen to dock and fill the respective half of the screen. You can also drag it to the top edge and bring the window to full screen.
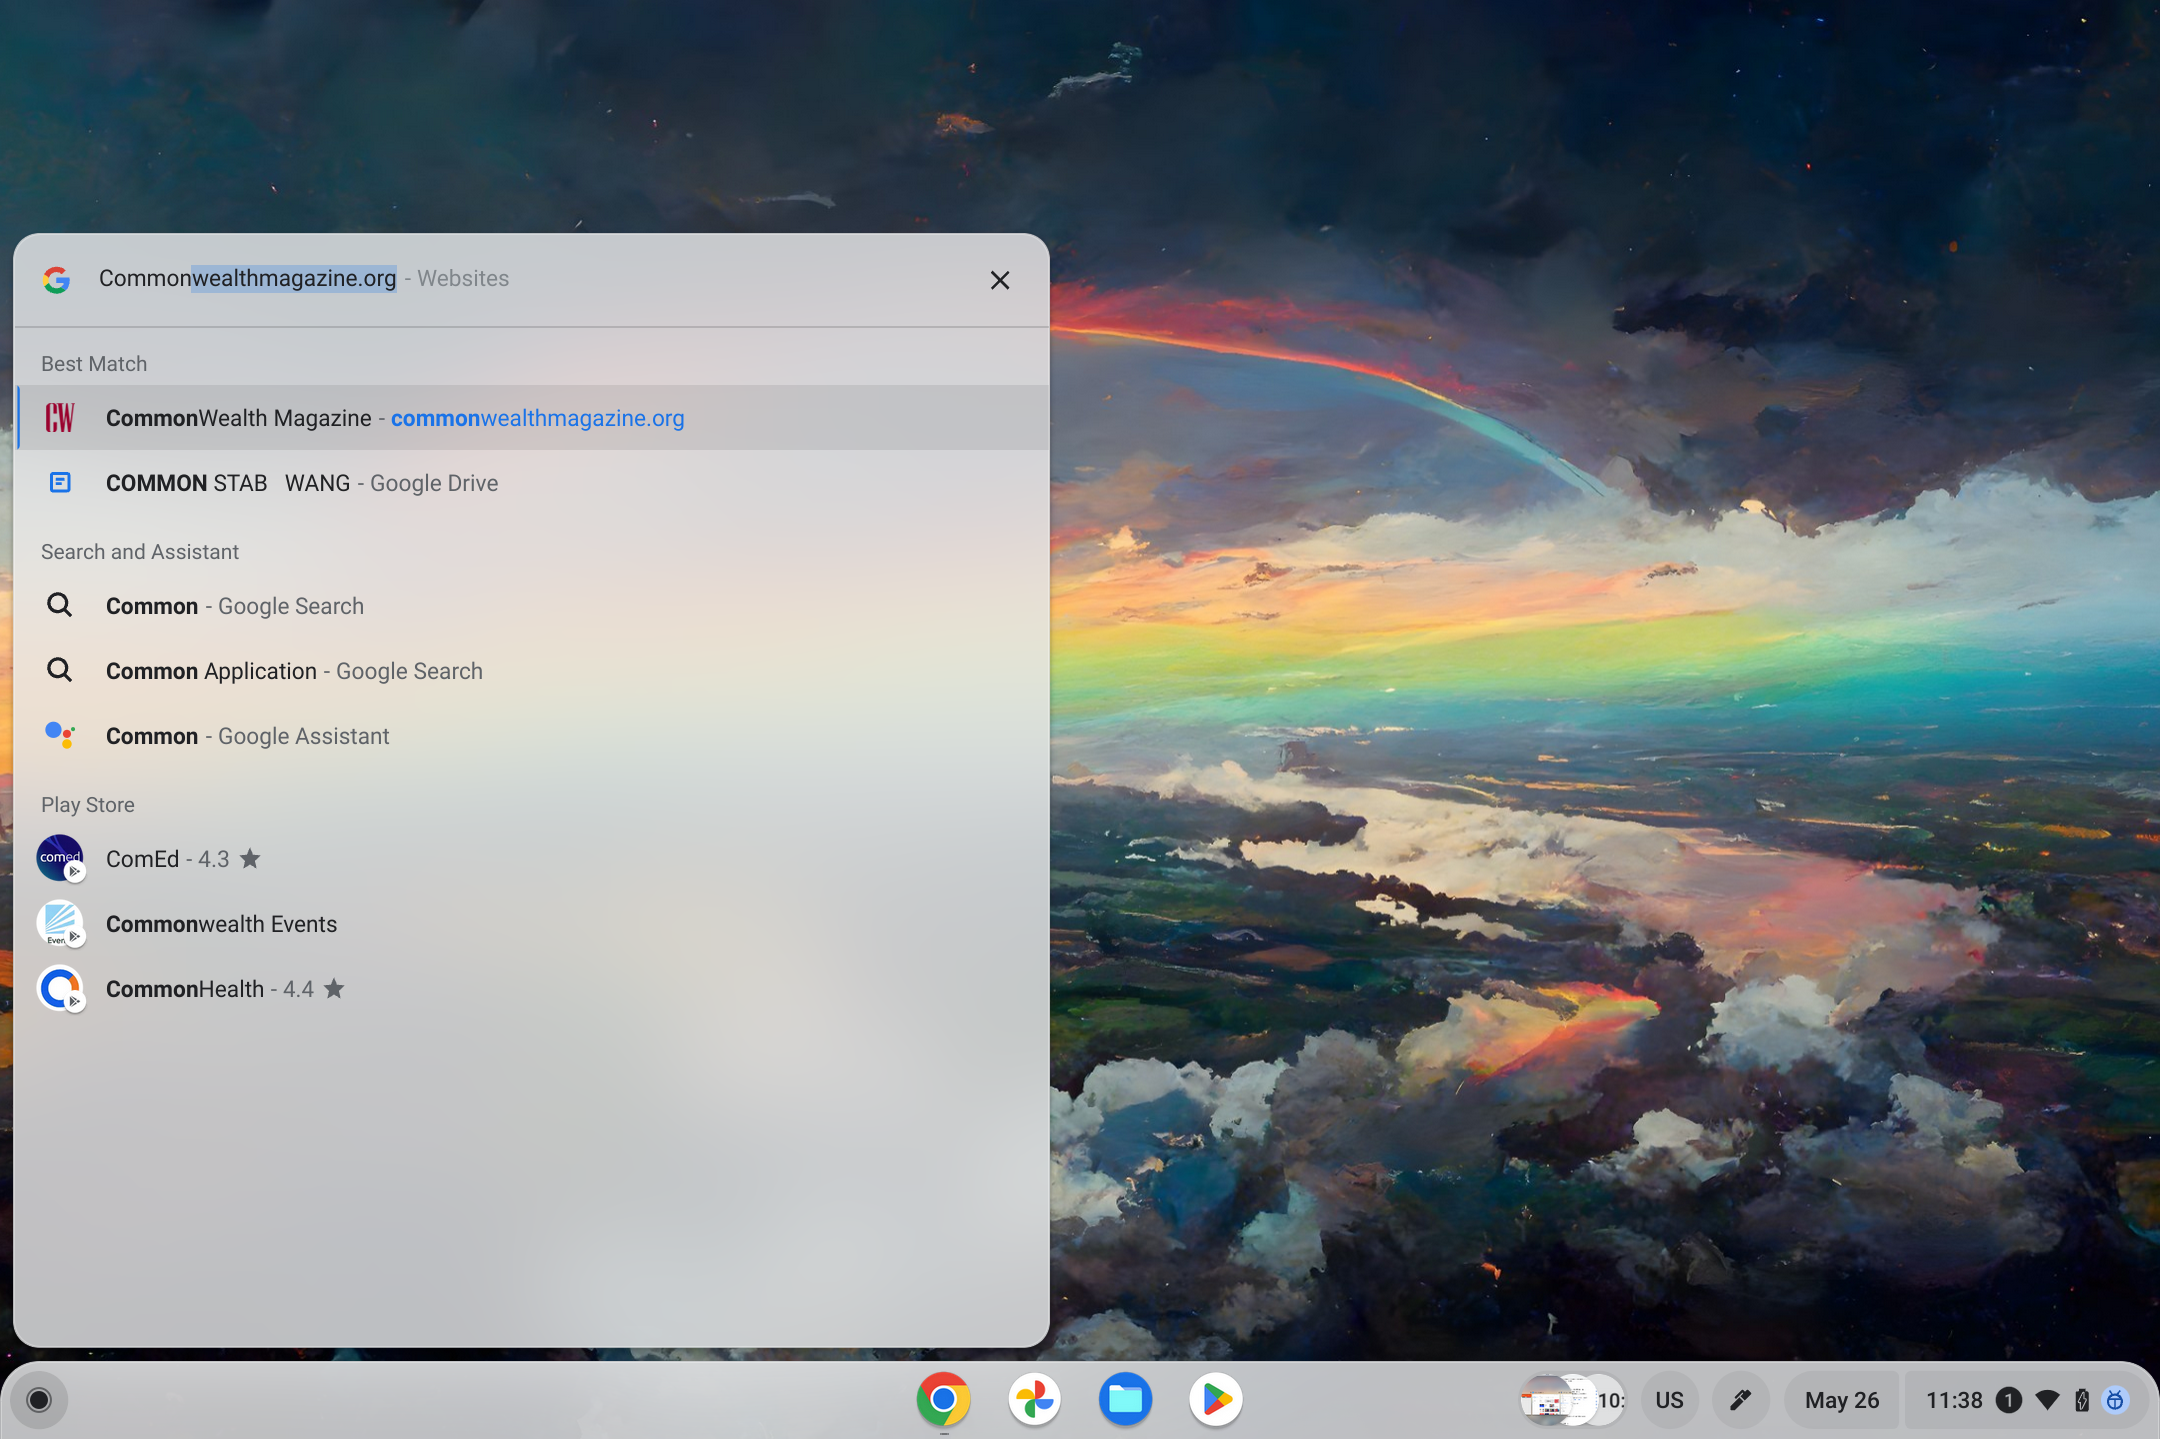
- search launcher: Open your launcher and use the search bar at the top to search not just for apps, but for any file or setting on your device or even the Chrome tab you have open (and it’s hidden in a window you can’t find).
- Sort out your operator: For the longest time, the ChromeOS launcher didn’t support custom sorting of apps. That has changed fortunately.
- Transfer applications: Tap and hold, then move the app to your preferred position on the launcher.
- Sort applications: Right-click any open space within the player. You will be able to choose to arrange the apps by names alphabetically or by color.
- Install on the shelf: You can set apps to launch directly from the shelf by right-clicking an app in the launcher and selecting “Pin to shelf”.
Tips about apps, games and files
You may lose some functionality that you had on Windows or Mac with its vast ecosystem of software. ChromeOS brings you the most with Android apps and the web, but sometimes you might want to use software you’re missing from Windows.
Linux applications
One way you can expand the app selection on ChromeOS is by using Linux apps. Yes, that means setting up Linux. No, you don’t have to be afraid of the process.
Here’s how to get started:
- go to Settings > Advanced > Developers.
- under linux development environment, He chooses His job.
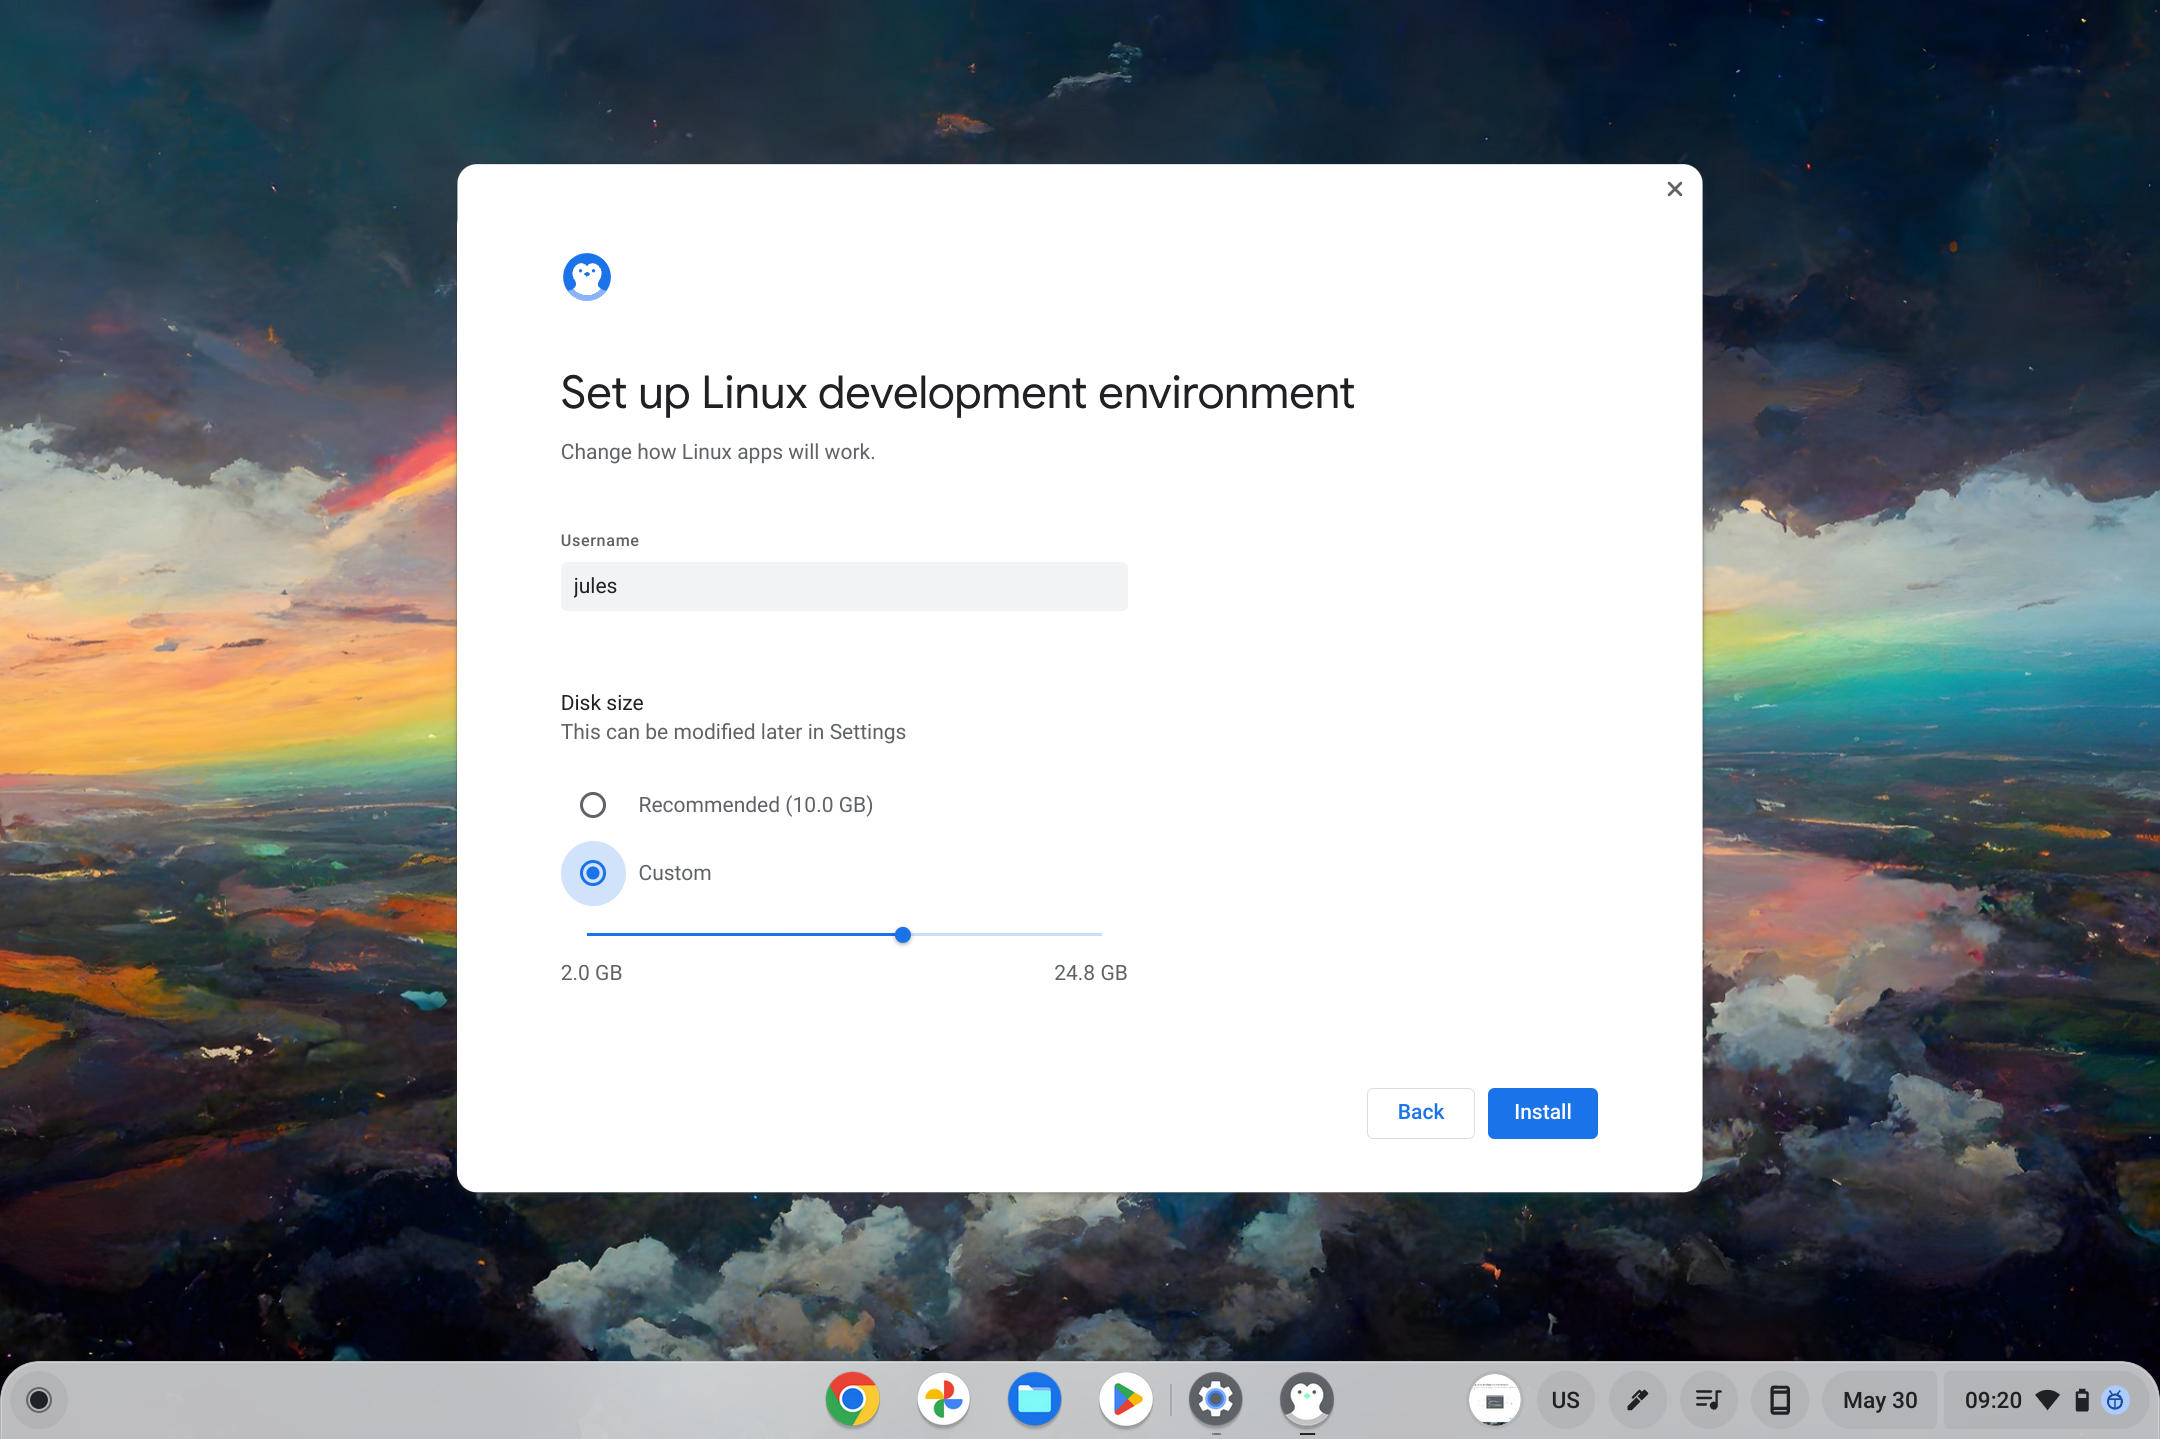
- During the installation process, you will need to provide a username to register in the Linux environment (not that important) and allocate disk space for the environment section (important, but this can be modified later on the same developer settings page).
- Once done, a terminal window will open. This will be the main interface for your Linux virtual machine, called Penguin.
- For future access, head to the launcher and find the folder named Linux applications. He chooses loungethen penguin. The terminal as well as the Linux applications you have installed will also appear in the Continue where you left off Row.
ChromeOS runs the default Debian 11 environment (codenamed “bullseye”) and supports instant installation of DEB files. Just double click on it and click install in an open prompt. There are other ways to download Linux applications including through various repositories such as Wine. The less complicated way is through the APT repositories, and we have a comprehensive tutorial on how to install Linux apps on ChromeOS to help you in that direction.
Make sure to move any files you want to use with Linux applications to the Linux partition.
games
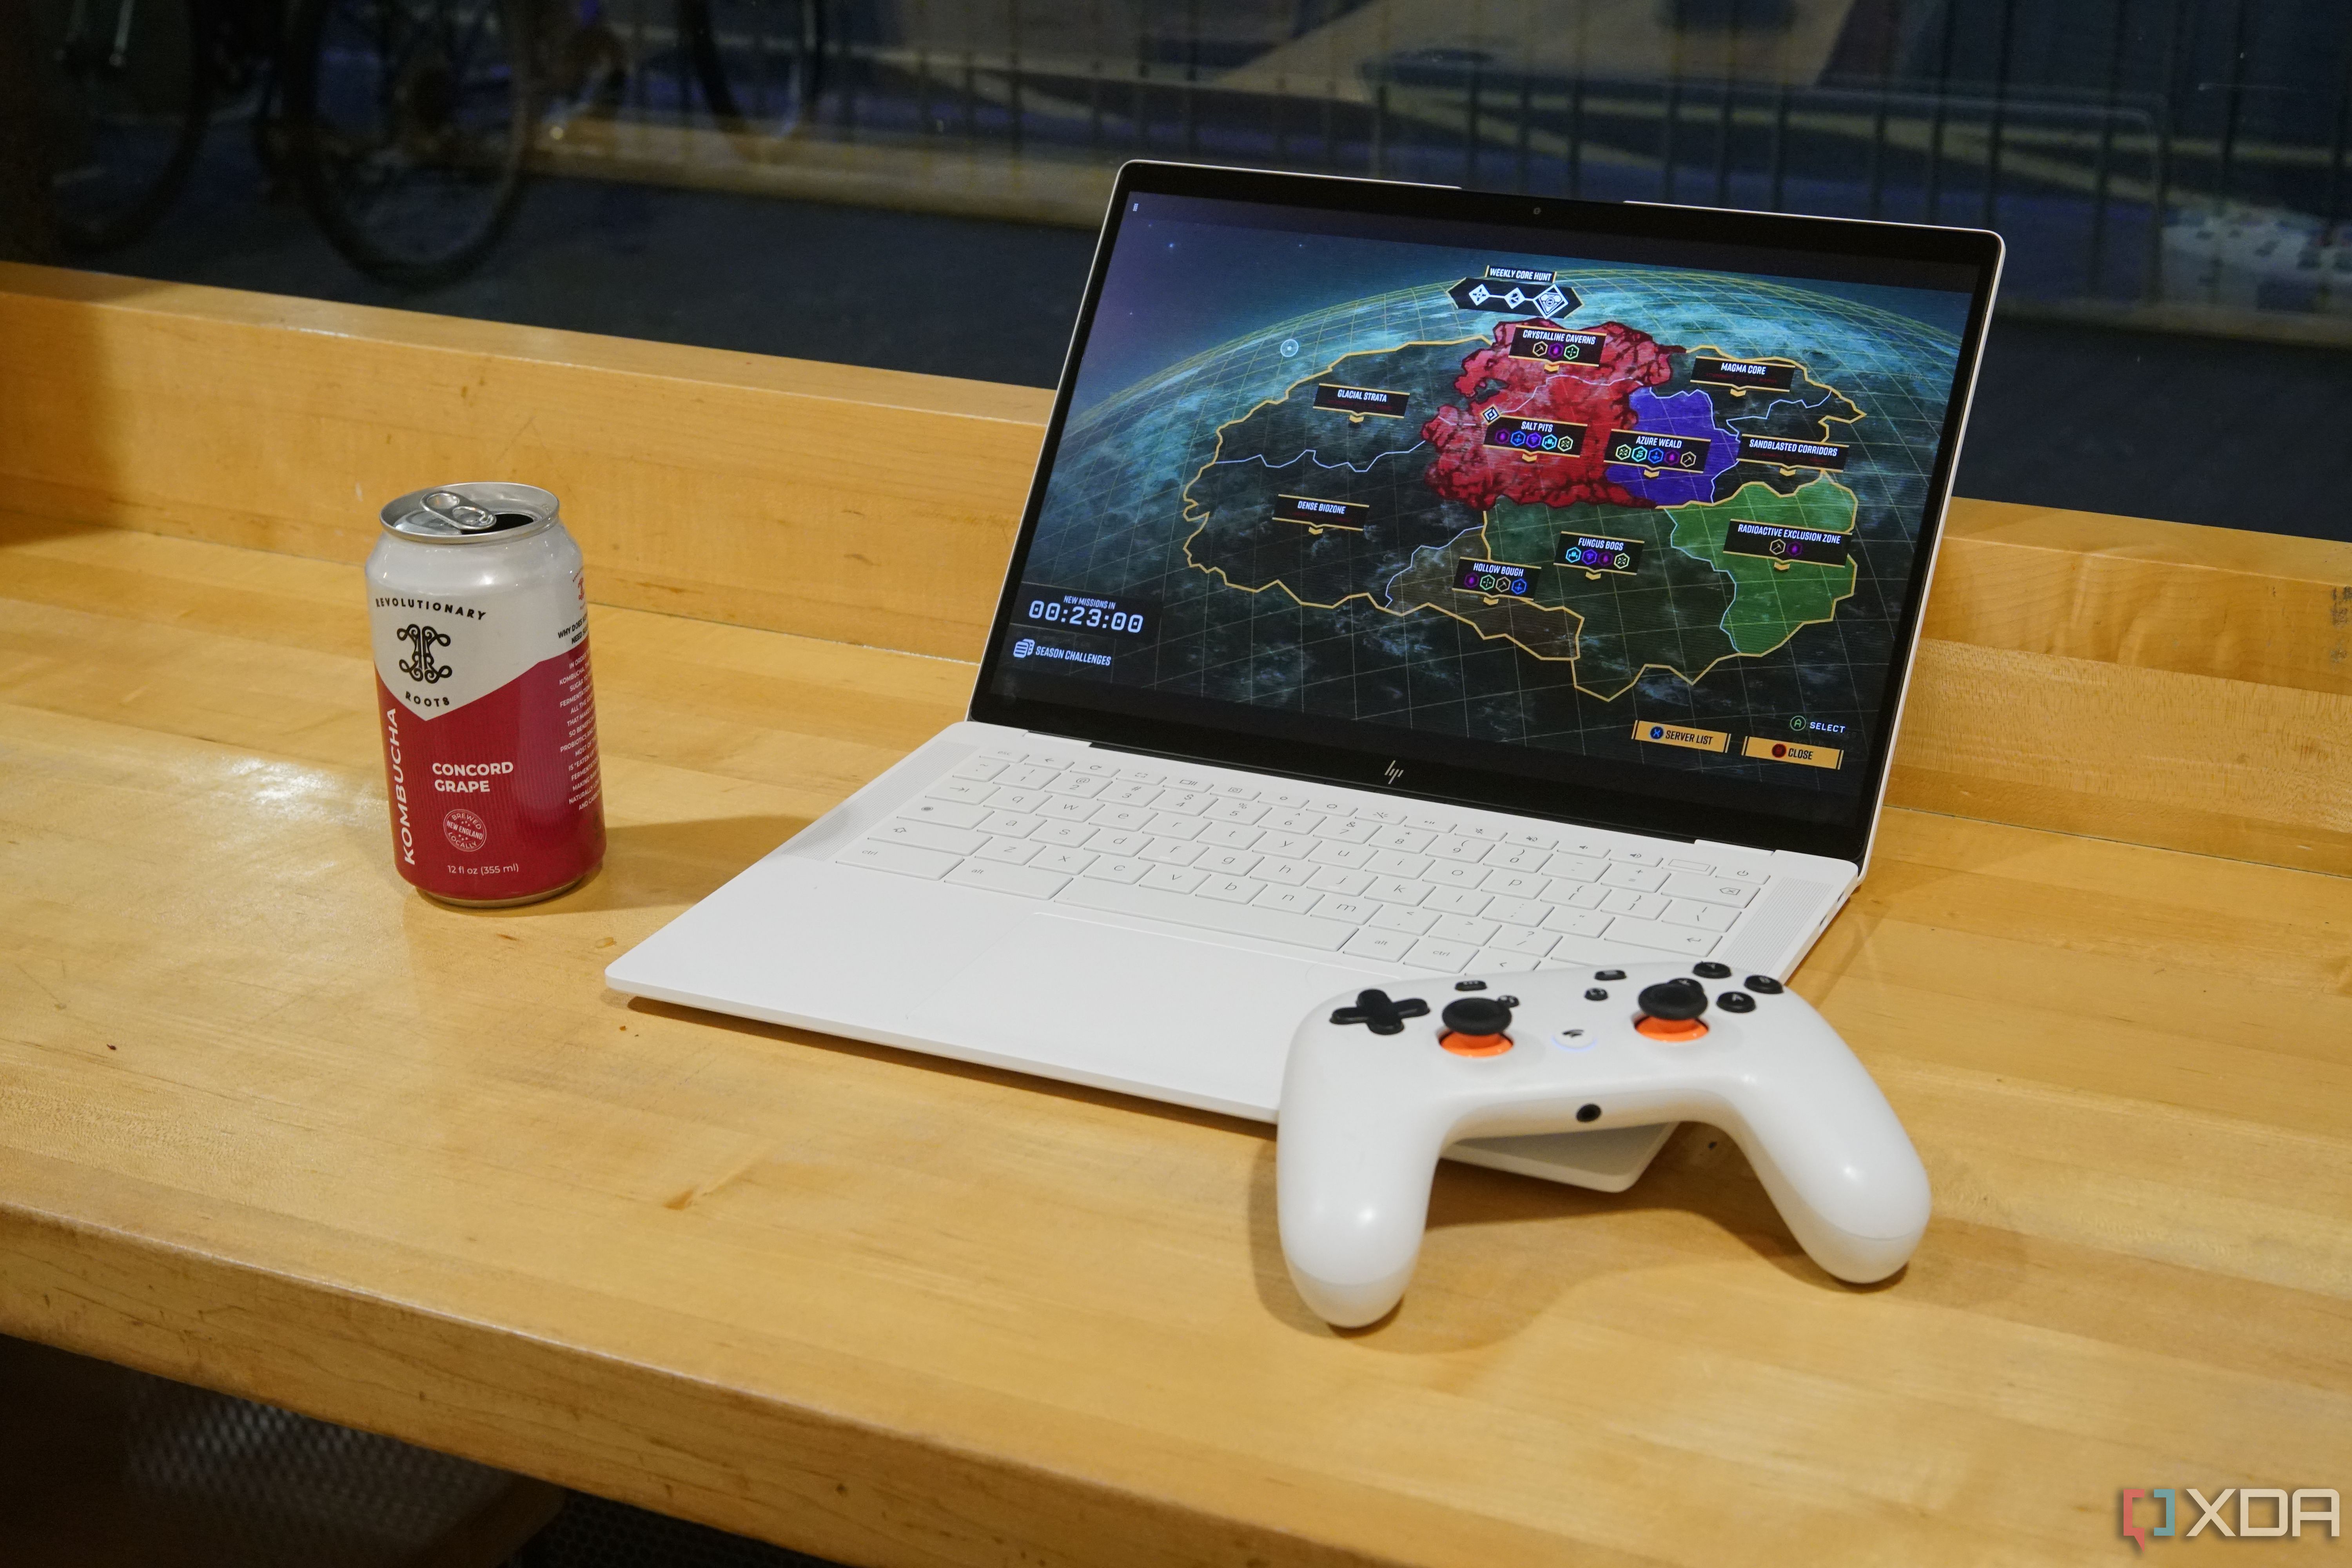
ChromeOS supports many cloud gaming services including Xbox Game Pass and Nvidia GeForce Now. But if you collect a popular library on Steam, you may be able to play some or all of your games from there because the platform is available on ChromeOS in beta. Having said that, you will need to make sure you get a capable machine and be willing to jump through some hoops.
Steam on ChromeOS supports Chromebooks running either an AMD Ryzen (5000 C-Series or later) or an Intel Core (12th generation or later) processor. Google recommends using at least a Ryzen 5 or i5 with 16GB of RAM for an optimal experience, but the minimum specification is a Ryzen 3 or i3 with 8GB of RAM.
To install Steam, follow these steps:
- go to Settings > About ChromeOS > Additional details Then under channelsswitch to beta. You will then need to restart your Chromebook.
- Open a Chrome window and enter chrome://flags #borealis-enabled.
- Flip the toggle switch for the coil Enable Borealis flag for maybe. Again, you will have to restart your device.
- If you don’t see this flag appearing at the top of the window, your device doesn’t support Steam for ChromeOS beta.
- Open the launcher and search for “Steam”. Select the best Steam score and follow the installation instructions.
After that’s done, you should be able to open Steam, sign in with your account, and download the games in your library that have the Linux version. You’ll be surprised at how far you’ll get – I’ve been splurging on the Android version of Civilization VIbut the Steam version works inappropriately and supports multiplayer games.
files
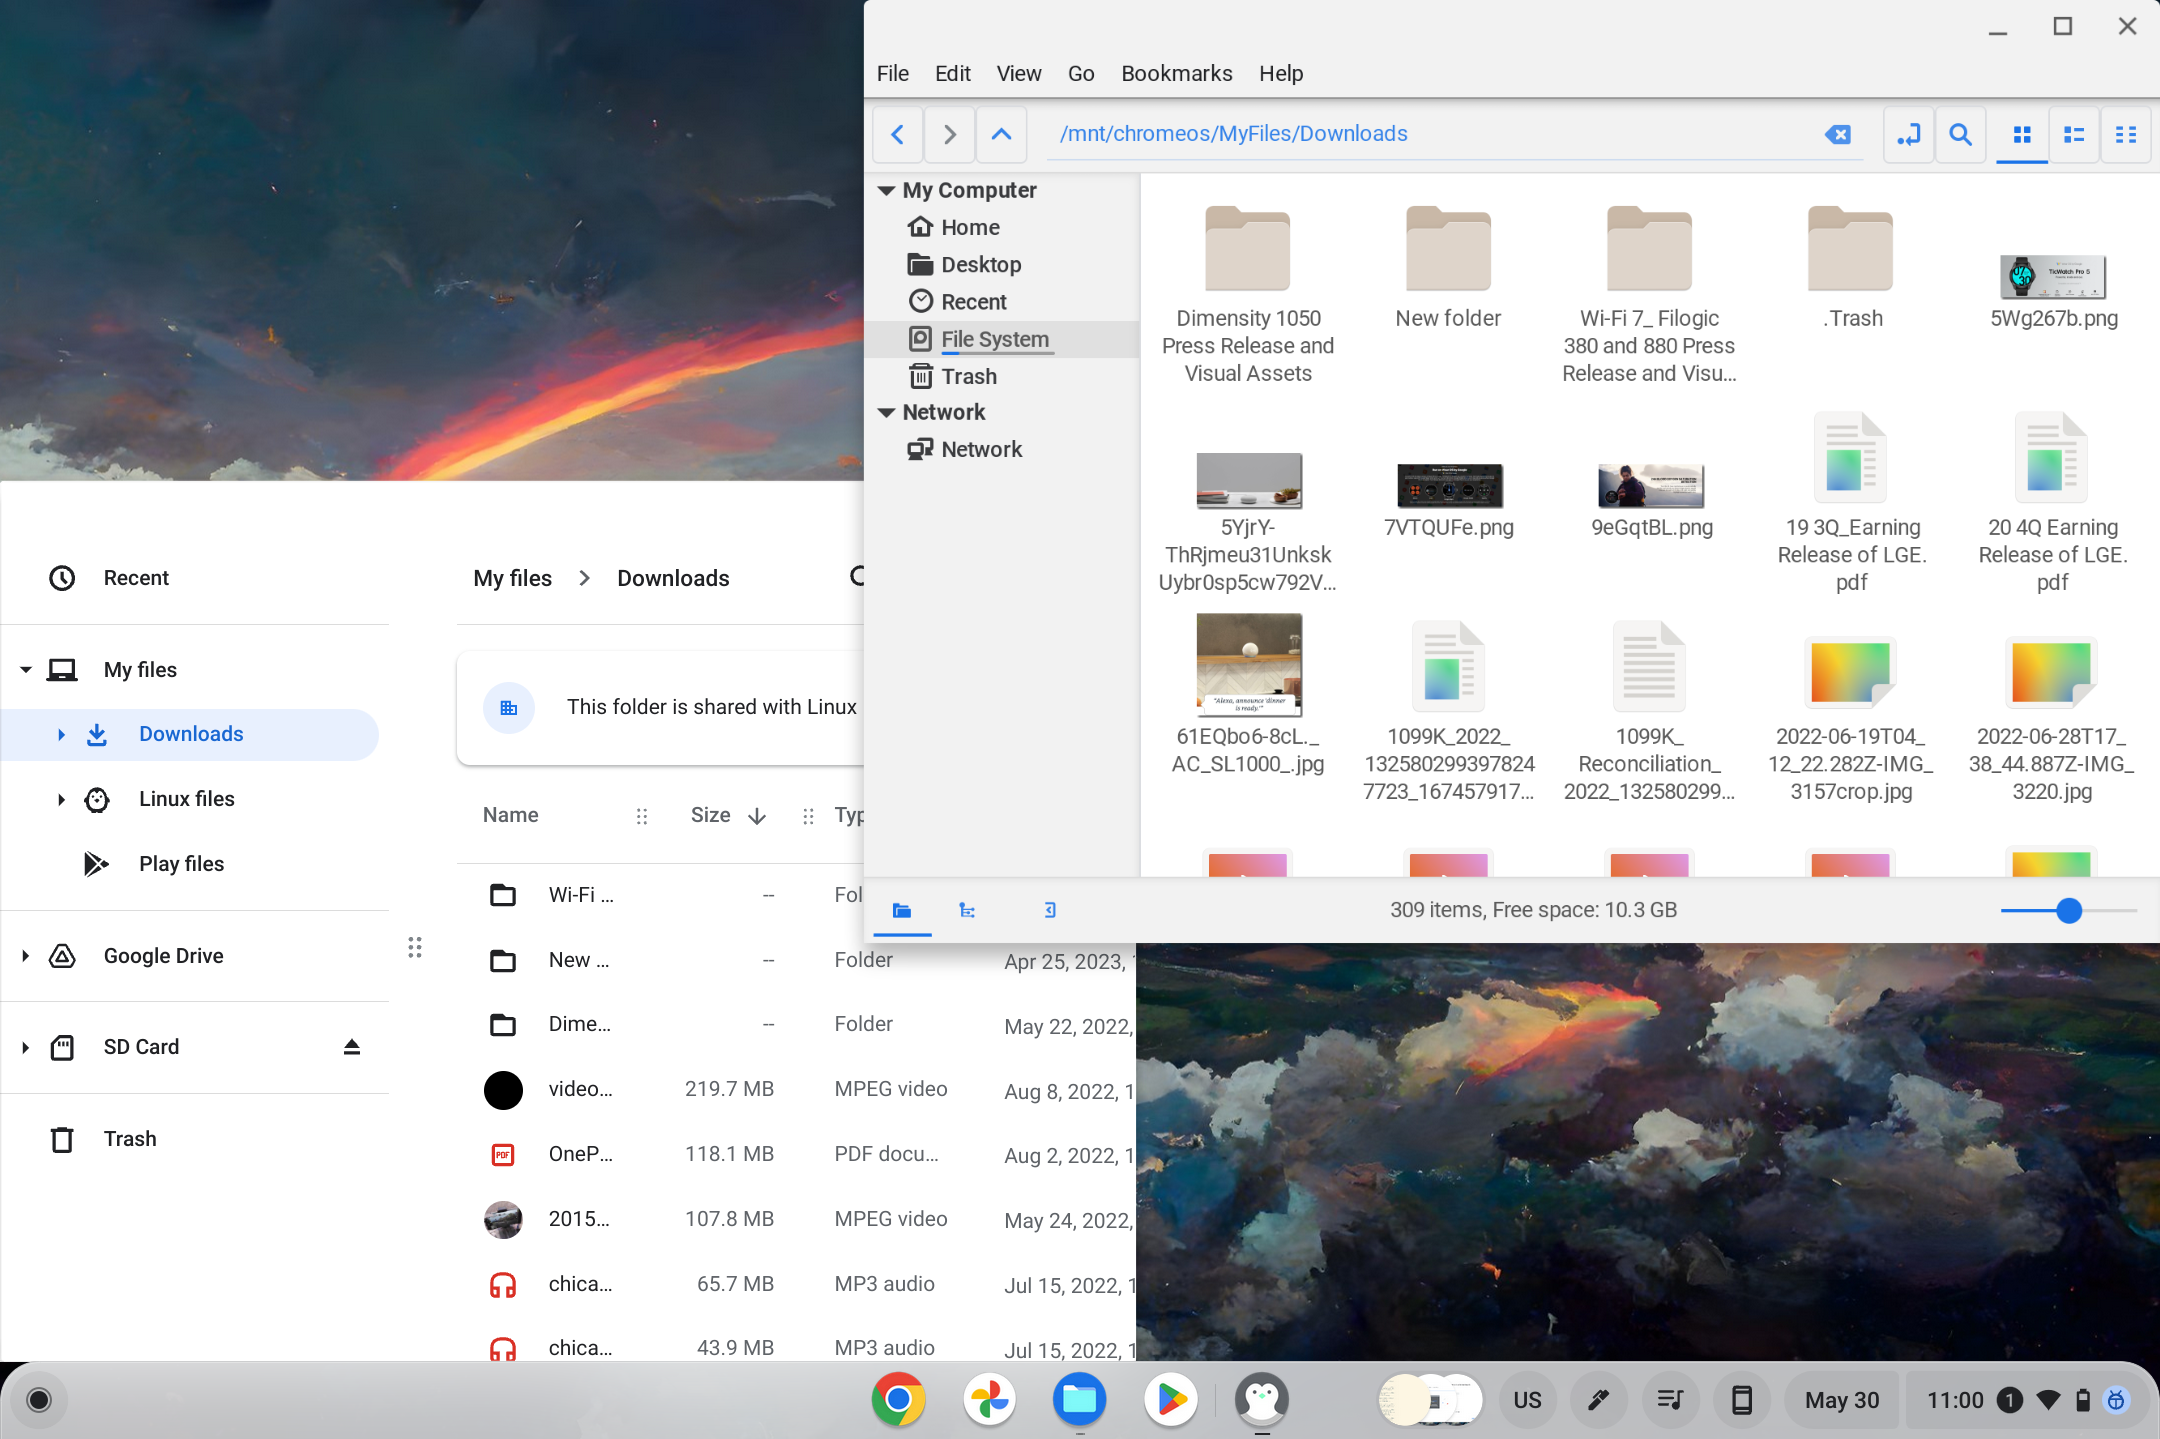
The file browser on ChromeOS might be a bit basic for your needs, so you’ll need to set up your Linux environment in order to install an alternative file browser like Nemo or Dolphin.
To get it, all you have to do is open Terminal and execute:
sudo apt install nemo\ orsudo apt install dolphin
You will then need to allow your Linux file manager to browse the files on your primary partition:
- From the ChromeOS file browser, right-click on a file Downloads folder and choose Share with Linux.
- Switch to a Linux file manager, and you should be able to open your Chromebook’s generic file system. Primary partition files are stored in the directory /mnt/chromos/.
These are just some of the things I’ve grown to know about ChromeOS from the Windows camp. I’m still doing a lot with Windows, thank you very much, but jumping between Chromebooks on top of that gives me a better sense of how messy computing really can be.
There are many millions of Chromebook owners who feel limited in what they think they can do. They shouldn’t feel that way. There is a wealth of resources online that can help them get what they want to do with their surprisingly powerful laptop. And if you’re just getting started with your ChromeOS experience, I’m glad you turned to us to get started.
[ad_2]


