

The Dell Latitude 5440 is pretty special when compared to other great Dell laptops. You can swap out many of the components onboard the laptop, like the RAM and SSD. Arguably, more importantly, you can replace the battery, which will be helpful if you start experiencing poor battery life. And thankfully, you can do so pretty easily, as long as you’re comfortable taking your laptop apart.
What you’ll need
Before working on your Dell Latitude 5440, you’ll need a few tools. First, you’ll need a Phillips head screwdriver to get inside your laptop and remove the bottom cover. Though it’s optional, you also might want to consider an anti-static wrist strap, which can protect your laptop from damage when you open it. Finally, you’ll need a pry tool to open that bottom cover without causing damage to it. Of course, you’re going to need a replacement battery, too. You can find one through Dell.com, with pricing starting at around $140.
What to do before working on your laptop
Before you work inside your laptop, you’re going to have to take some safety precautions. While we understand you’re going to replace the battery, you’re still going to have to disable it by putting your laptop into Service Mode first.
- Unplug your laptop from the charger.
- Unplug all peripherals from your laptop.
- Power on your laptop and hold the B key and the power button for three seconds.
- Press any key to continue.
- The computer will beep there times and shut down into service mode.
How to replace the battery in the Dell Latitude 5440
- Power off your laptop.
- Turn the laptop over, with the hinge facing away from you.
- Remove the eight Phillips head screws at the bottom of the laptop. There are three on the rear, two on the bottom, and three in the middle.
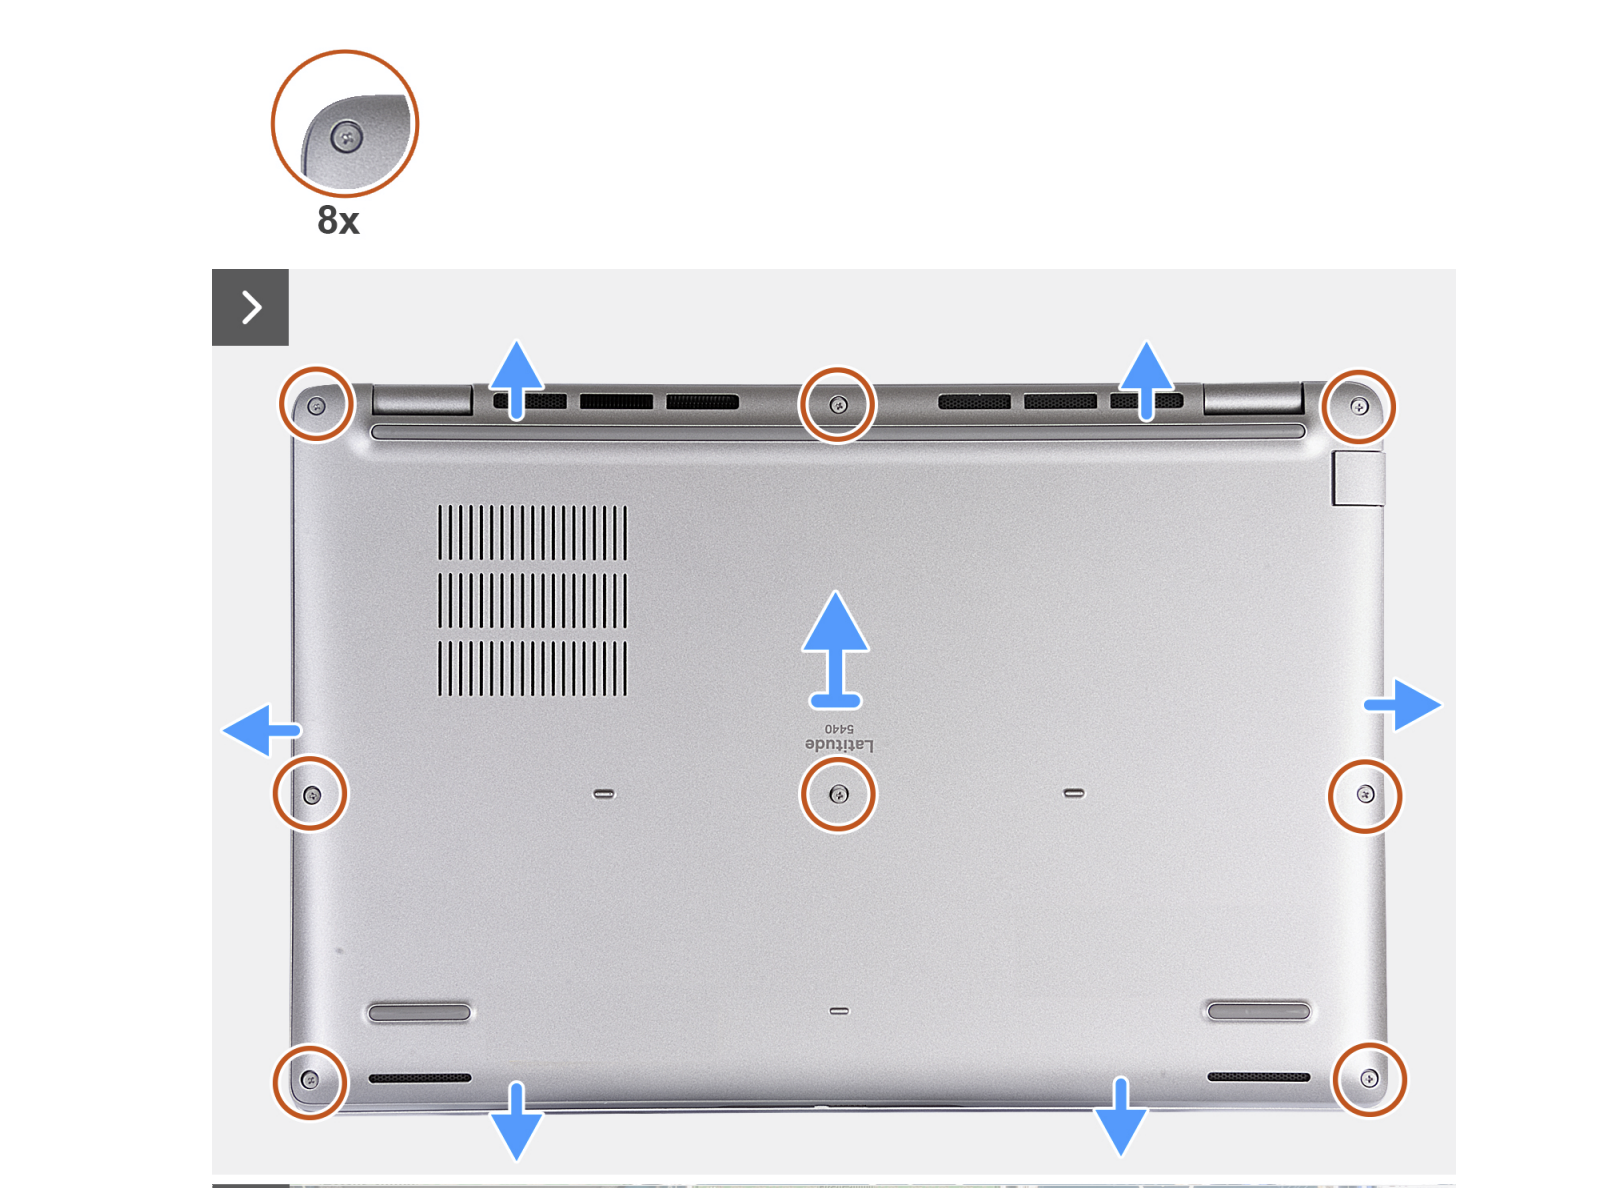
- Insert your pry tool into the hinge and then move around the laptop until the cover slightly lifts off the chassis.
- Lift the lid off.
- If you’re using one, attach the anti-static wrist strap to the side of the laptop.
- Peel back the tap securing the battery cable to the palm rest assembly.
- Disconnect the battery cable from the system board.
- Remove the five Phillips head screws that secure the battery to the chassis.
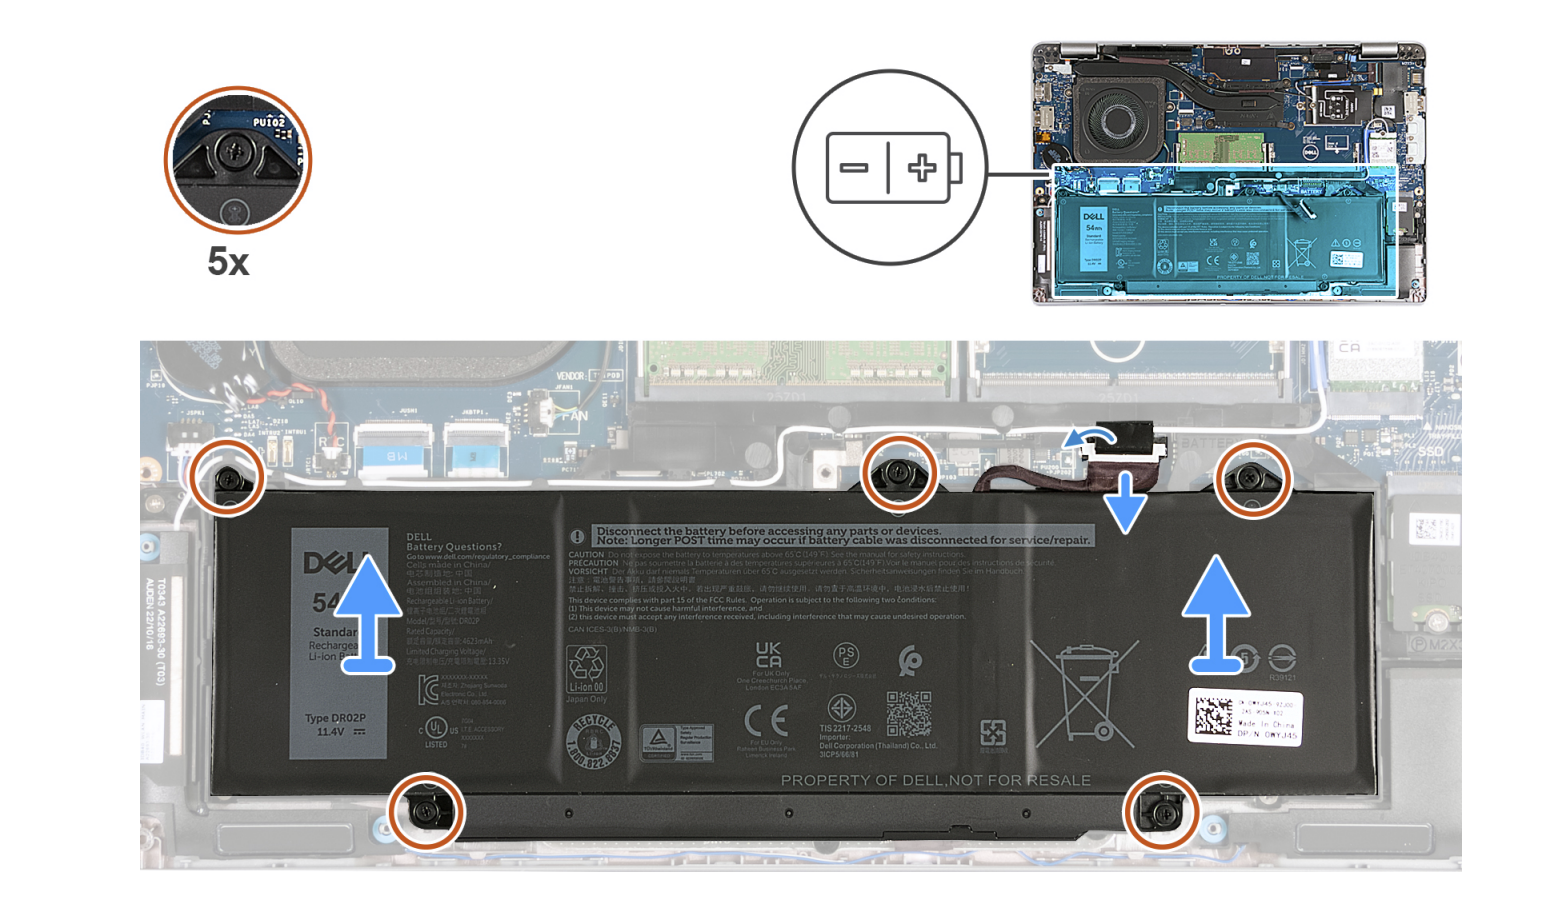
- Lift the battery off
- Place the new battery into the slot, and align the screw holes.
- Put back the five screws that hold the battery in place.
- Connect the battery cable to the system board.
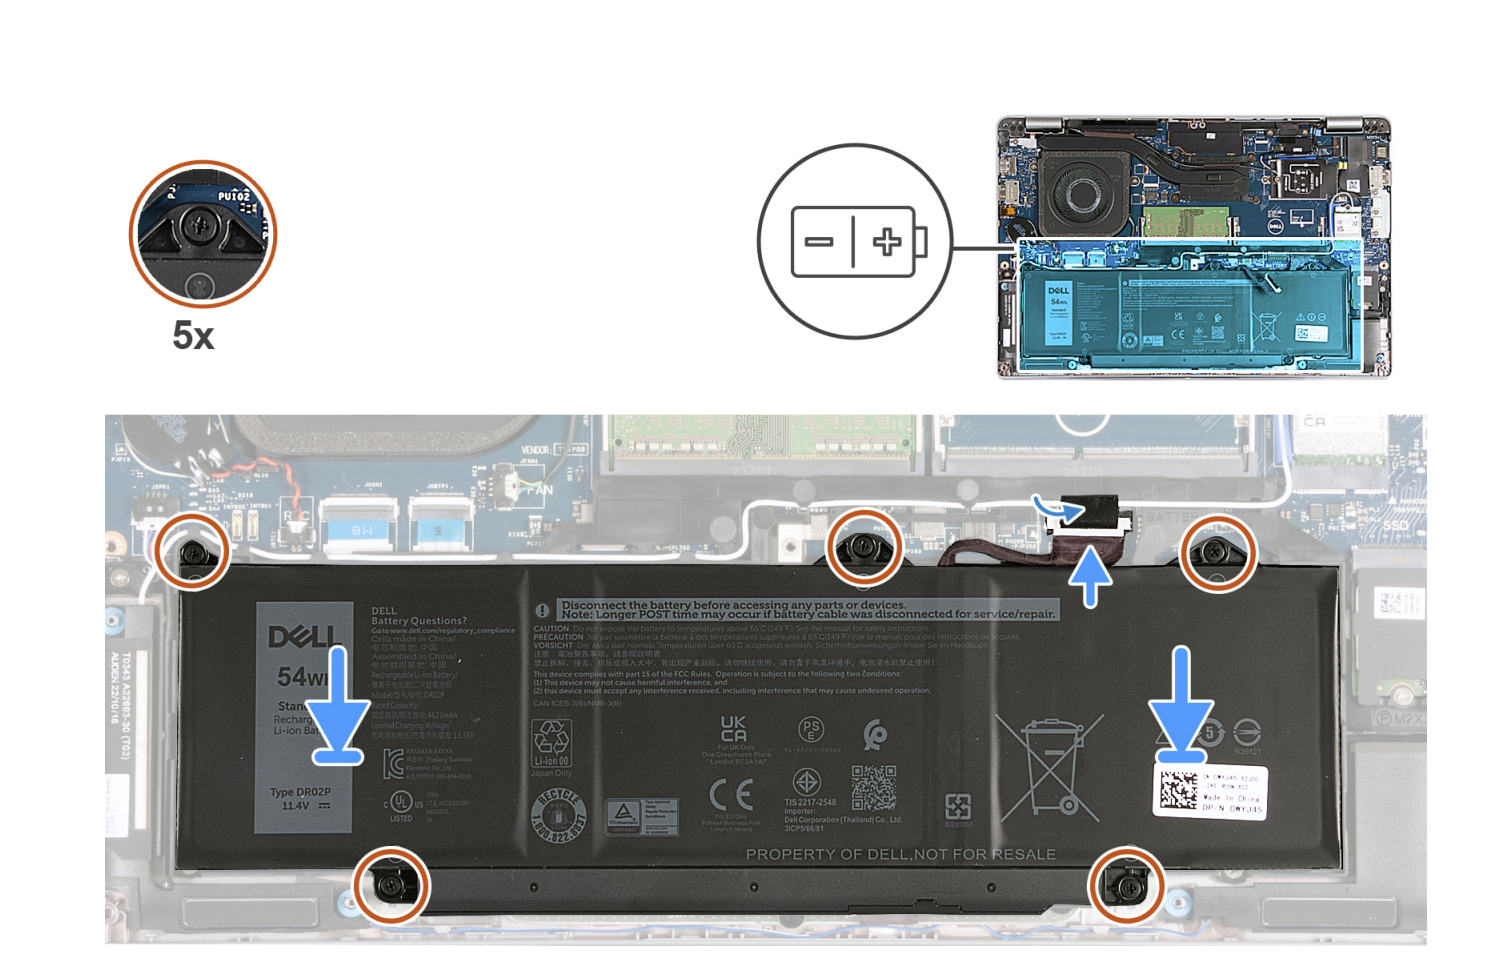
- Adhere the tape to the battery cable.
- Detach your anti-static wrist strap.
- Replace the cover, and screw the eight Phillips head screws back in place.
- Plug your PC into a power outlet, letting the laptop’s battery charge.
- Power back on the laptop for it to exit service mode.


With all these steps completed, you’ve officially replaced the battery on your Dell Latitude 5440. Remember to fully charge your laptop before using it just on battery for the first time. You might also want to visit the Power and battery section of Windows 11’s settings page to see recommendations on how to improve your laptop’s battery life.
These days, it’s really rare to see a laptop with repairable and replaceable components like the Dell Latitude 5440. Typically, these parts might be soldered to the motherboard on the device. So, if these things are important to you, you can check out the Latitude 5440 with the link below or check out other great laptops, too.

Dell Latitude 5440
$1419 $2181 Save $762
The Dell Latitude 5440 is a solid business laptop. This year’s model features the latest 13th-generation Intel P-series or U-series CPUs, a new option for Nvidia MX graphics, and 5G connectivity, along with faster DDR5 RAM.
[ad_2]


