

Microsoft’s PowerToys suite includes a ton of tools that can help boost your productivity or get complex tasks done. There are plenty of tools for all kinds of users, and among them is Color Picker, a relatively simple, but potentially super useful tool that lets you grab any color from your screen to use in another app. It’s not always easy to grab a color to use in different places, but Color Picker offers a robust solution to this problem so you never have trouble using the color you want again.
It’s a fairly straightforward tool, but if you’re not sure how it all works, we’re here to help.

The ultimate guide to using PowerToys
Windows may not be perfect, but Microsoft gives you the tools to make the experience better with PowerToys. Here’s everything you need to know.
How to pick a color using Color Picker in PowerToys
The basic use of Color Picker can be very simple. All you need to do is install PowerToys and it should be available by default. Here’s how it works:
- Download and install PowerToys from the Microsoft Store (or using one of the other methods)
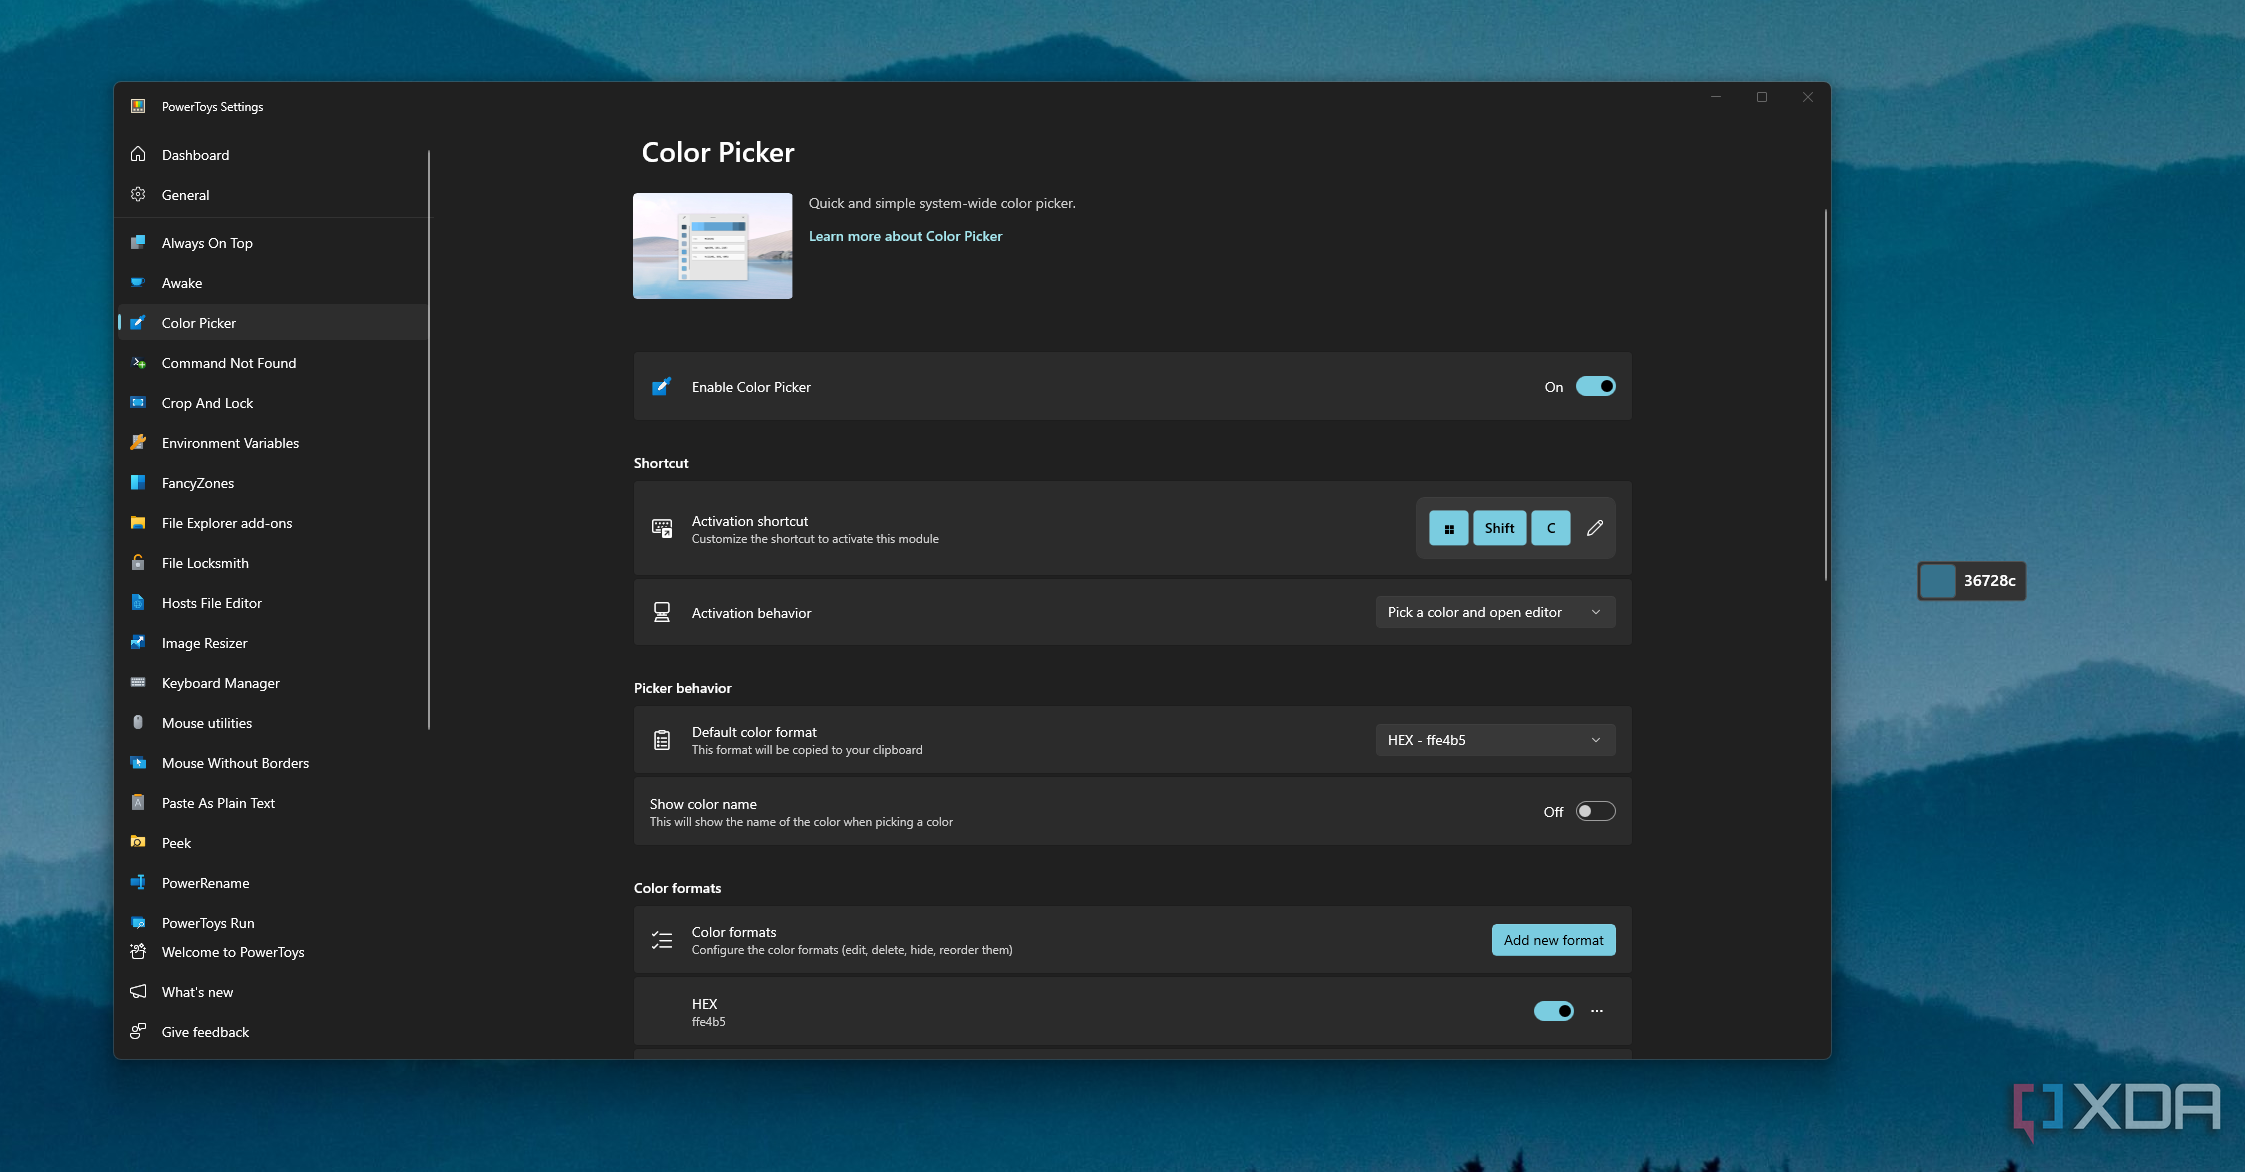
- Launch PowerToys and switch to the Control Picker tab on the left.
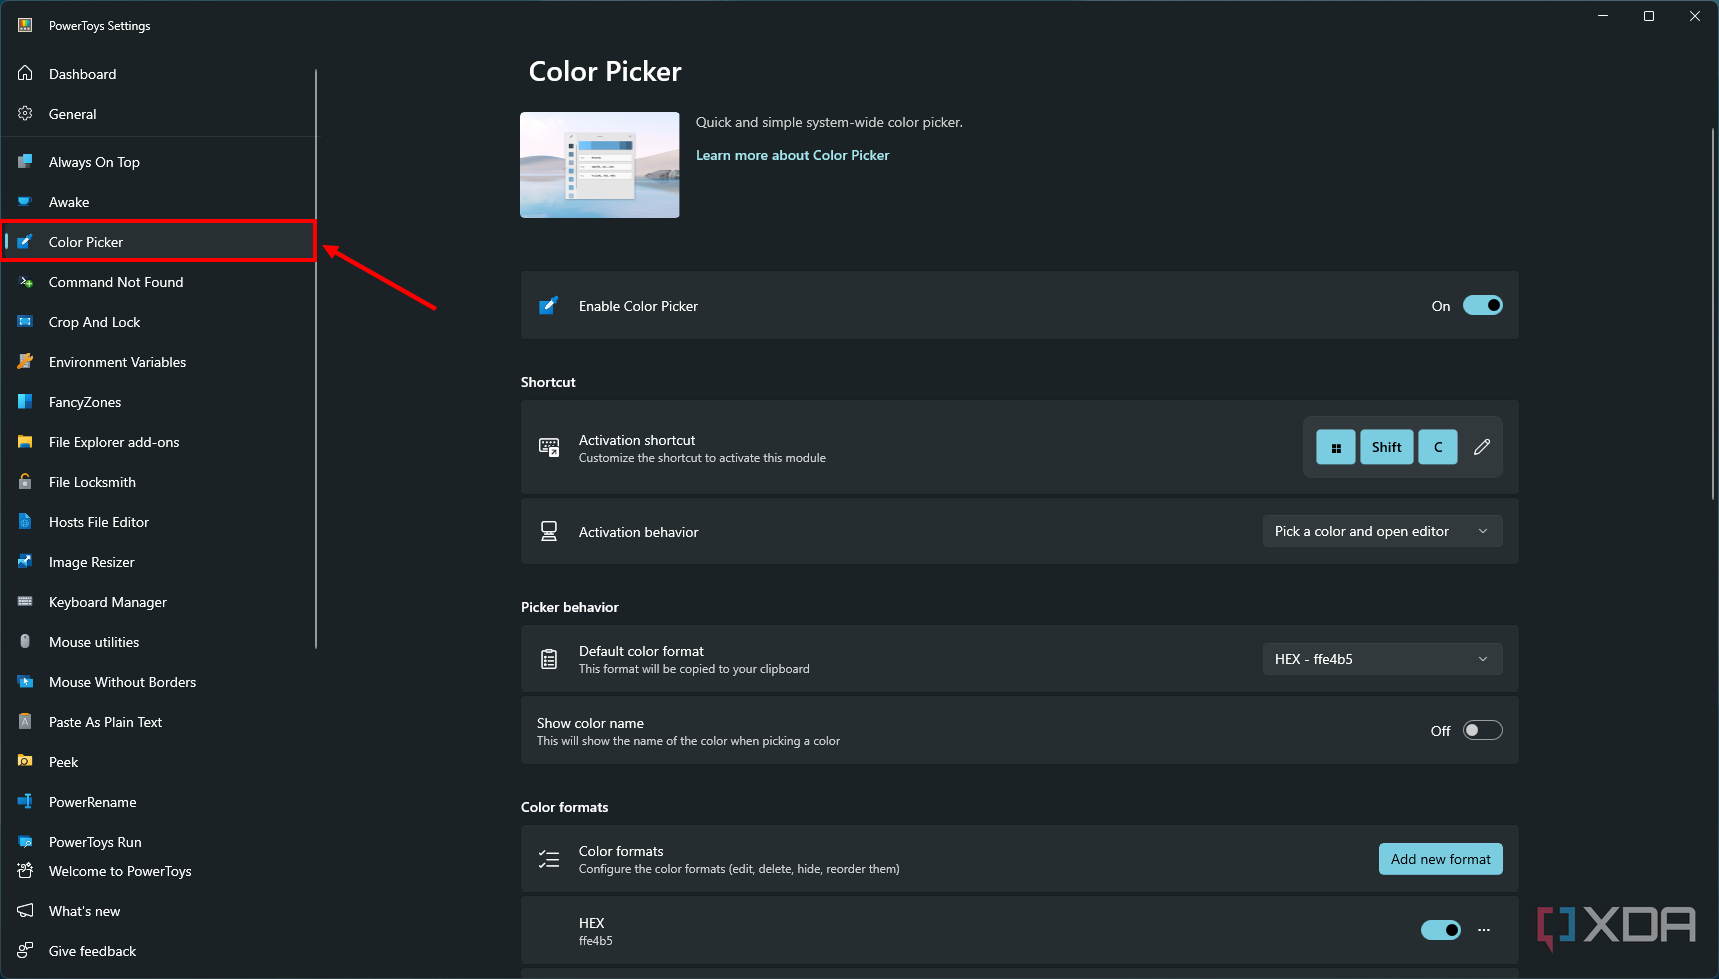
- Make sure the primary Color Picker toggle is set to On.
- To pick a color from your screen, navigate to wherever that color is and press Windows + Shift + C on your keyboard.
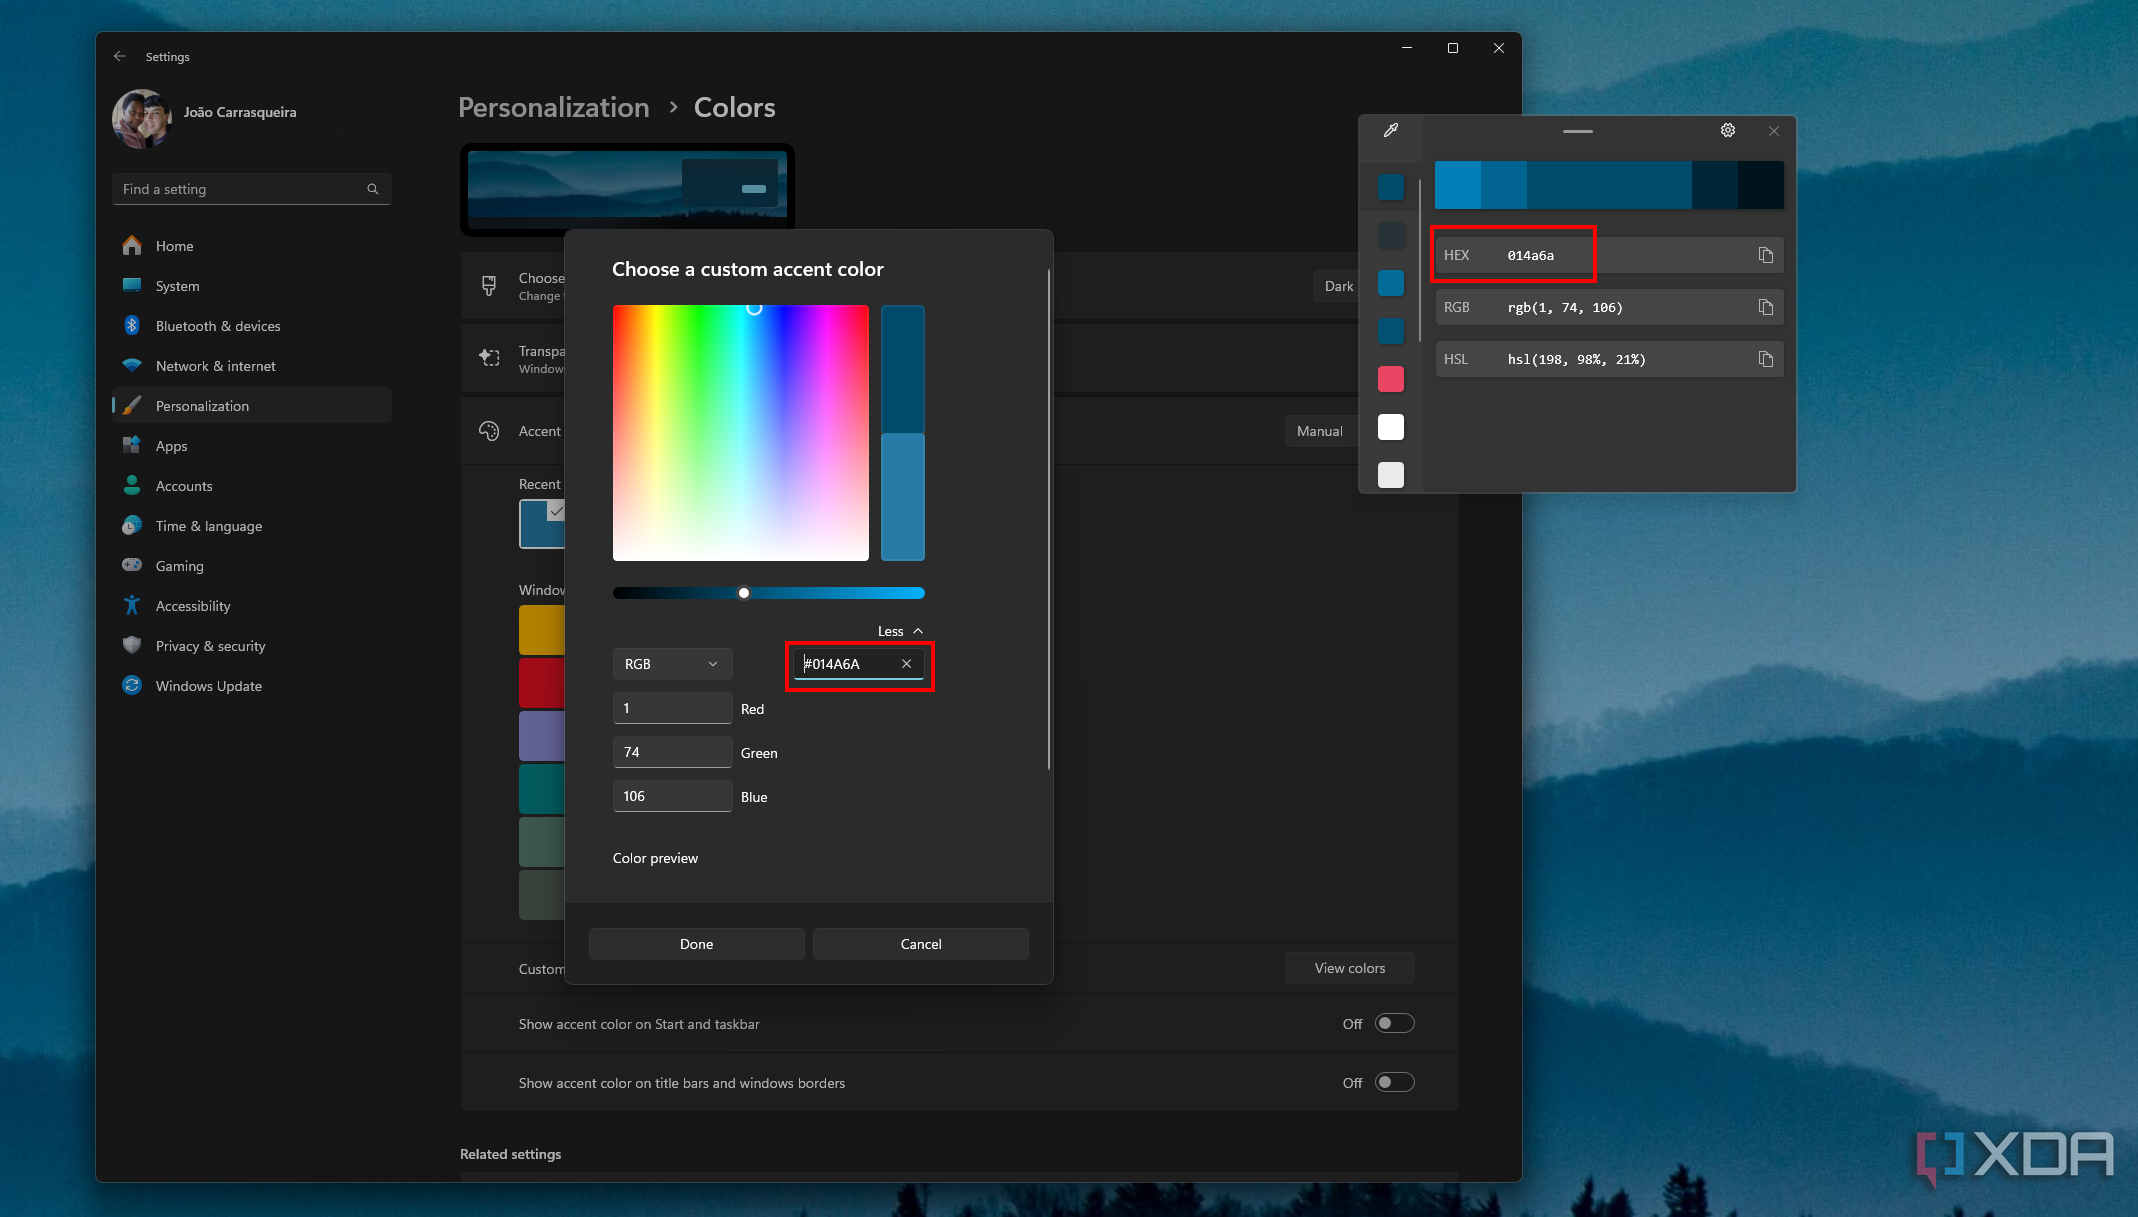
- Click the pixel you want to pick the color from. An enlarged preview will show you what color the pointer is on.
- Color Picker will open a dialog with the color you chose and the values needed to reproduce it across different color formats.
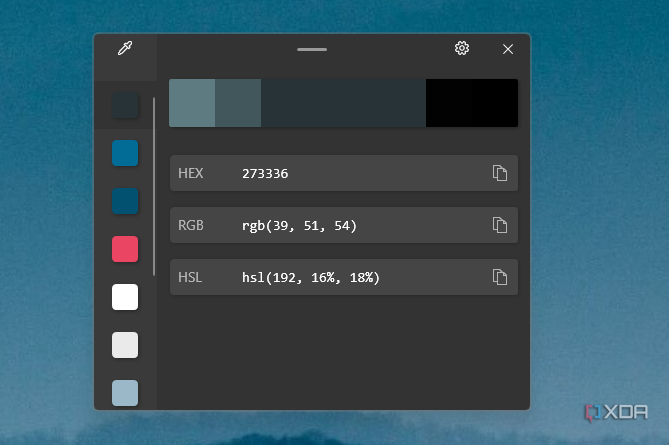
- At the top, you’ll also see related shades of that color. You can click them to see their values so you can use them in other apps.
- Now, simply copy the values used by the app you want to use the color in, and enter them in the respective field.


That’s it! It’s a very simple process to pick any color you want. Since PowerToys runs in the background, you don’t need to open the app each time. As long as the toggle is enabled, you can press the keyboard shortcut at any time to launch the color picker.
Customize the Color Picker shortcut and behavior
If you don’t like the way PowerToys is activated or how it works by default, you can customize the activation shortcut and how it works once in use. Here’s how:
- Launch the main PowerToys window and head to the Color Picker tab.
- Next to Activation shortcut, click the pencil icon at the very right.
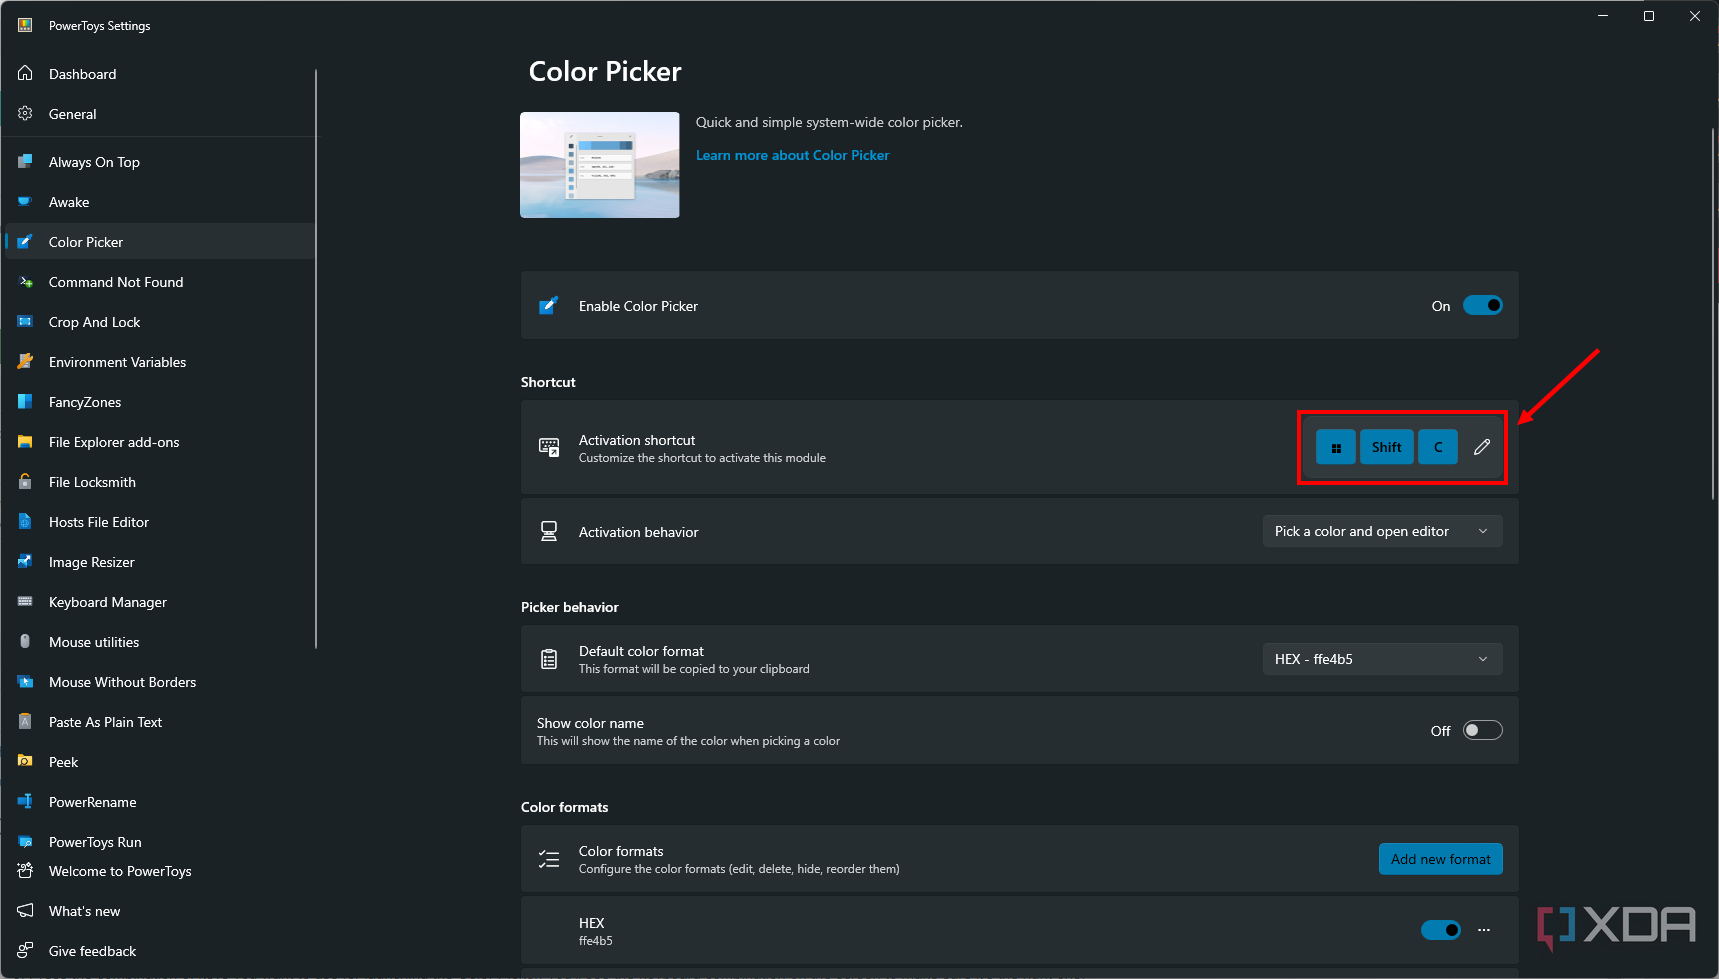
- Press the combination of keys you want to use for launching the Color Picker. You’ll see the keyboard combination on the screen to make sure it’s the right one.
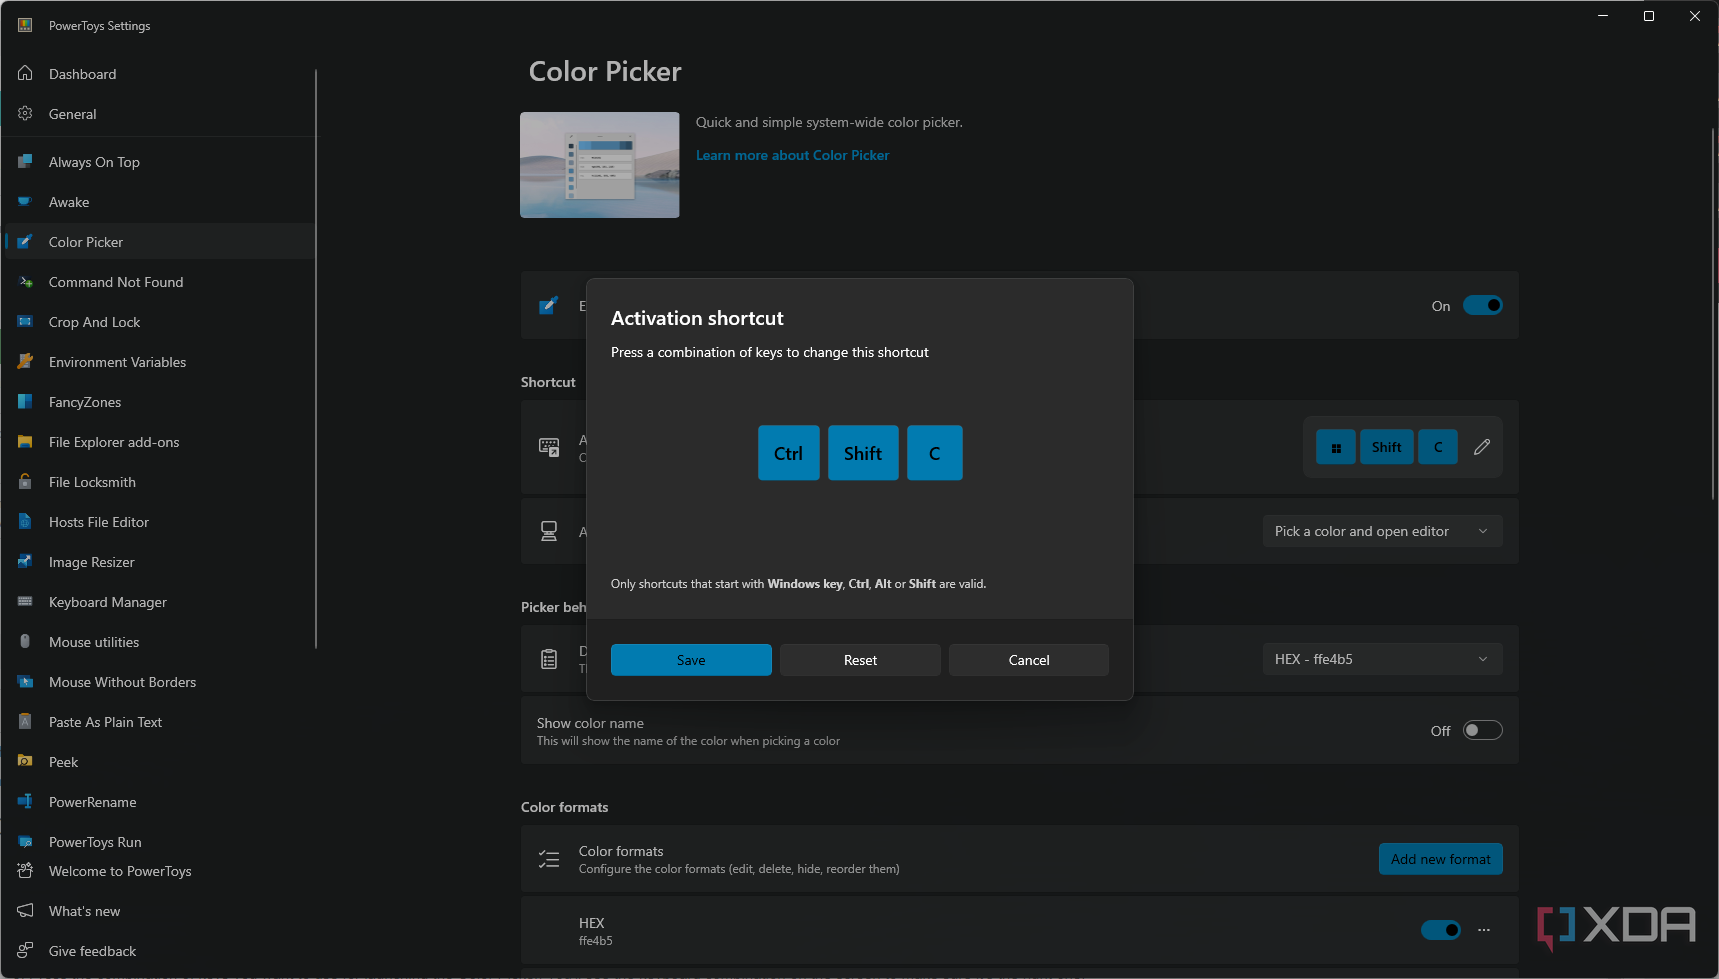
- Click Save. From now on, you’ll be able to use that keyboard shortcut to launch the color picker UI.
- If you don’t want to see the color editor after picking a color, click the dropdown menu next to Activation behavior and choose Only pick a color.
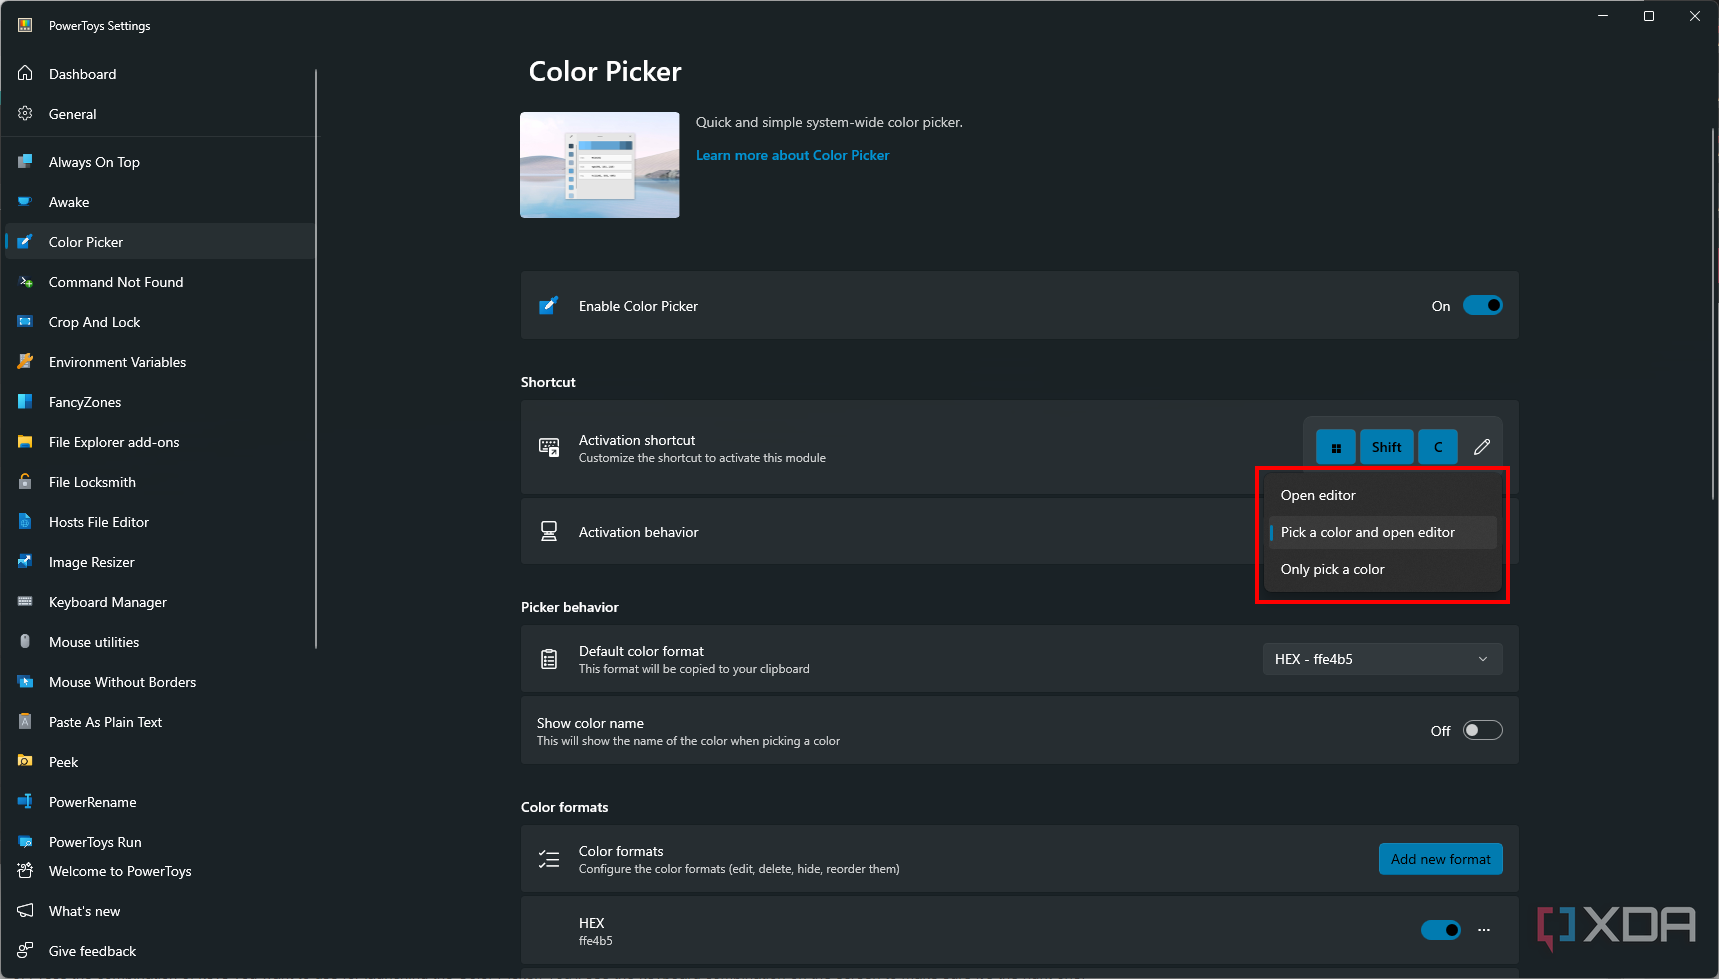
Alternatively, you can choose Only open the editor if you don’t want to immediately pick a color when you press the shortcut.
- The Default color format dropdown menu lets you choose the color format that’s copied to the clipboard when you choose a color. The default is HEX, but you can choose any of the formats available.
- You can also enable the Show color name toggle if you want to know the name of the color you’re choosing.


Change the color formats available

If you want to get even more into the weeds with the Color Picker, you can go further and customize the color formats available for use in the color editor. To do this, simply open the main PowerToys window and switch to the Color Picker tab, then scroll down to see the list. Out of the box, you have the following options:
- HEX
- RGB
- HSL
- HSV
- CMYK
- HSB
- HSI
- HWB
- NCol
- CIELAB
- CIEXYZ
- VEC4
- Decimal
- HEX Int
If you want a specific format to be shown, simply set its toggle to On. You can also click the … (ellipsis) icon and choose Move up or Move down to re-organize them.

PowerToys even gives you the option to create your own color format if you want. Simply click Add new format, and you can pick the variables you want to use for the color format to have the colors you pick reproduced in that style. For example, here, we’re creating one that’s based on red, yellow, and blue levels, rather than the typical RGB which uses green.
Of course, depending on your needs, you can get a lot more creative with this.
Never struggle to find the right color
It’s a fairly simple tool at first glance, but like much of PowerToys, Color Picker has a lot of depth and, for the right people, usefulness. Whether you want to get the right color to use in Photoshop or simply choose a color to set your Windows 11 theme, Color Picker makes it easier to get just the right shade.

How to customize your Windows 11 PC
Windows 11 is a great operating system, but not everyone has to like how it looks out of the box. Here’s how you can change
And this is just one of the many fantastic tools in PowerToys. If you want to make the most of your PC, this is a suite of tools that shouldn’t be overlooked.
[ad_2]


