

Steam Link has been around for years, with the first dedicated Steam Link hardware released in 2015 and remote play between devices more generally coming in 2019, allowing you to stream games over your home network from a powerful gaming PC to far less powerful clients. Recently, Steam Link has been coming to more and more TVs natively and is now even on iOS and Android. But what if your TV doesn’t support Steam Link? Well, there’s an easy (and cost-effective) solution! Using a Raspberry Pi is a great way to get Steam Link running on your PC to stream games over your local network.

How to install Steam on Raspberry Pi
The Raspberry Pi boards may not be built for heavy gaming, but that doesn’t mean you can’t run Steam games on these tiny computers
What you’ll need
We’d recommend a recent Raspberry Pi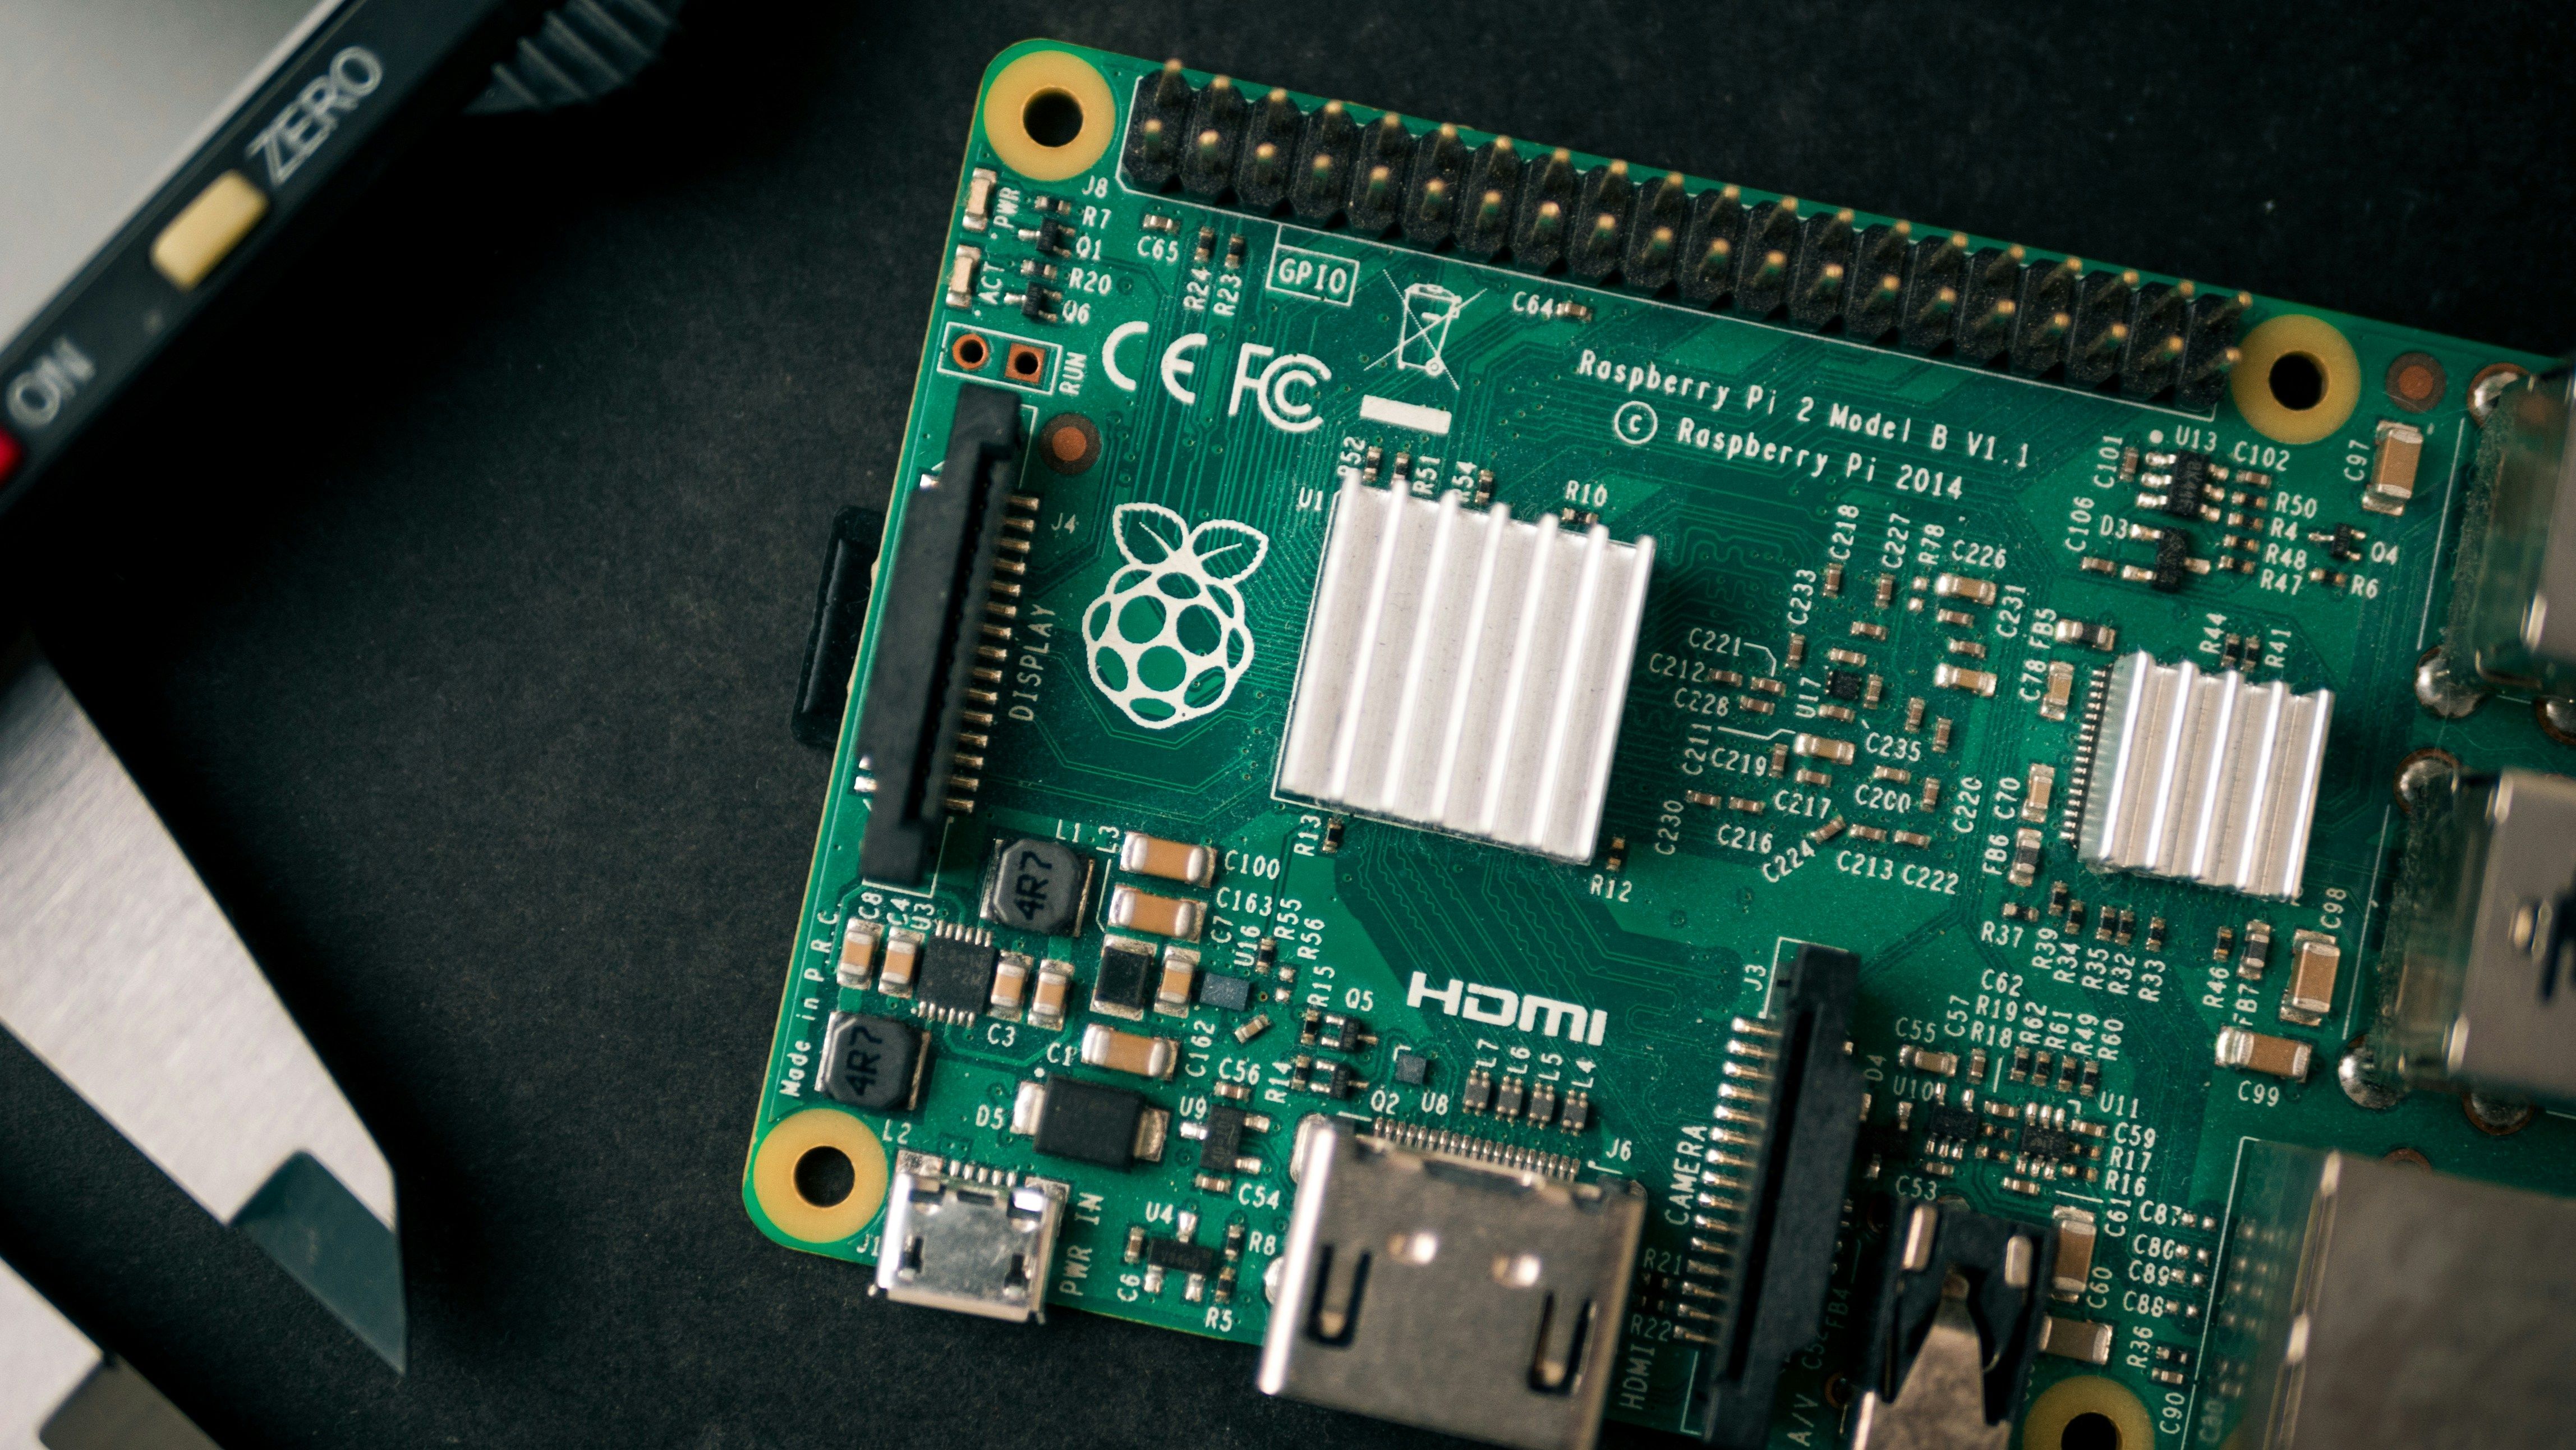
The Steam Link app has been available on Windows, macOS, and Linux for a few years and is generally well-supported. We’re using a Raspberry Pi in this demo, as it’s a cheap and cost-effective device that can easily be hidden in a TV cabinet, doesn’t draw much power, and has native HDMI onboard. Still, you could just as easily use an old laptop or even a desktop PC. We’d recommend either a Pi 3 or above — the model of each Pi is written on the PCB near the Raspberry Logo. For these steps, though, we’ll be using the following:
- Raspberry Pi 3 Model B
- 16GB MicroSD and SD adapter
- An Ethernet cable or Wi-Fi connection
- A correct power adapter is important to ensure full performance!
- A gaming PC to stream from
- An Xbox Controller (any Bluetooth-supported controller should work)
You could also add other accessories — a cooling fan or case are often worthwhile, but the Raspberry Pi is pretty durable and will be fine just on its own.
Enable Steam Remote Play
Steam Remote Play is built into your Steam Desktop Client
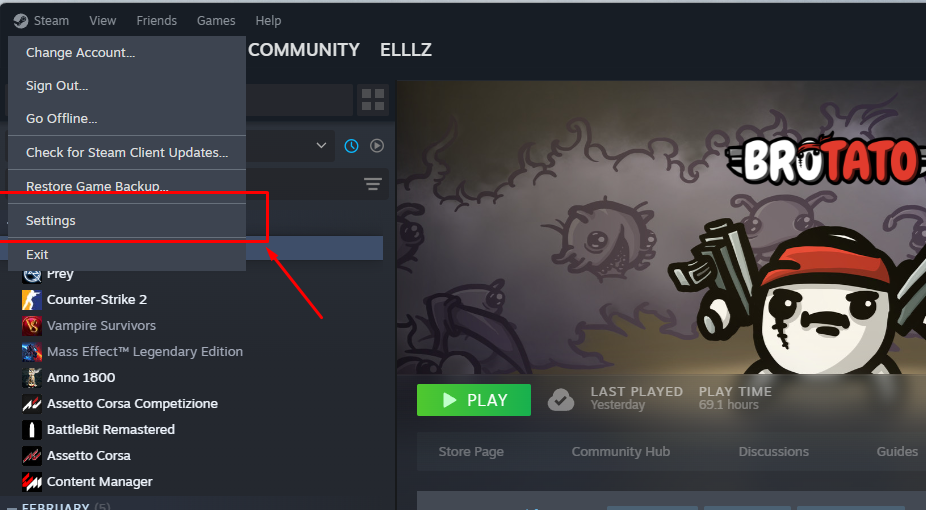
You’ll need to enable Steam Remote Play on your host PC in order for Steam Link to stream games from it. This isn’t an account-wide setting, so you’ll need to do this on each client you intend to stream games from. Follow these steps to enable Steam Remote Play on your Desktop PC.
- Open your Steam Client
- Click Steam on then top menu and choose Settings.
- Select Remote Play in the sidebar
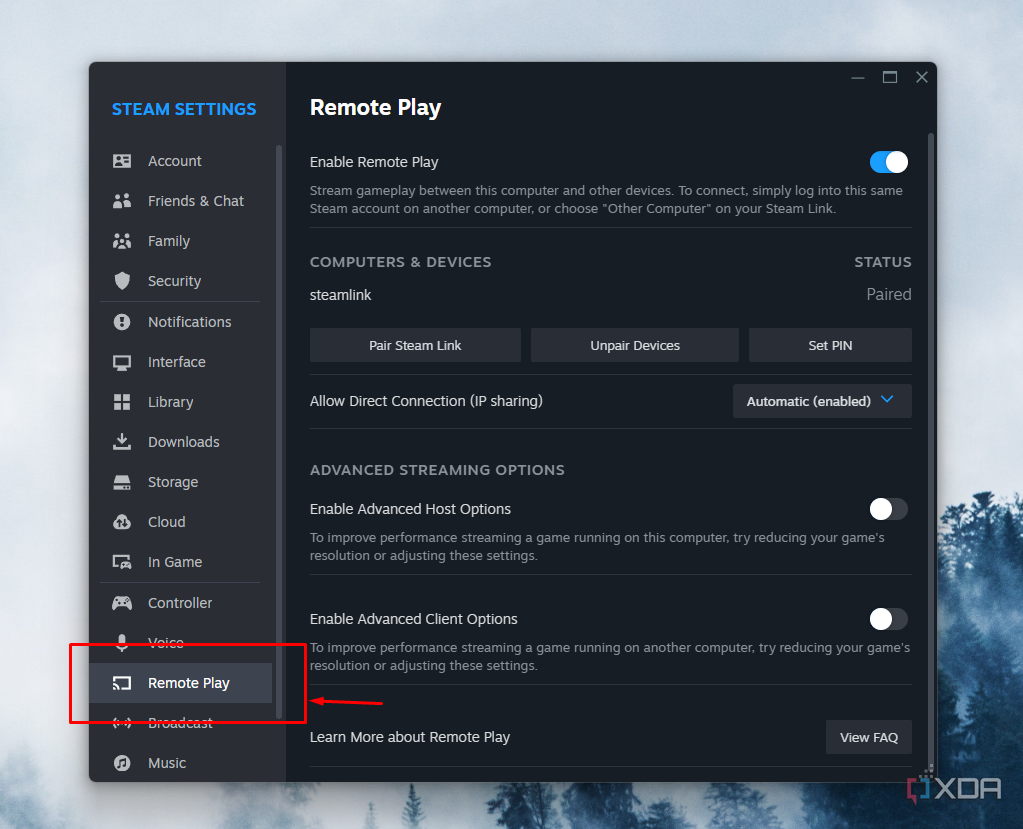
- Select Enable Remote Play
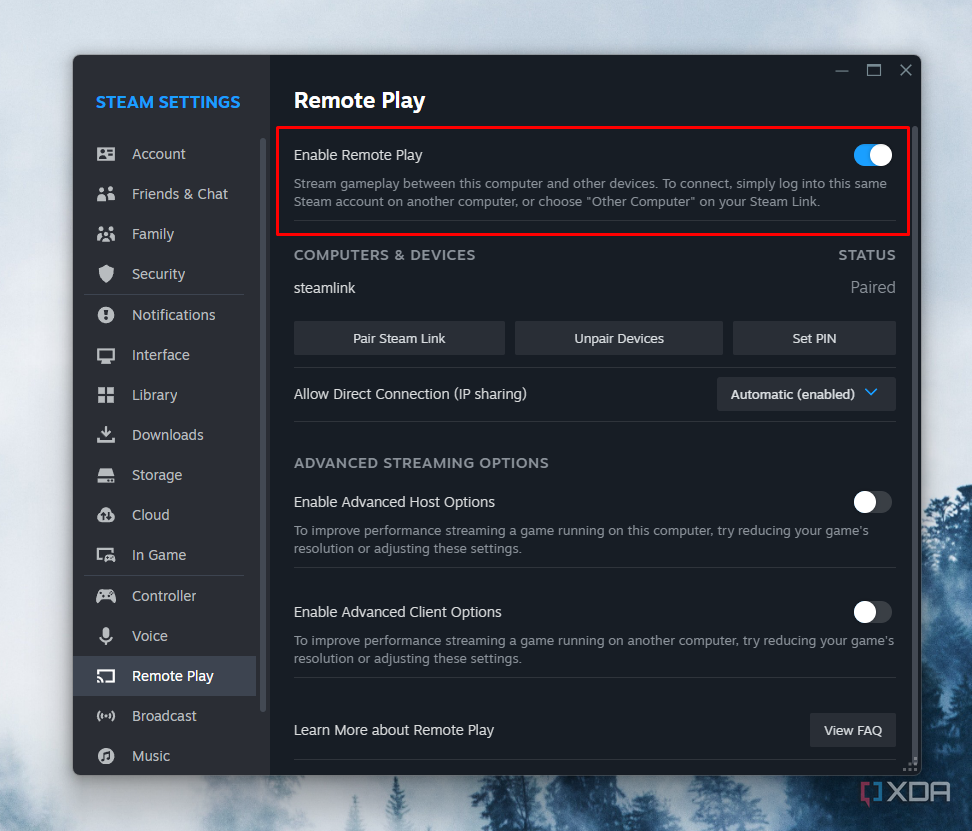


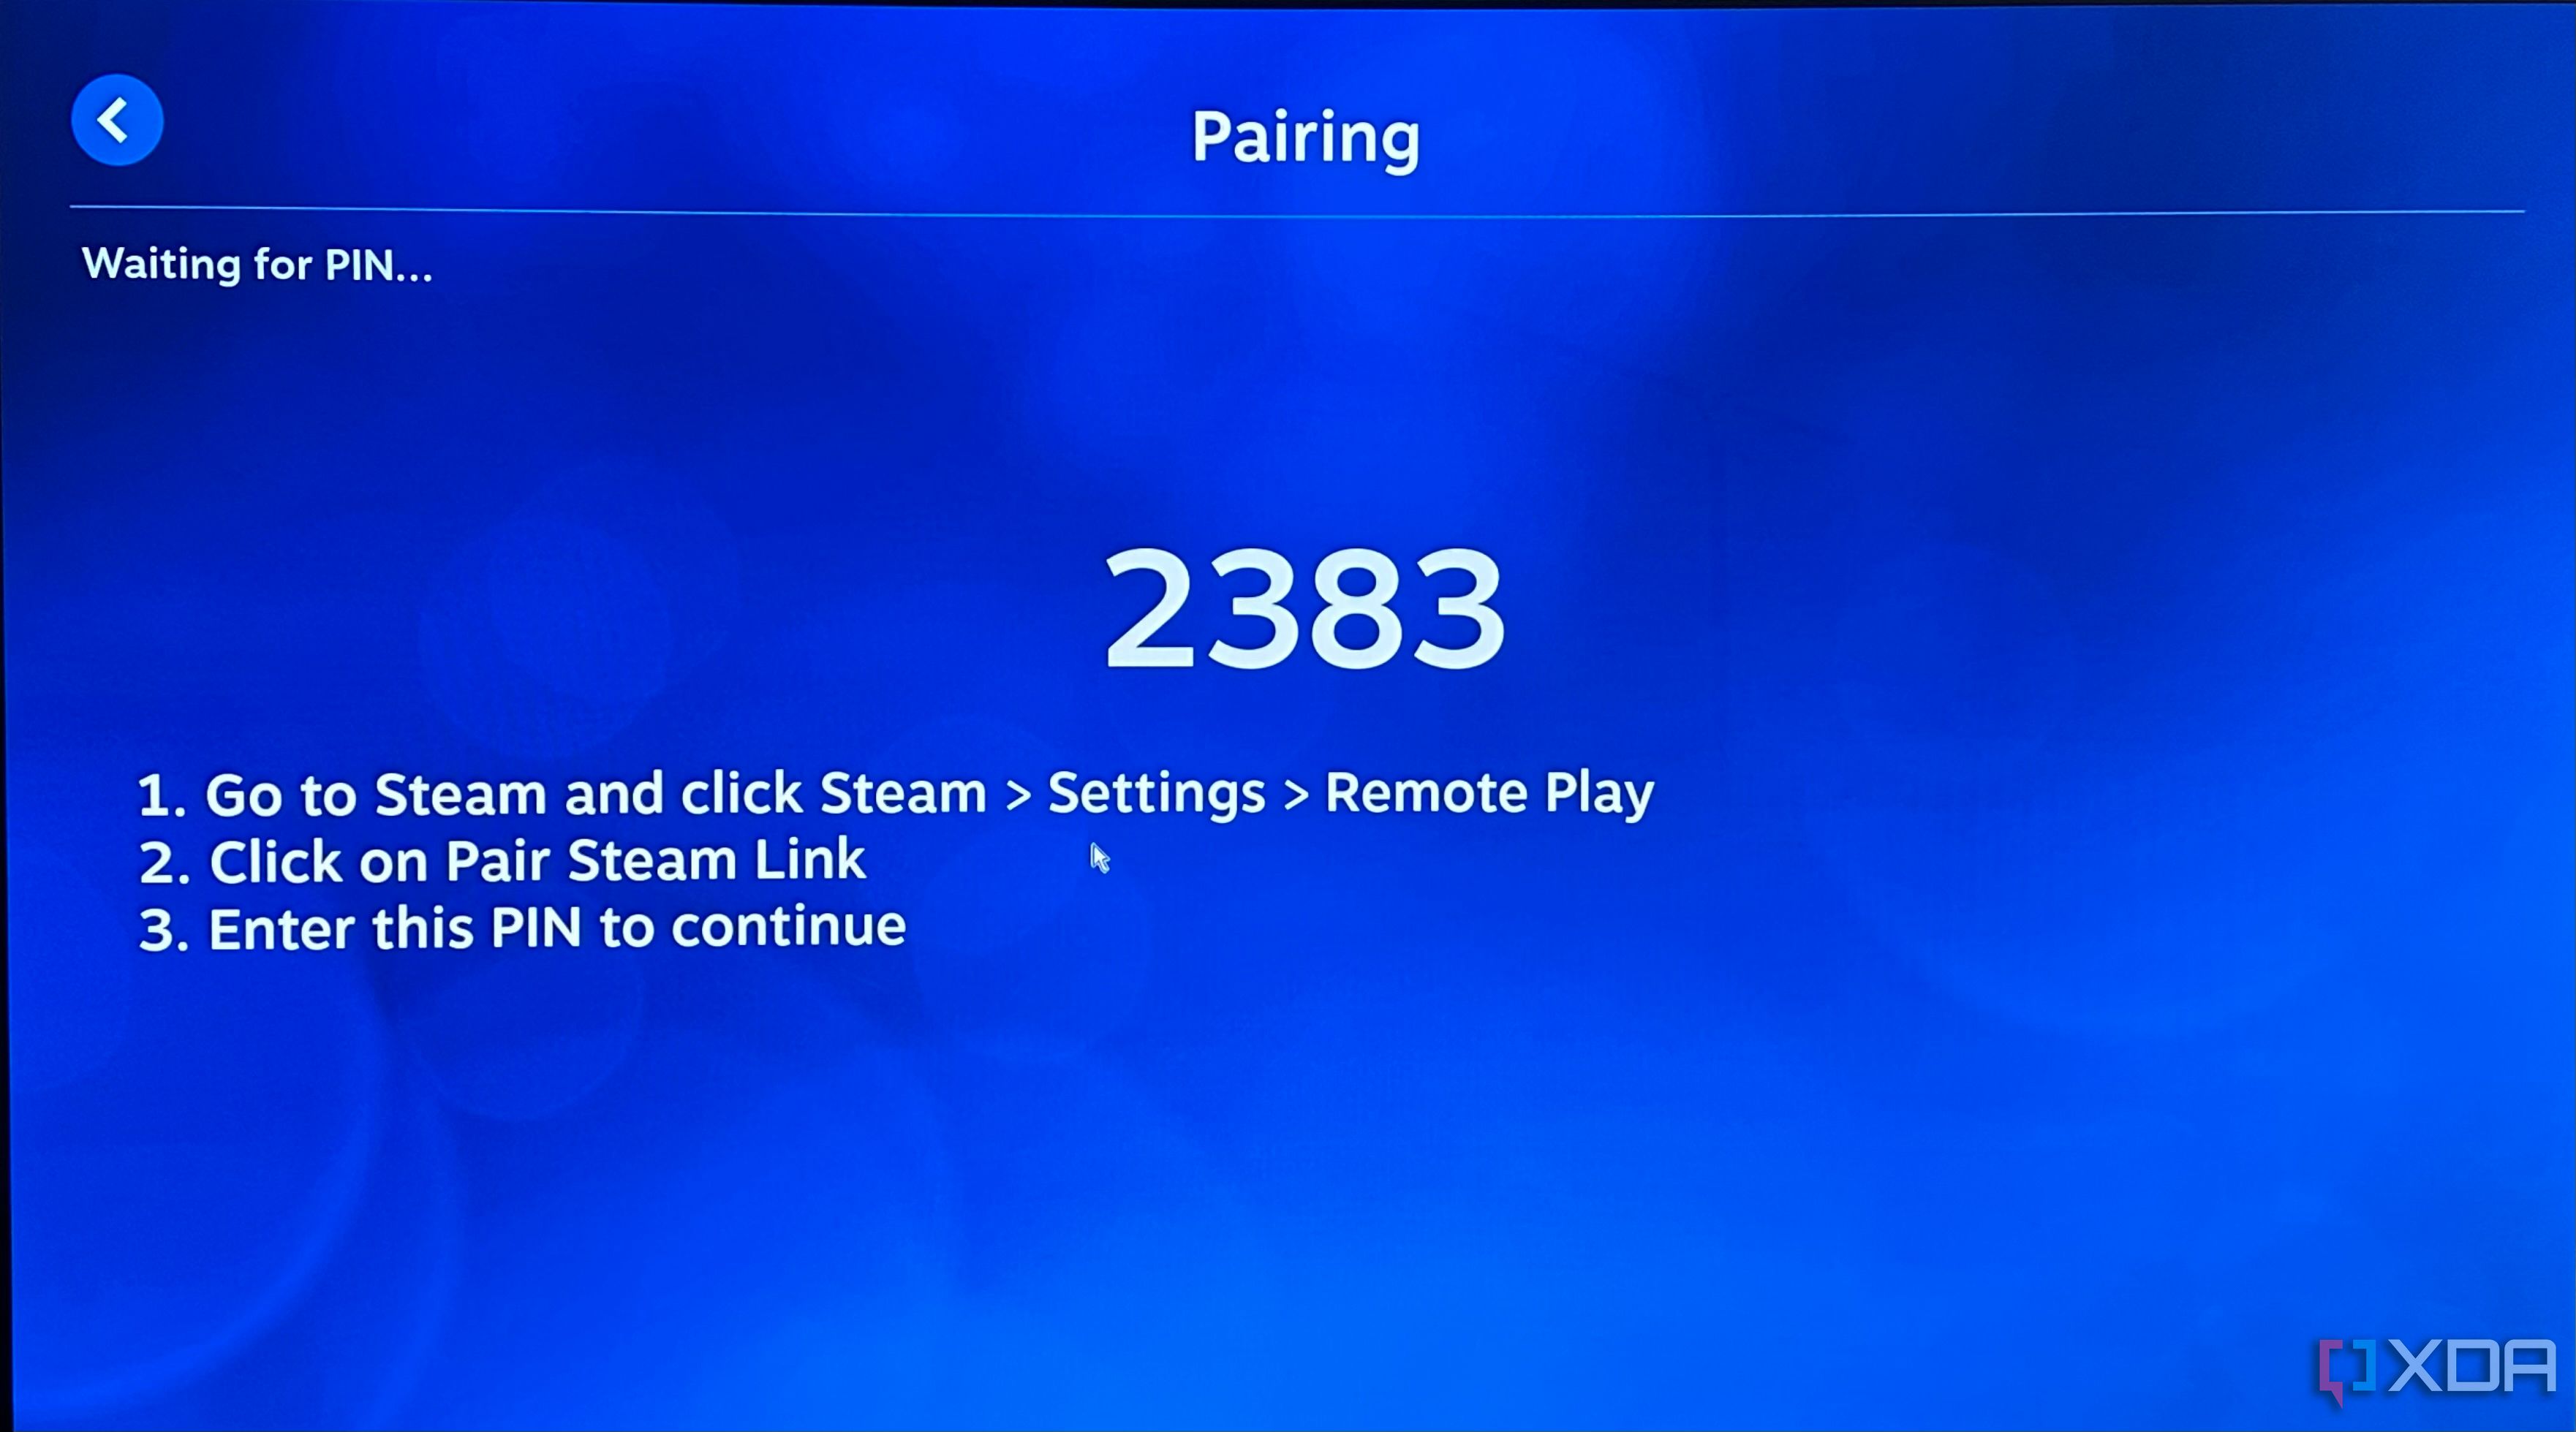
You shouldn’t need to change any other settings. Devices paired with your PC will appear under Computers and devices. You’ll need to enter a PIN to pair a new device.
Installing Raspberry Pi OS
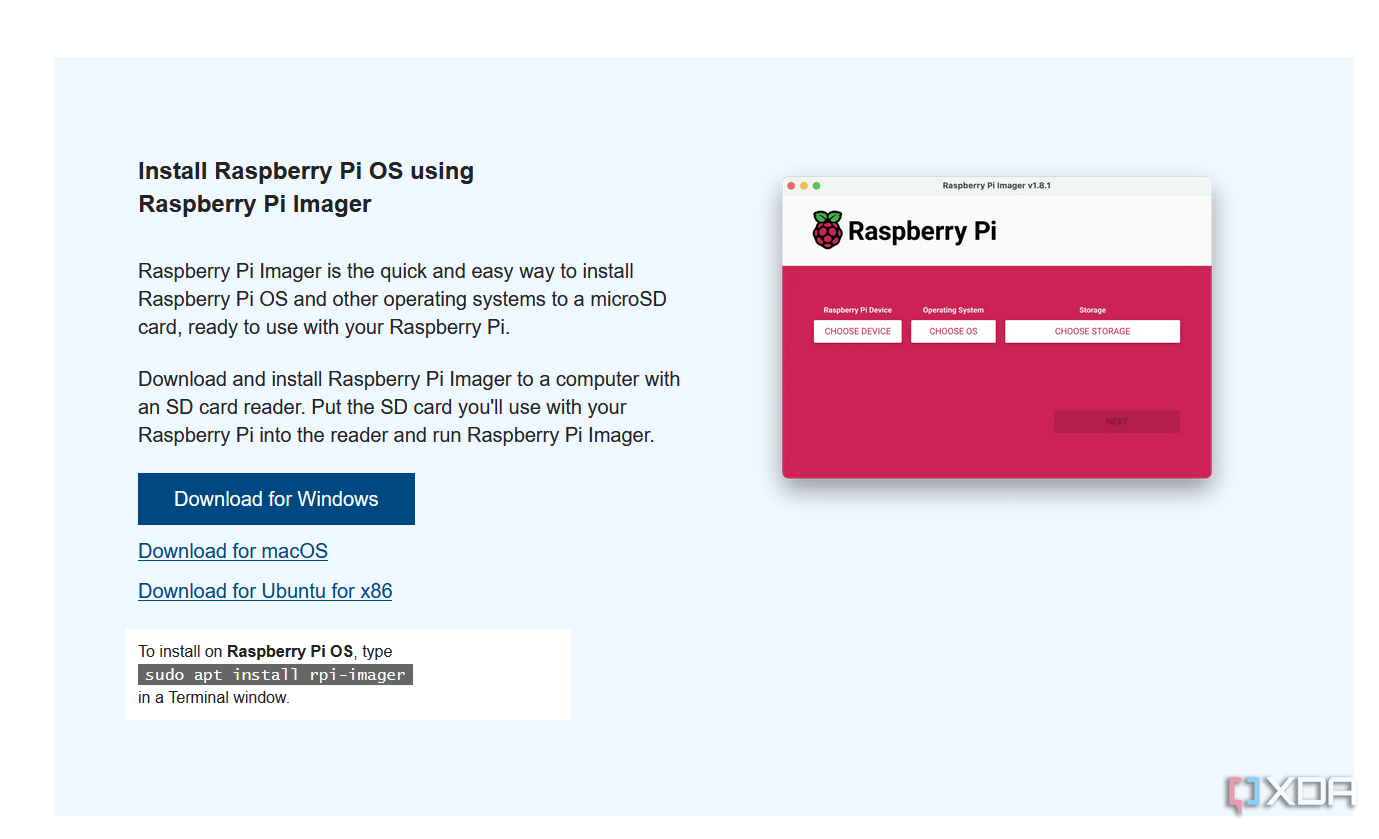
We’ll be flashing Raspberry Pi OS (formerly known as Raspian) onto your Raspberry Pi. You’ll need a microUSB adapter to connect to your PC. Beware that in flashing Pi OS your SD card will be wiped, so ensure you back up any files first. Previously you needed to use third party tools like Etcher or the evergreen Rufus to flash images to your SD cards, but the Raspberry Pi Imager has made this process far easier. Follow the steps below to get started with it:
- Download and install the Raspberry Pi Imager for your platform. If you’re using Linux, you can install it via your package manager.
- Insert your MicroSD Card. Depending on the filesystem and which platform you’re using, you may need to flash the SD card for your Operating System to recognize it correctly.
- Open the Raspberry Pi Imager and select your Model. We’re using the Pi 3.
- Hit Choose OS and select your Pi’s top (default) option. In our case, it’s a 32-bit version of PiOS.
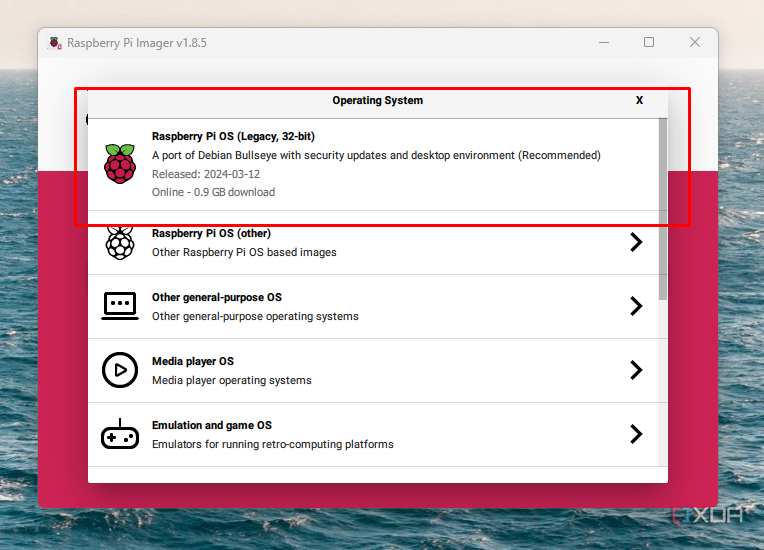
- Hit Storage and select your SD card.
- Double-check your settings.


You’re now free to hit Next and continue the installation process. At this point, it’s worth knowing some details that can save you time later. The imager will ask you if you want to use OS customization, which allows you to preconfigure some aspects of your operating system at the flash stage. This is extremely useful, as it lets you preset things like Hostnames, users, and SSH settings. We’d recommend you press Edit Settings and explore some available options. Most of the settings are self-explanatory: we’d suggest setting a hostname – mine is called steamlink – creating a user and password, and configuring Wi-Fi if you’re not intending to connect via Ethernet.

We’d also suggest heading to the Services tab and enabling SSH, which will save you the trouble of connecting a mouse and keyboard to your Pi.

Once you’ve finished configuring your settings, close out the settings window and hit Yes in the original dialog. Your SD Card will now start to flash. Once your SD card is flashed, insert it into your Raspberry Pi and connect it to a power supply. It should quickly boot to the Raspberry Pi OS desktop.
Installing Steam Link
Now you’re up and running with your Raspberry Pi, we’re good to install the Steam Link app. For simplicity, we’ll be using the terminal to do this. Some versions of Steam Link don’t support Raspberry Pi OS’ window manager (X11), which can create problems. We’ll be using a keyboard to install this directly on the Pi, but if you configured SSH on your Raspberry Pi earlier, you can do this over SSH.
- From your Raspberry Pi OS desktop, hit Ctrl + Alt + F2 to exit your GUI and enter a terminal prompt. You may need to log in with the user + password you configured earlier. If you didn’t set a password, the default password is normally raspberry.
- Firstly, update your local packages by running:
sudo apt-get upgrade
- Once complete, install Steam Link with:
sudo apt-get install steamlink
- Once the installation finishes, reboot your Pi with the following:
sudo reboot
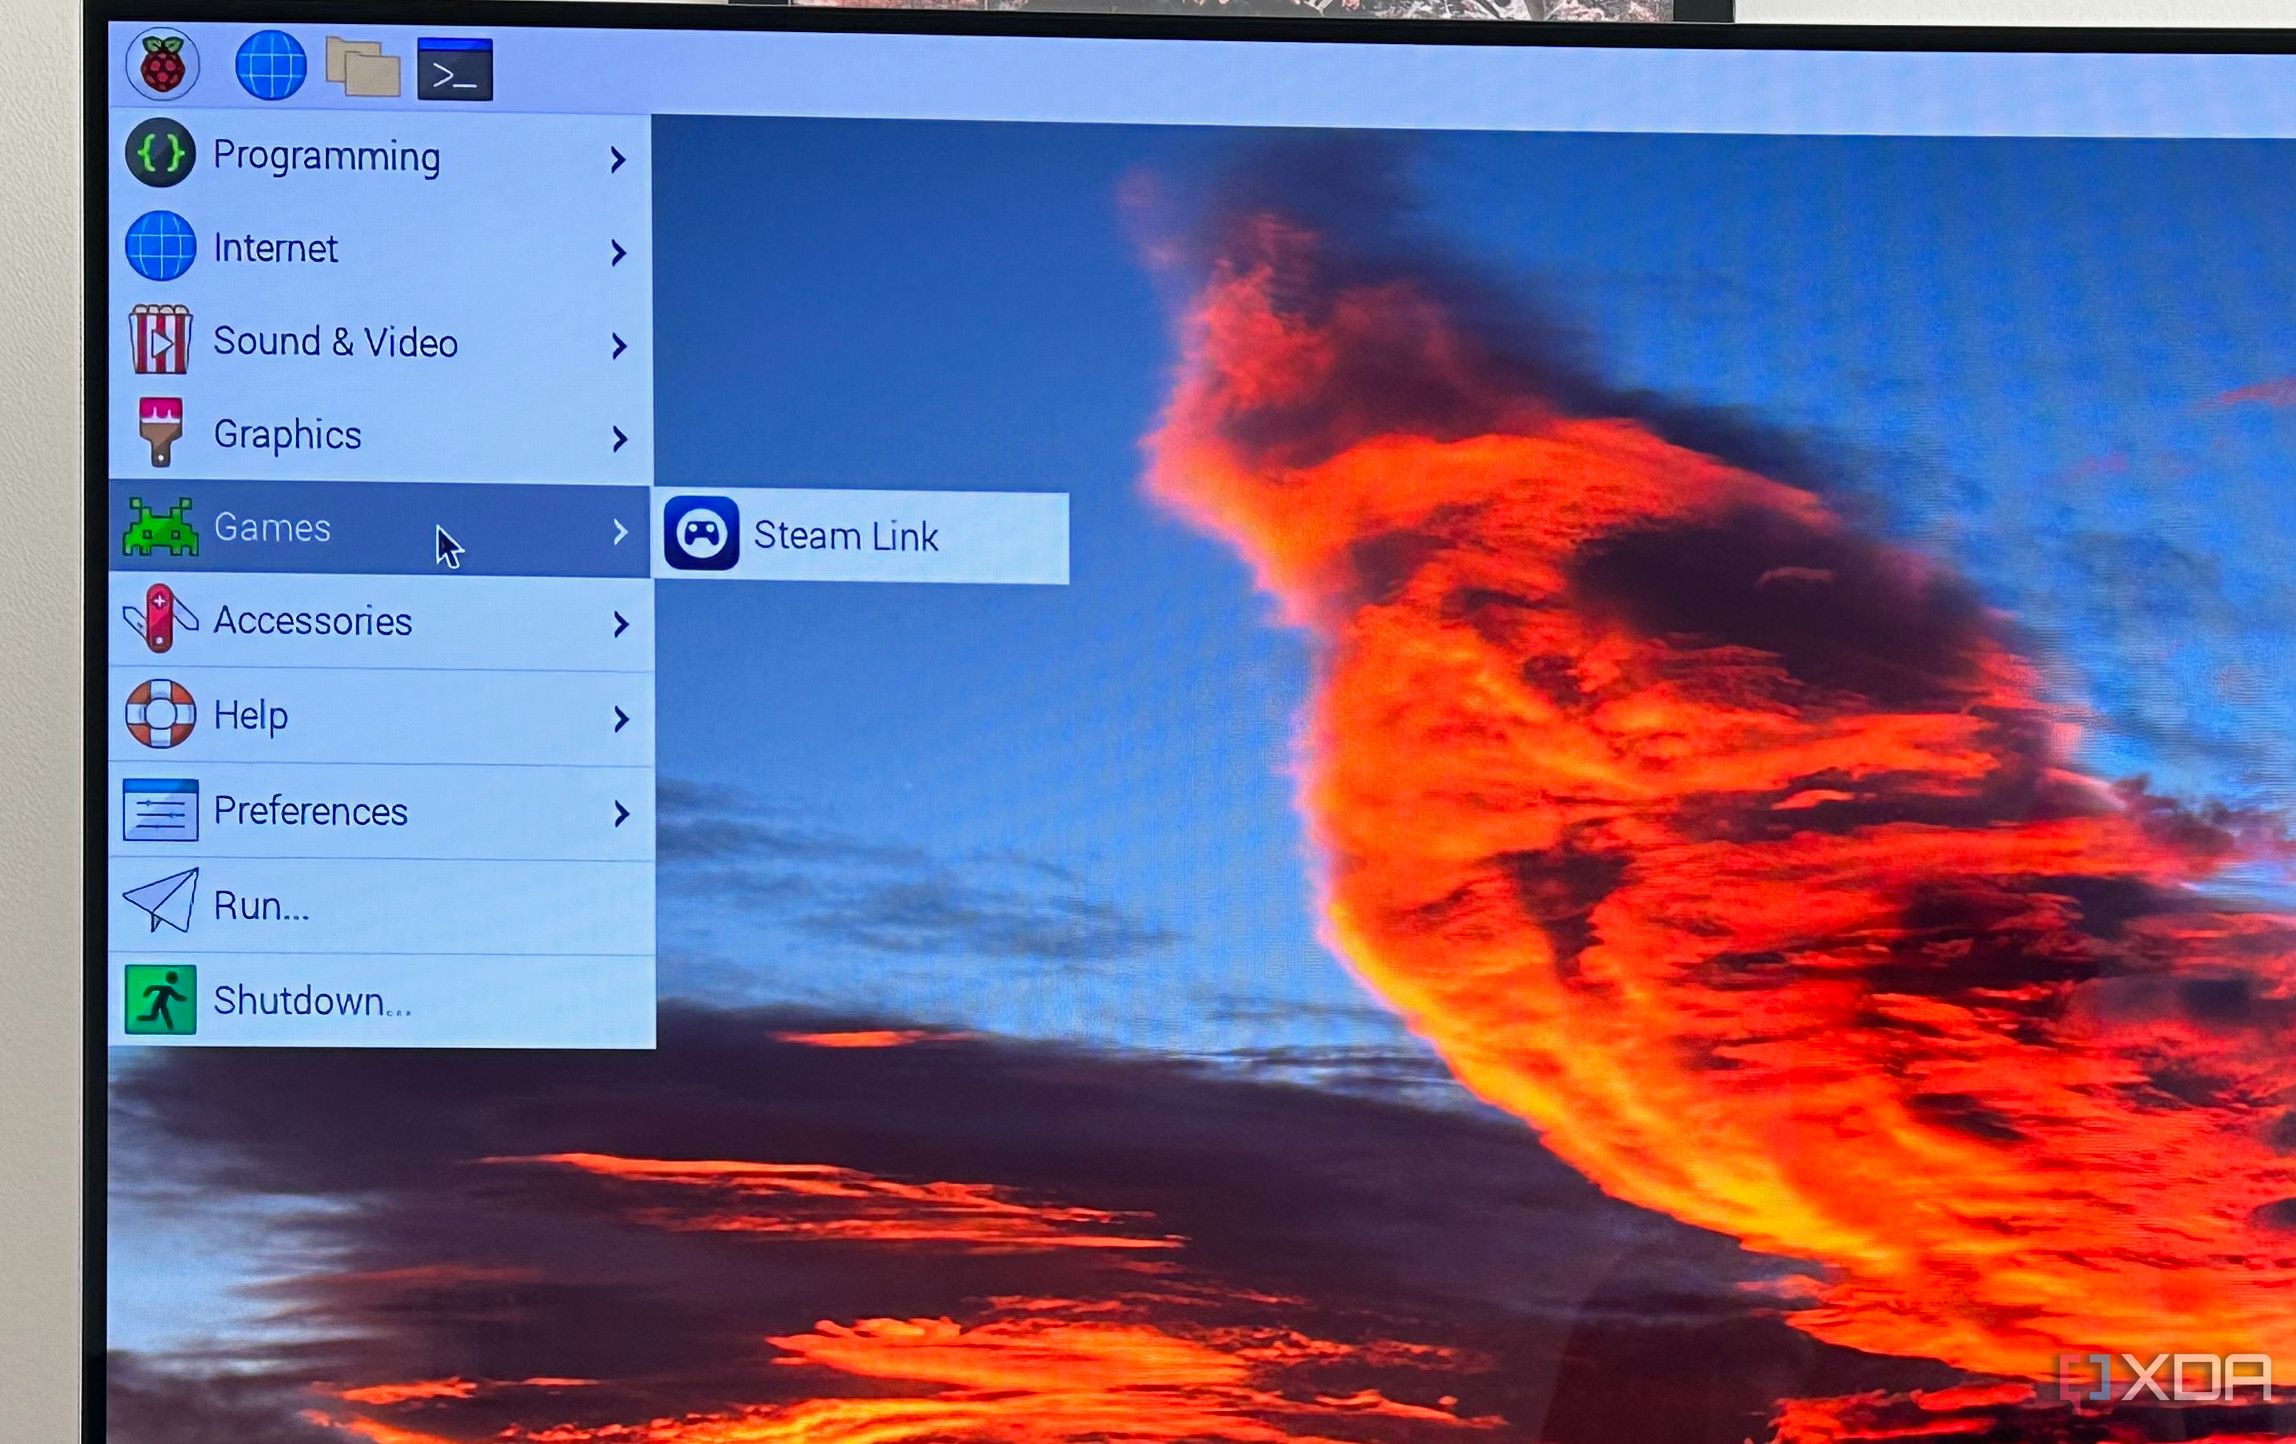
- Once your Pi has rebooted to the desktop, browse the Application menu in the top left using a mouse and keyboard. Under Games, you’ll find the Steam Link app. Alternatively, hit Ctrl + Alt + F2 again on a keyboard, log in and enter:
steamlink
This second stage can also debug problems if your application isn’t working immediately.
Our Pi 3’s version of Raspian didn’t support booting from the desktop, as Steam Link doesn’t support X11. You can work around this by enabling Wayland in raspi-config or booting Steam Link from the terminal.
- Once the Steam Link app has started, follow the onscreen instructions, pressing the Get Started button. Your Steam Link will scan for active Steam installs on your network with Remote Play enabled, so make sure your desktop computer is switched on. You might also be asked to pair a controller at this stage (I’ve just plugged mine in).
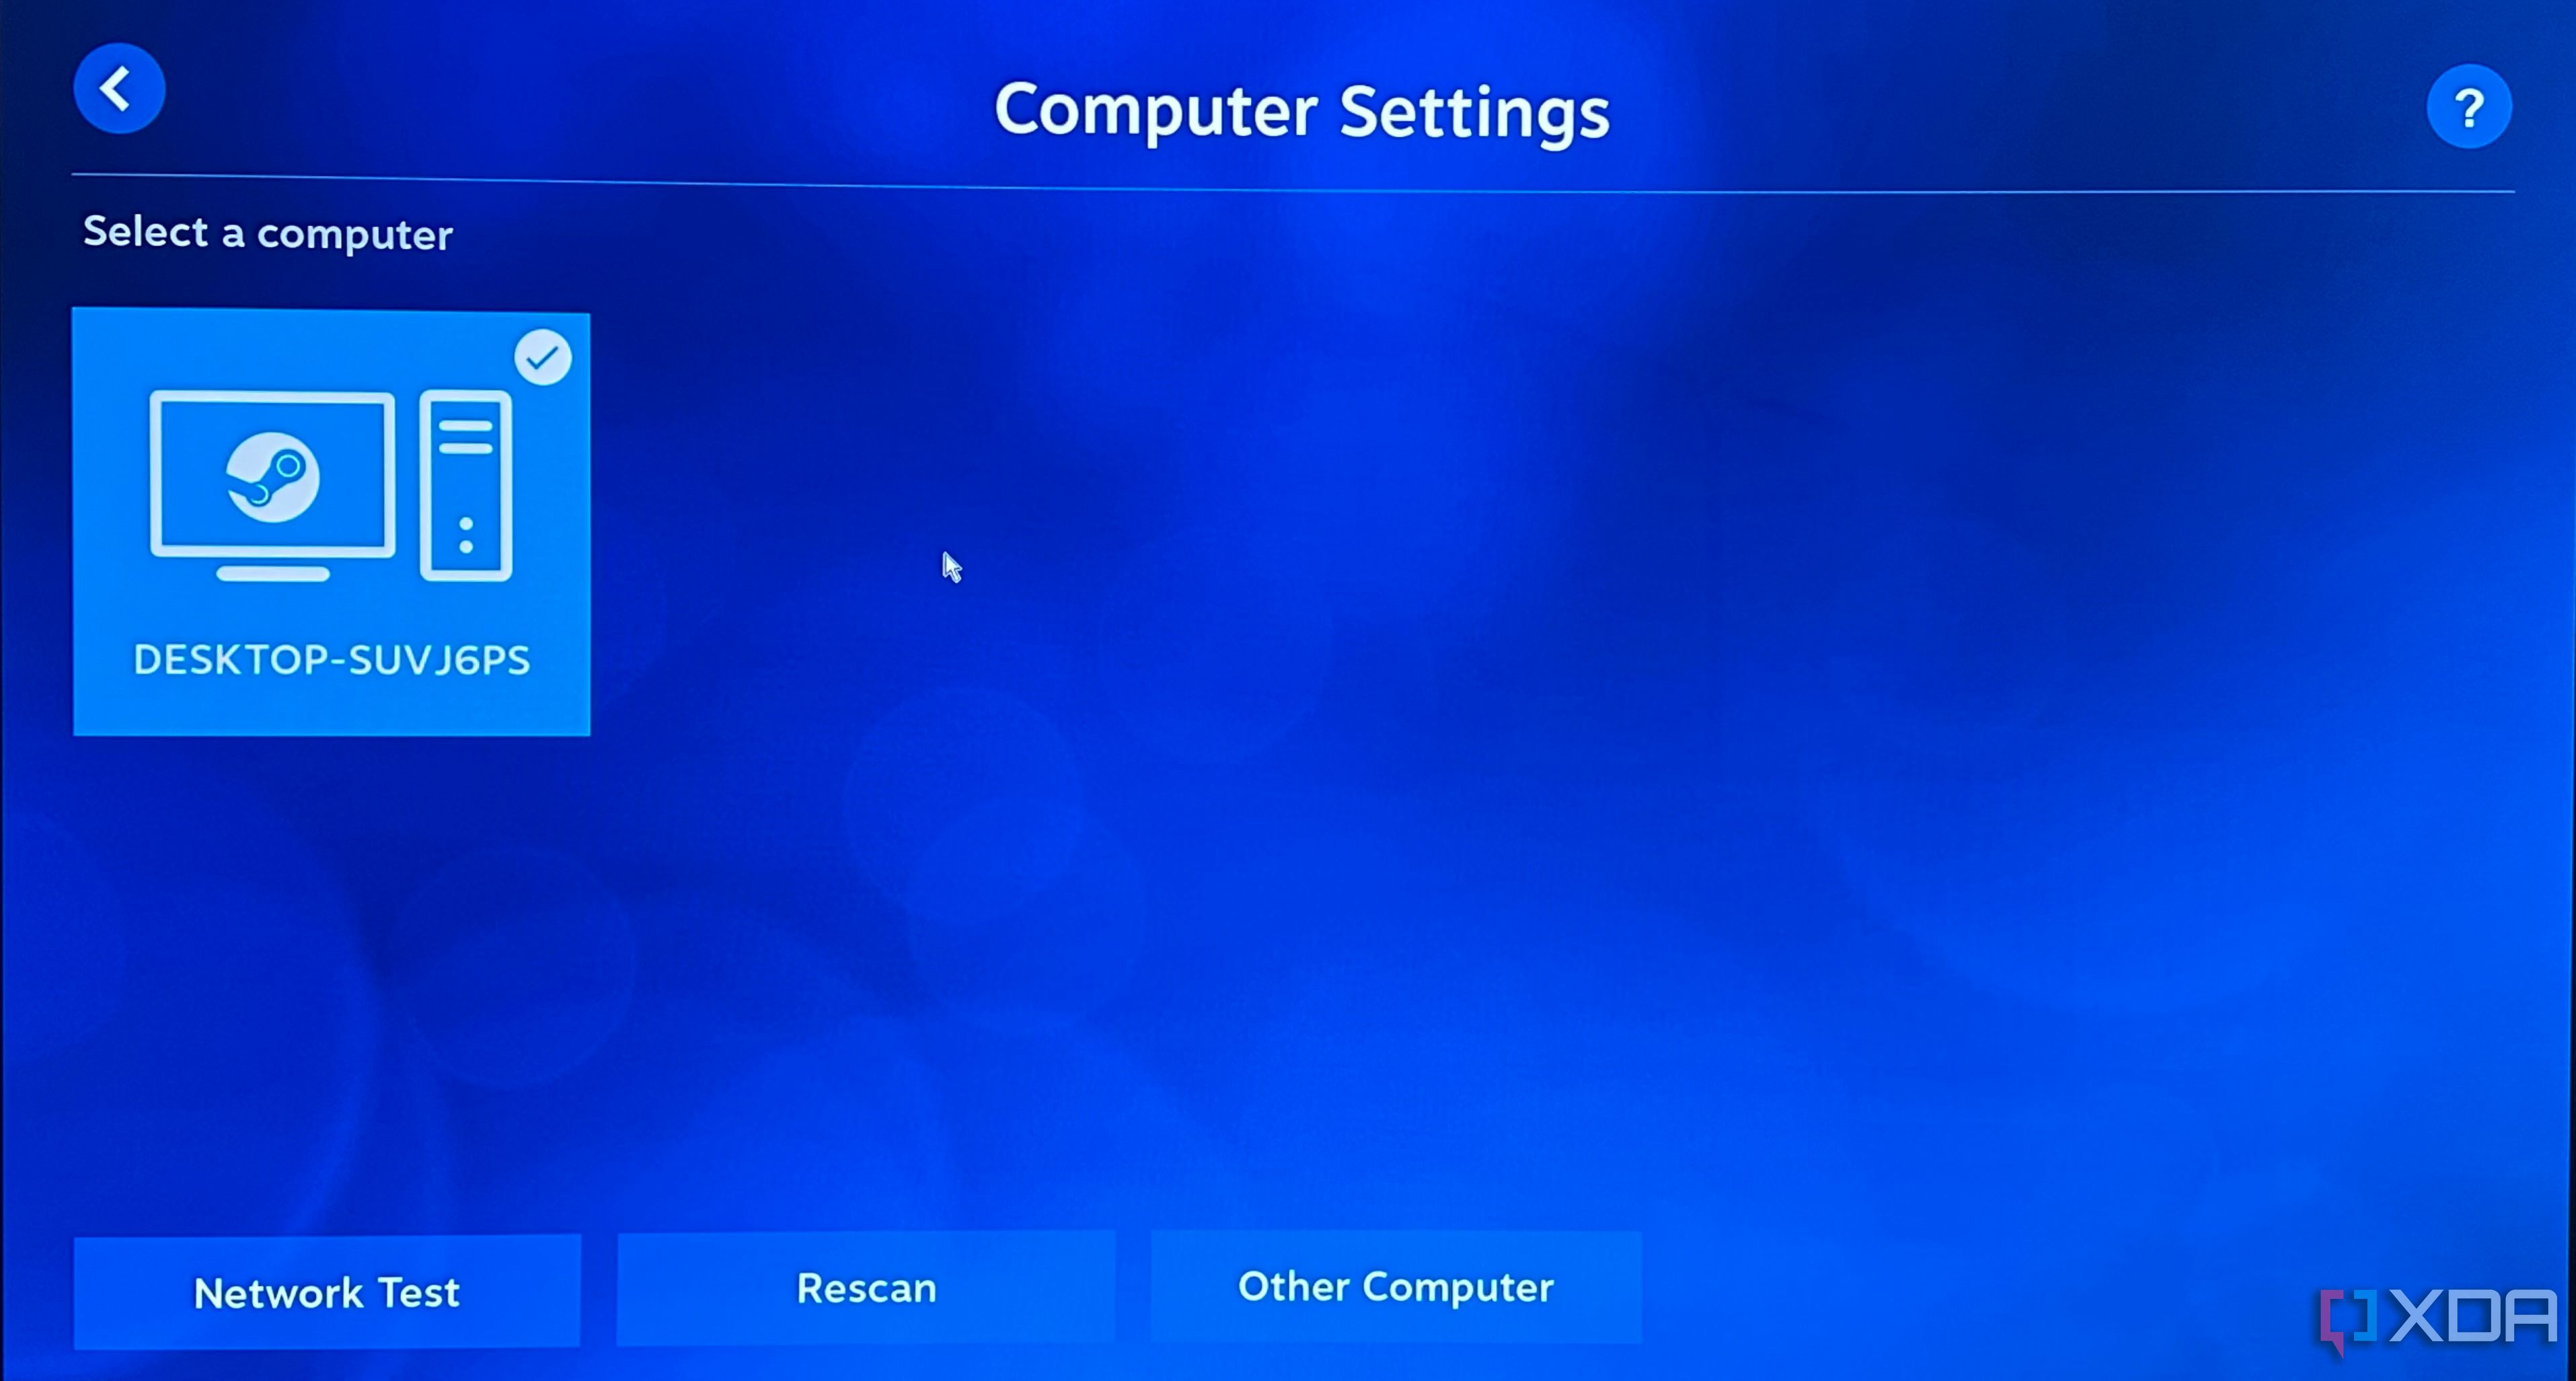
- Select your PC, and you’ll be given a PIN. Enter this on the host PC
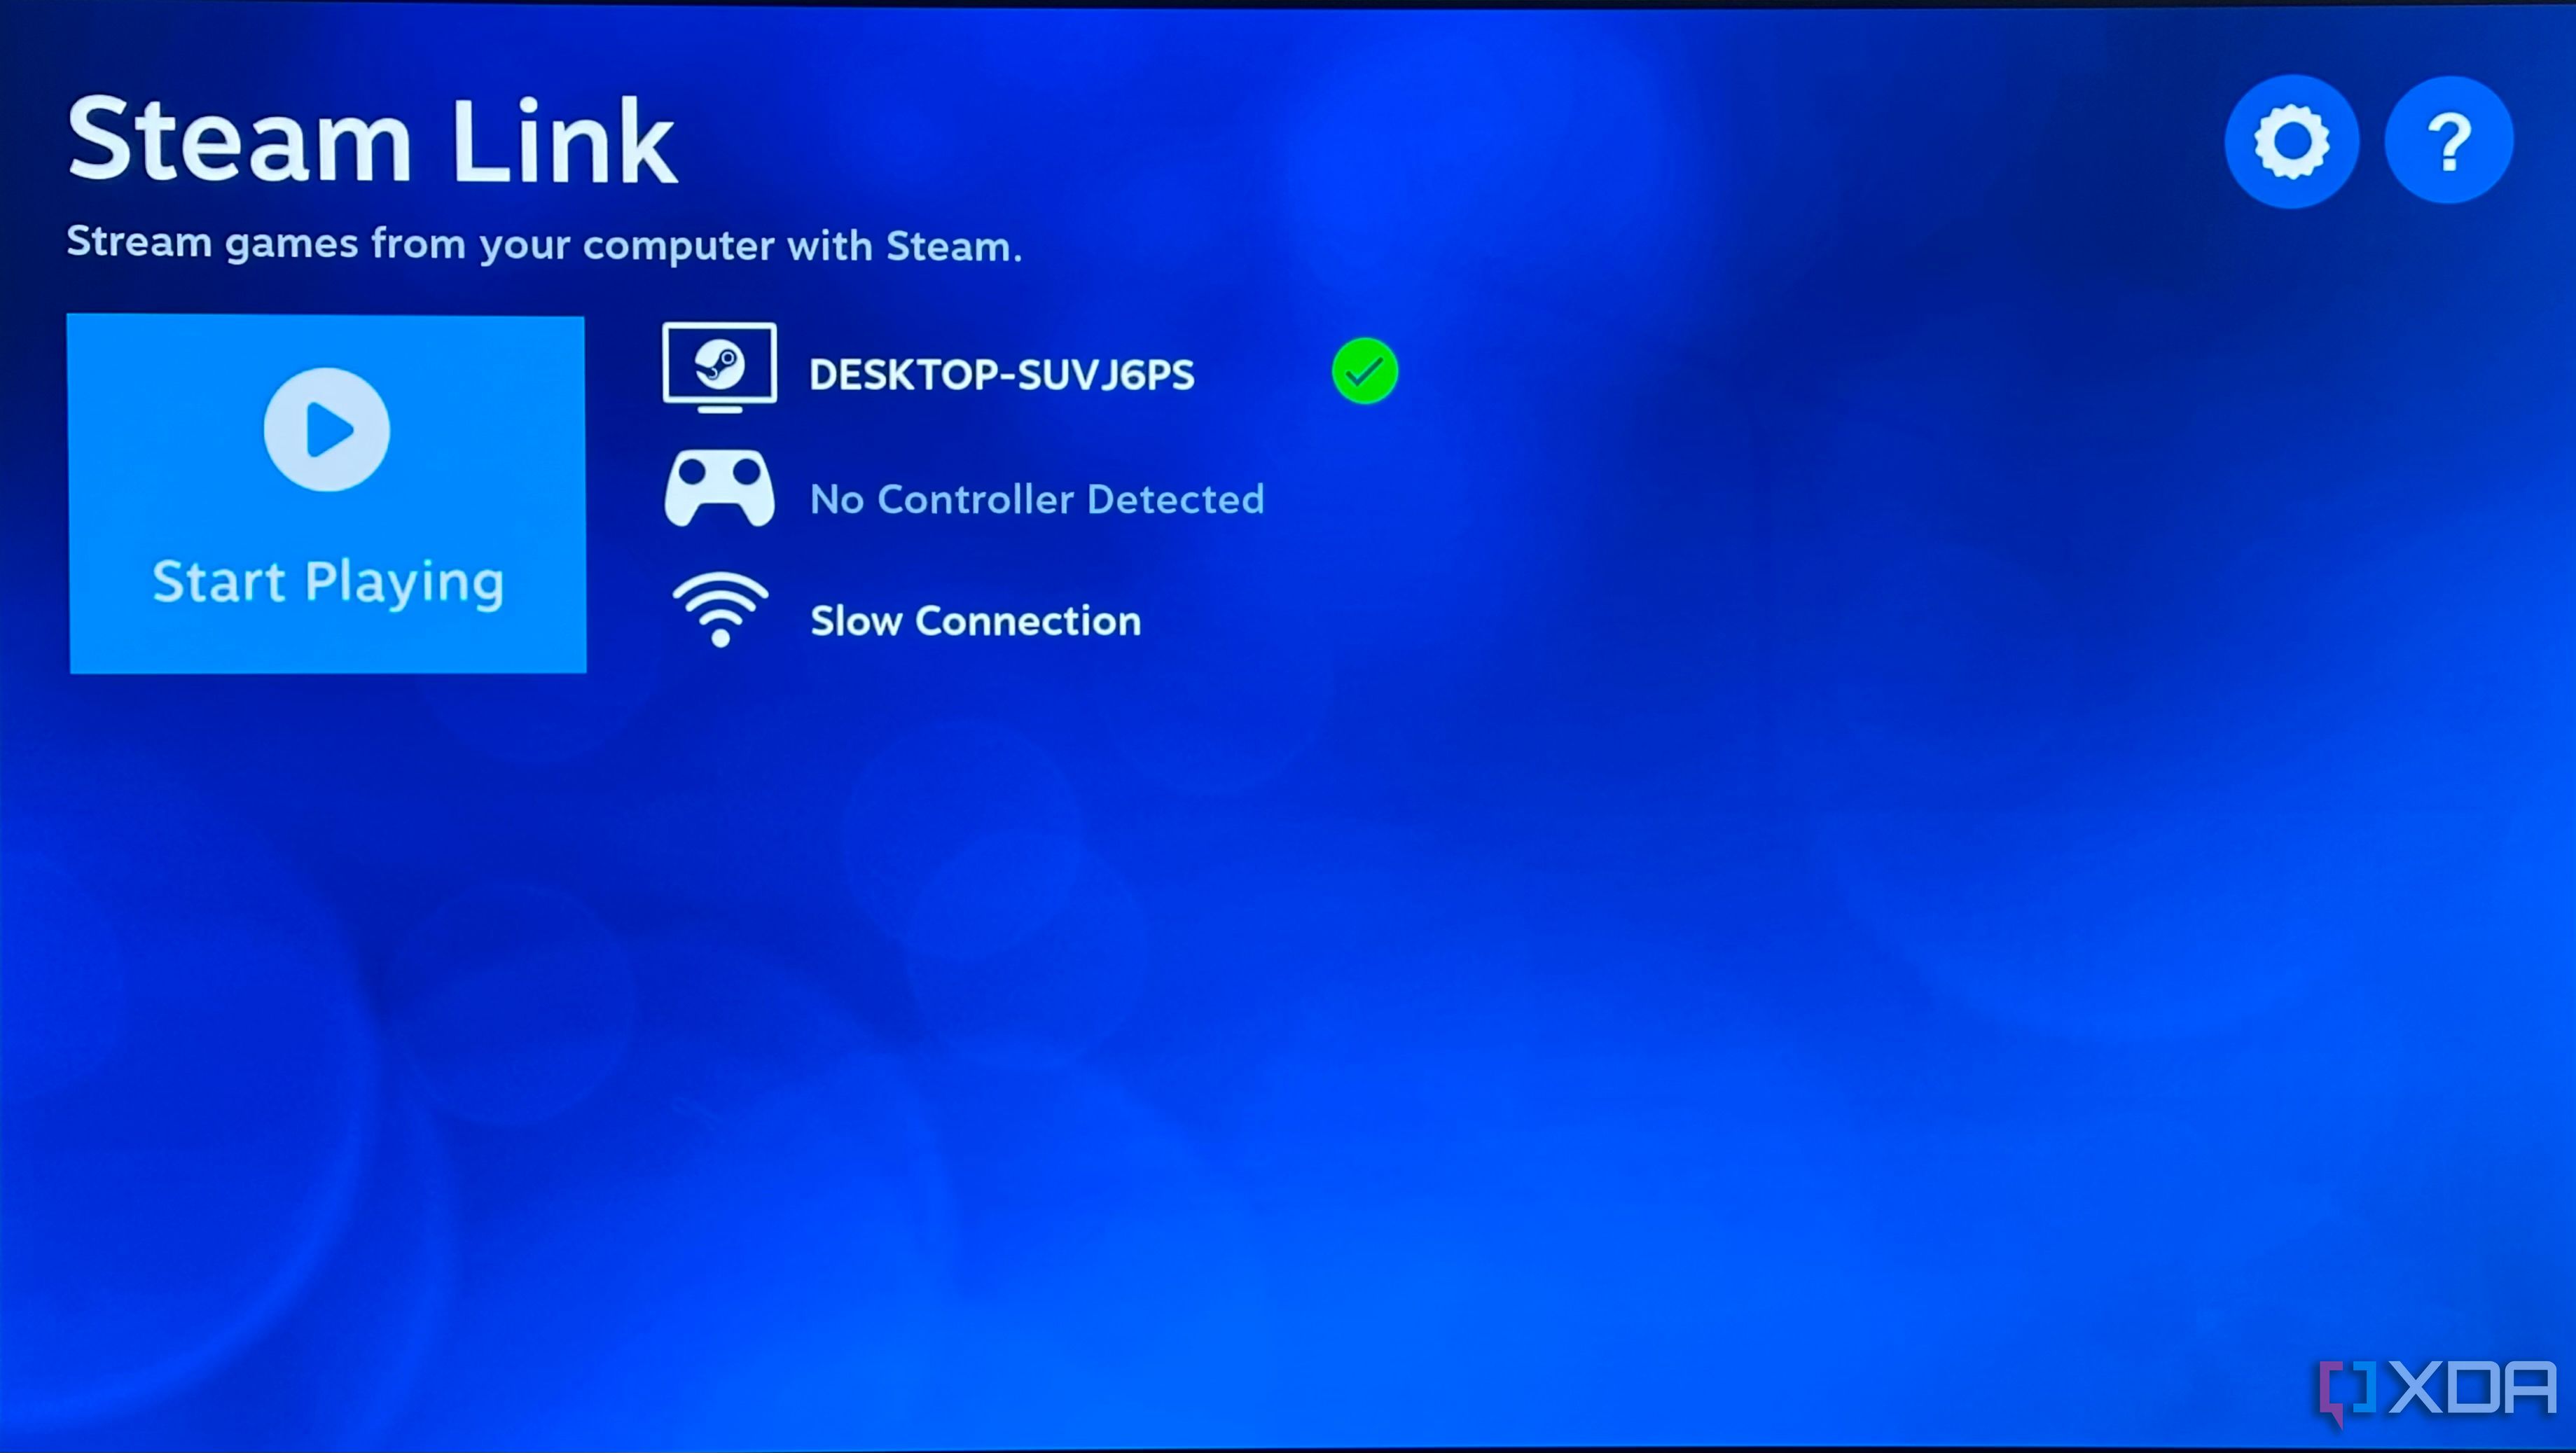
- Once you complete it, you’ll see the screen below. Tap Start playing to boot your desktop PC into Steam big-picture mode and start remotely streaming games.


Network performance is key
Streaming any game quickly and easily to your sofa is a fantastic feature and can save you hundreds on running a second gaming PC or console in your living room. But network performance is key to the experience here, so you’ll want to make sure you’re using the fastest possible connection to your router on both your host PC and Raspberry Pi. I’ve successfully used Powerline adapters in a trio to connect my host PC, router, and Raspberry Pi across three separate rooms, but if your house has Ethernet ports, you can use those instead. You can also try using Wi-Fi, though it will be a bit more hit or miss.
Steam Machines are dead, but Desktop gaming on the sofa doesn’t have to be
Valves ill-fated Steam machines and desktop Steam OS have been dead for a while, as is the original Steam Link hardware, and while the OLED Steam Deck is a wonderful bit of hardware, it still has limited performance and can be clunky in the living room. If you’re looking for an easy way to start playing games in your living room and aren’t planning on playing anything latency-intensive (like fast-paced shooters), setting up a Raspberry Pi as a Steam link can be a great alternative. Having a Raspberry Pi in the living room can also be useful for other things, especially always-on applications that can take advantage of having an ethernet connection and constant uptime.
[ad_2]


