

Microsoft OneNote is one of the best note-taking apps out there, especially for Windows users. It integrates seamlessly with Microsoft OneDrive and other Microsoft products like Word, Excel, and Teams. This integration opens the door to easy file sharing and collaboration, but it offers much more even if you’re not a part of the Microsoft 365 ecosystem.
In this guide, we’ll show you how to make the most of OneNote and peel back some of the hidden layers of its functionality. We’ll be exploring features that enhance organization, integrate multimedia, improve search functionality, and more.

How to get the most out of Windows Copilot
Microsoft’s new AI assistant is incredibly versatile and powerful. Here’s you can leverage its capabilities.
8 Managing notebooks
Creating new notebooks, sections, and pages
If you’ve just been randomly dumping text into OneNote, then you’re not really using it to its full potential. You can organize your notes by creating a new notebook, adding sections to that new notebook, and then going a step further by adding different pages to those new sections.
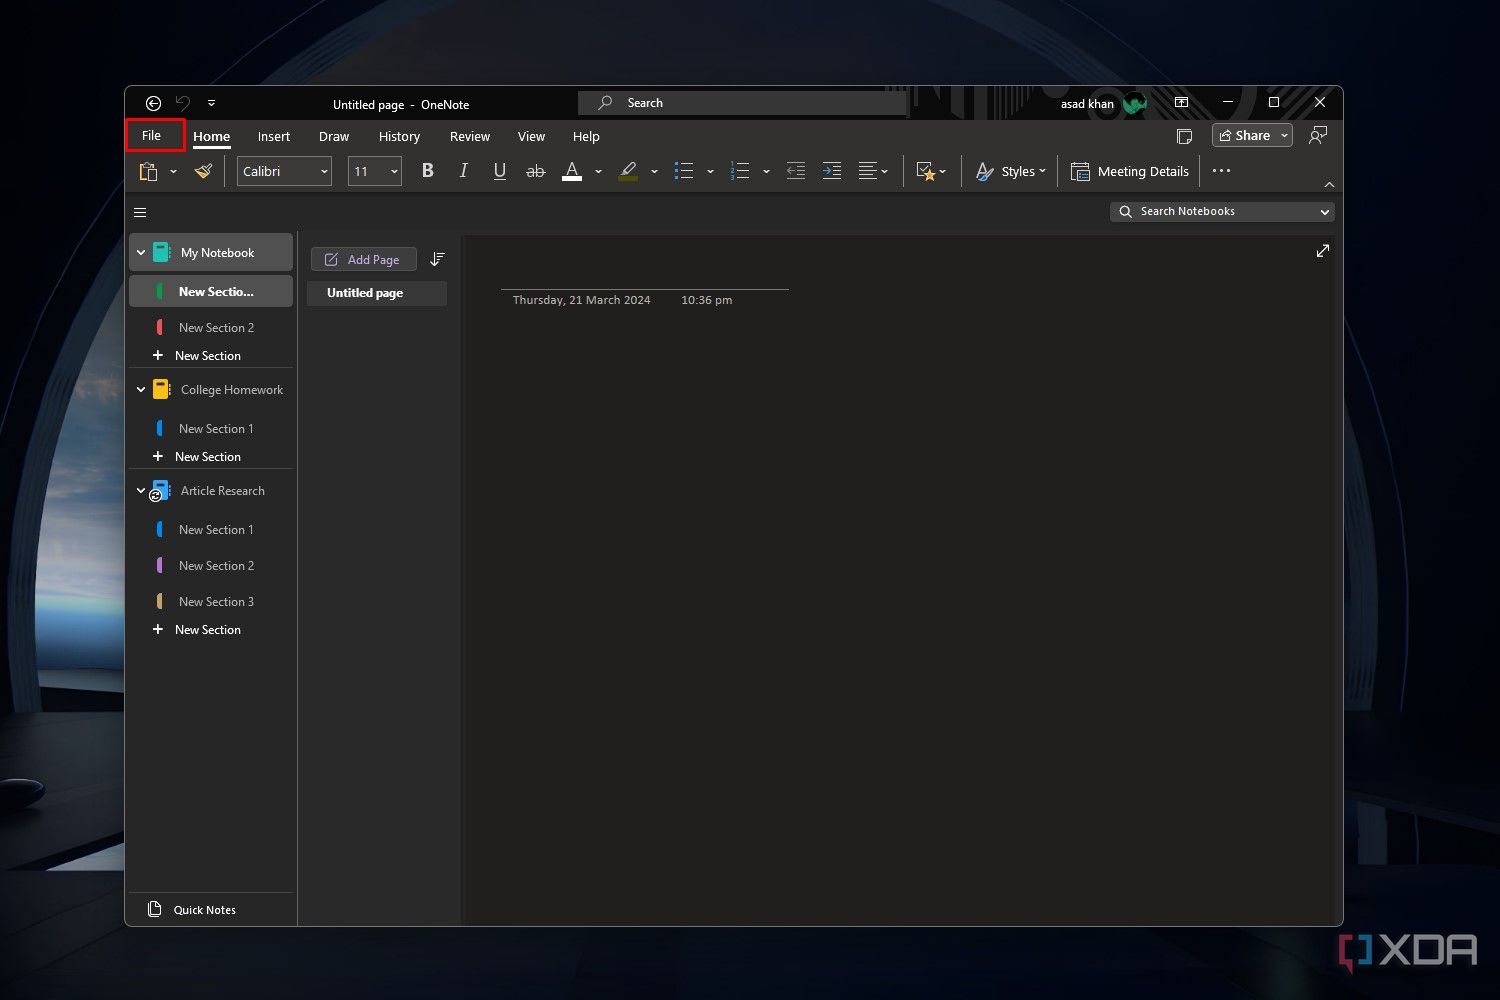
To create a new Notebook, click File to navigate to the File menu page. From the left sidebar, click New to create a new Notebook. You can save this new notebook to OneDrive, your PC, or in a specific directory. Choose OneDrive if you want the notes to be backed up automatically. Enter a name for the Notebook, and click Create Notebook.
You can switch between different notebooks by selecting them from the left sidebar.

From the left sidebar, you’ll now be able to see a list of your different notebooks and their respective sections. Hit the
New Section
button under a notebook to add a section. You can change the name of the section by double-clicking it.

Just as you would create a new section, you can also create new pages within different sections. Select the section you want to add a page to and click Add Page. Enter a title at the top of the page to rename it.

7 Sharing options
Link settings, editor access, and password protection
The ability to share and work on notes with other users is what makes OneNote one of the best productivity apps for Windows. Here’s how all the sharing options work within the app:
Share
button in the upper-right corner. If you want to share it with a specific person, enter their email in the text field, and hit
Send
.
By default, anyone you share the notebook with will be able to edit it. If you want to share a view-only version instead, click the
Pencil
icon next to the text field, and select
Can View
from the drop-down menu. Hit
Send
, and a view-only version of your notebook will be forwarded.

Sharing Settings
from the drop-down menu. From here, you can set an expiration date or password for the notebook from the
More Settings
section. However, both of these features are not available on the free version.
Finally, you can just copy a link to the notebook by hitting the Copy button at the bottom. Your preferred sharing settings will apply to this copied link.

6 Dark mode
Improve readability
As the name implies, dark mode will change the appearance of your pages from light to dark. Take it from someone who writes (and reads) a lot of articles — Dark Mode is easier on the eyes and superior for better readability.
Here’s how you can enable dark mode in Microsoft OneNote:
- Open OneNote and click File in the top-left corner.
- From the File menu window, select Account from the left sidebar.
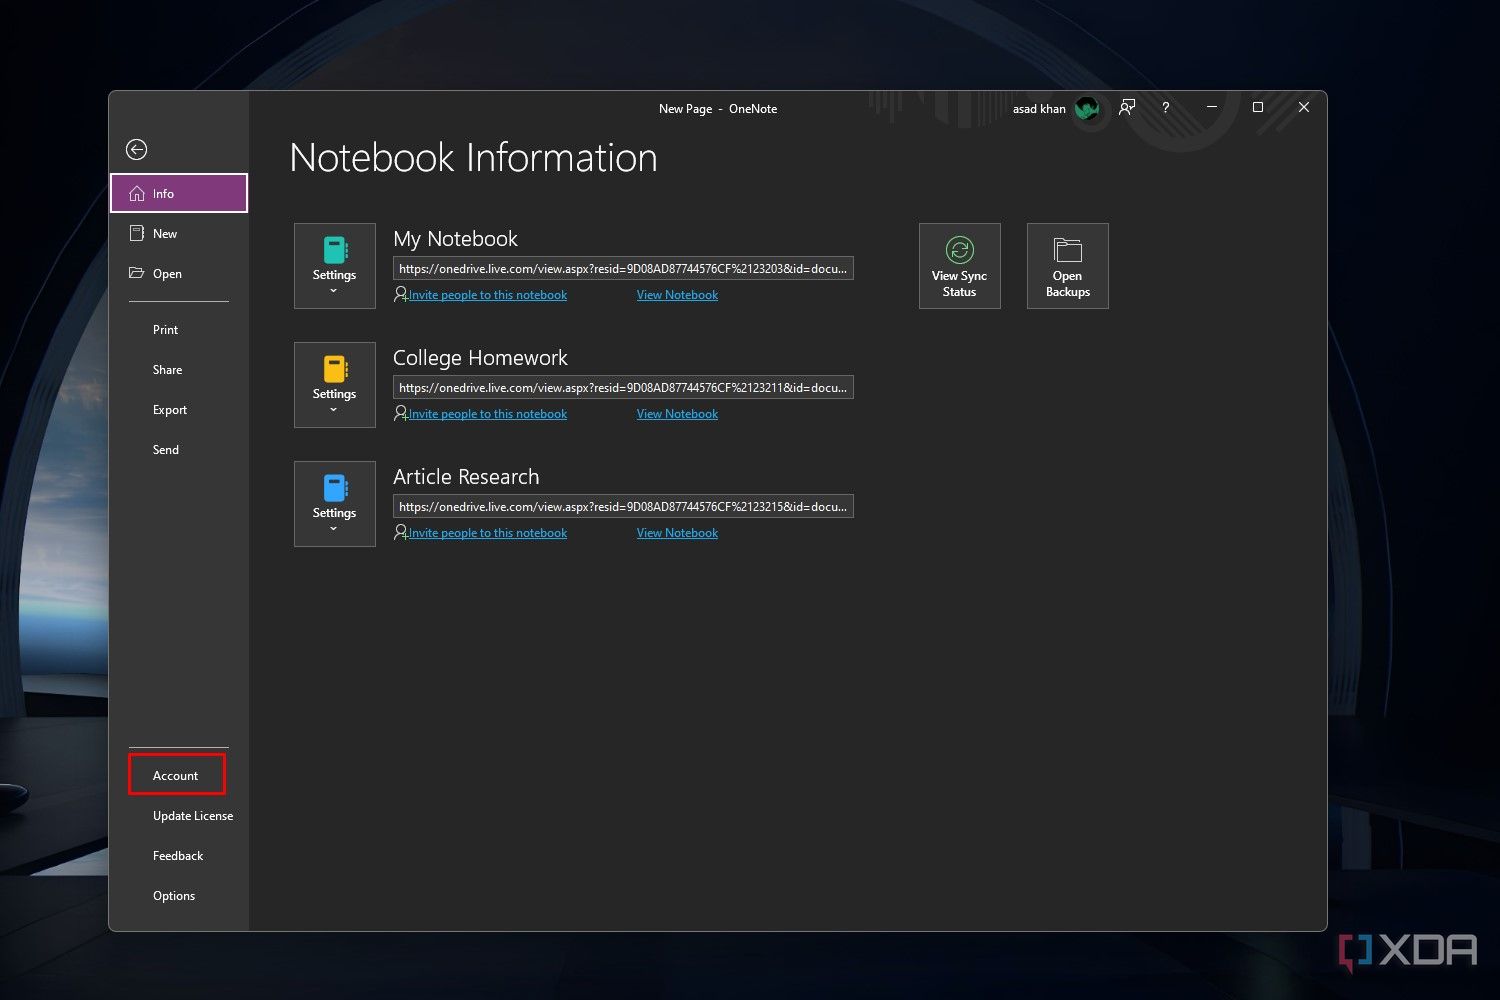
- Click Office Theme, and select Black from the drop-down menu.


Alternatively, you can also enable or disable dark mode for a specific page. Here’s how:
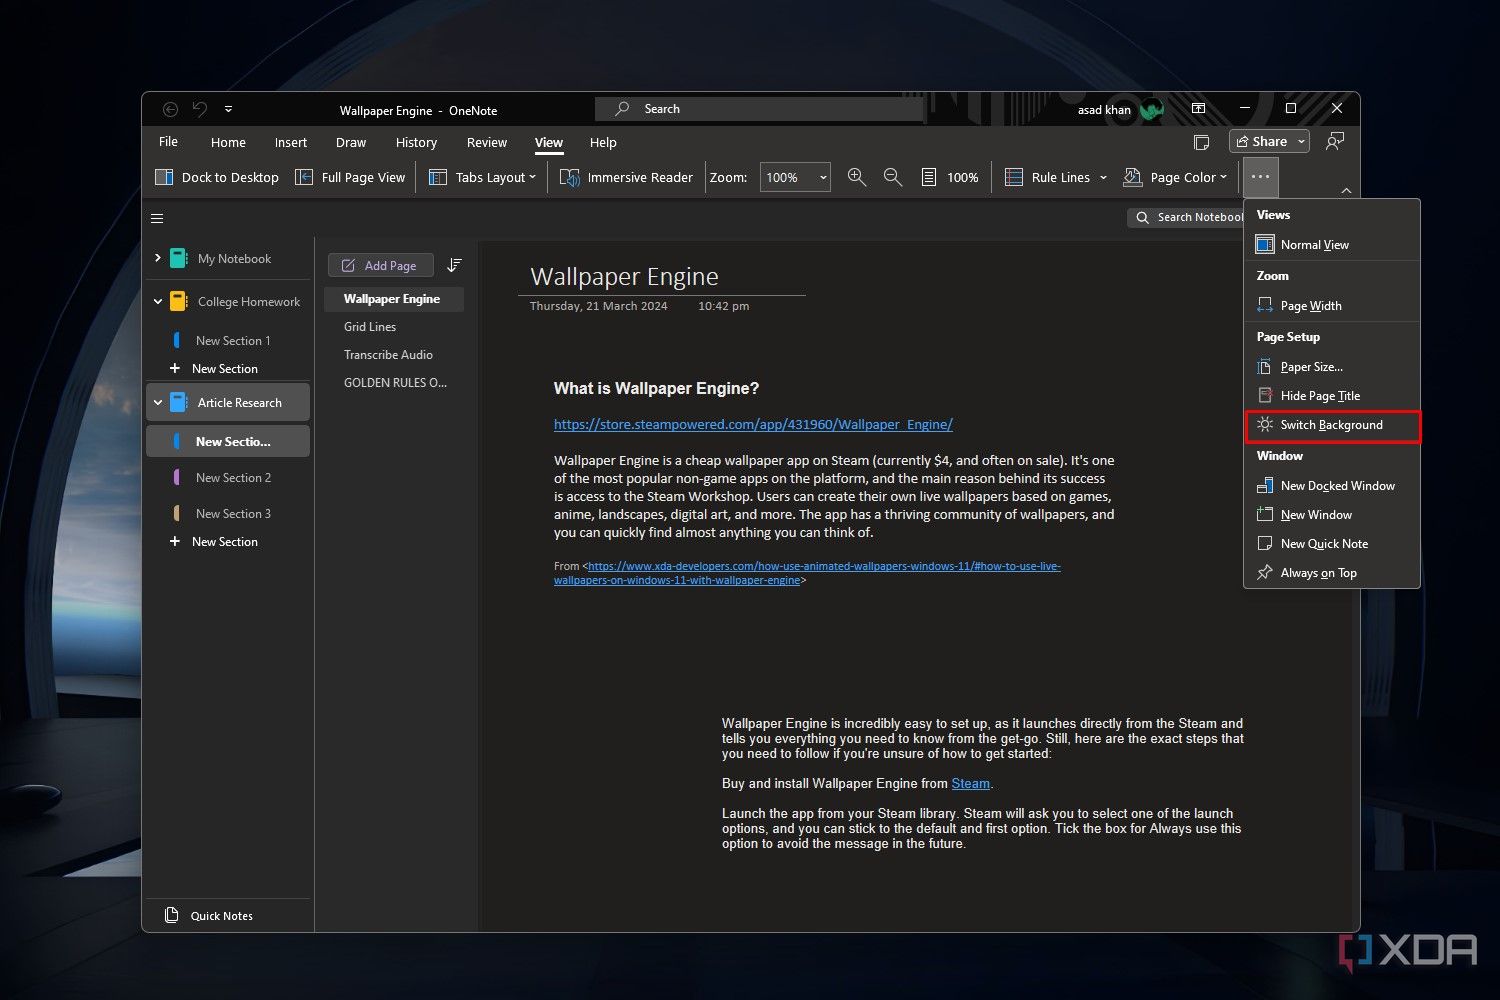
- Open the page that you want to change the background for, and click View from the toolbar at the top.
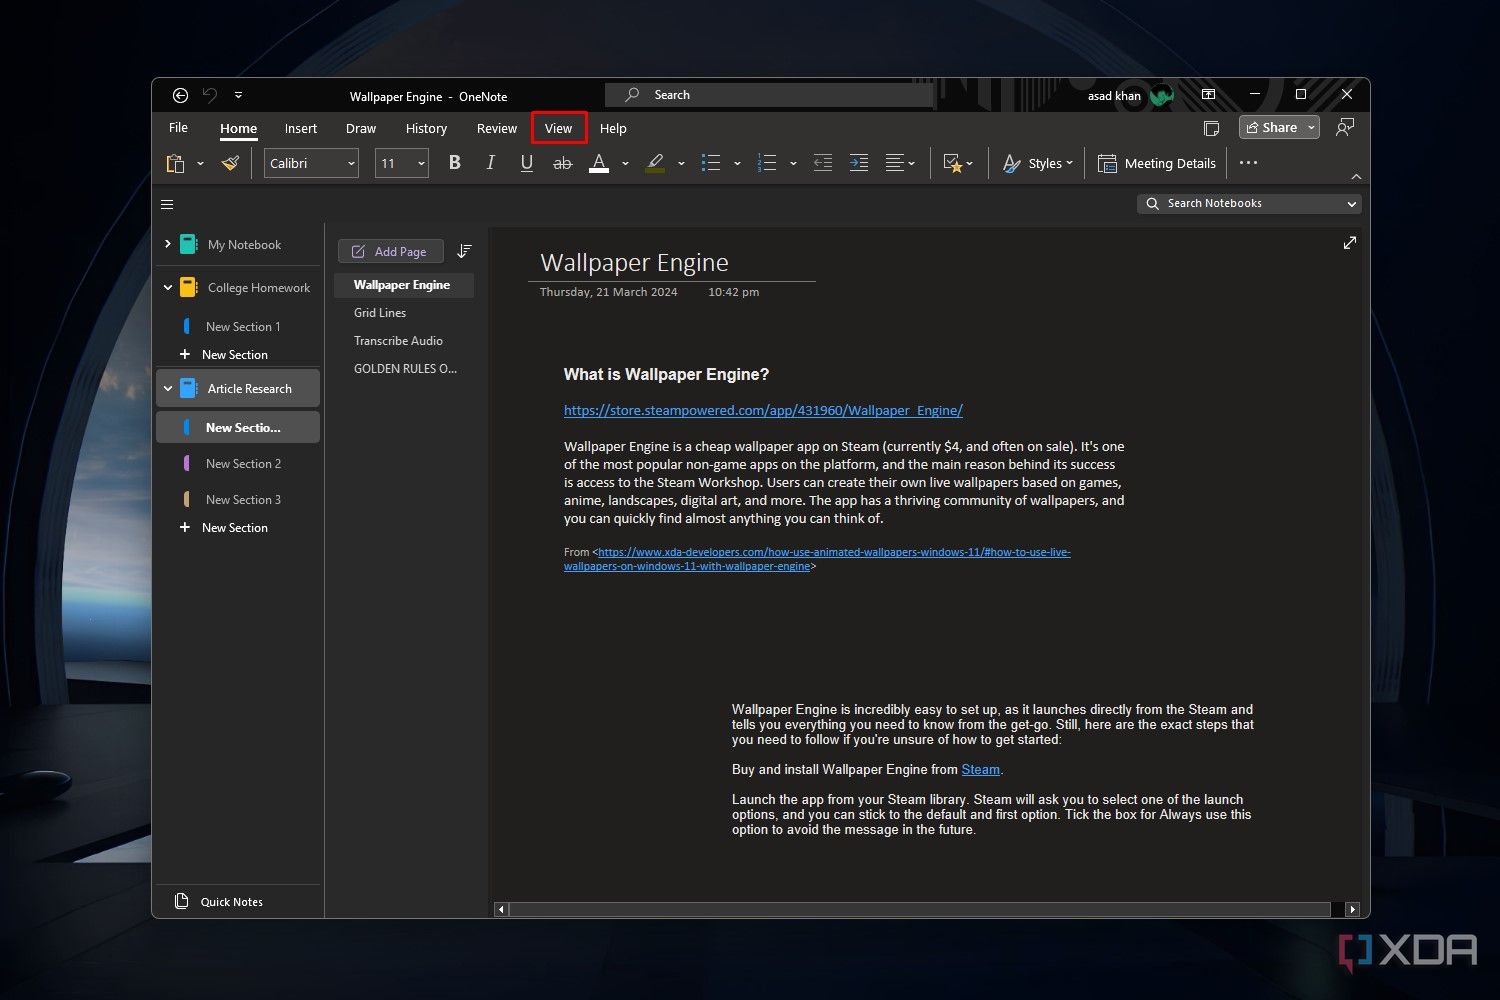
- From the menu that pops up, hit the three dots in the right corner.
- Select Switch Background from the drop-down menu.


5 Note containers
Kanban-style organization
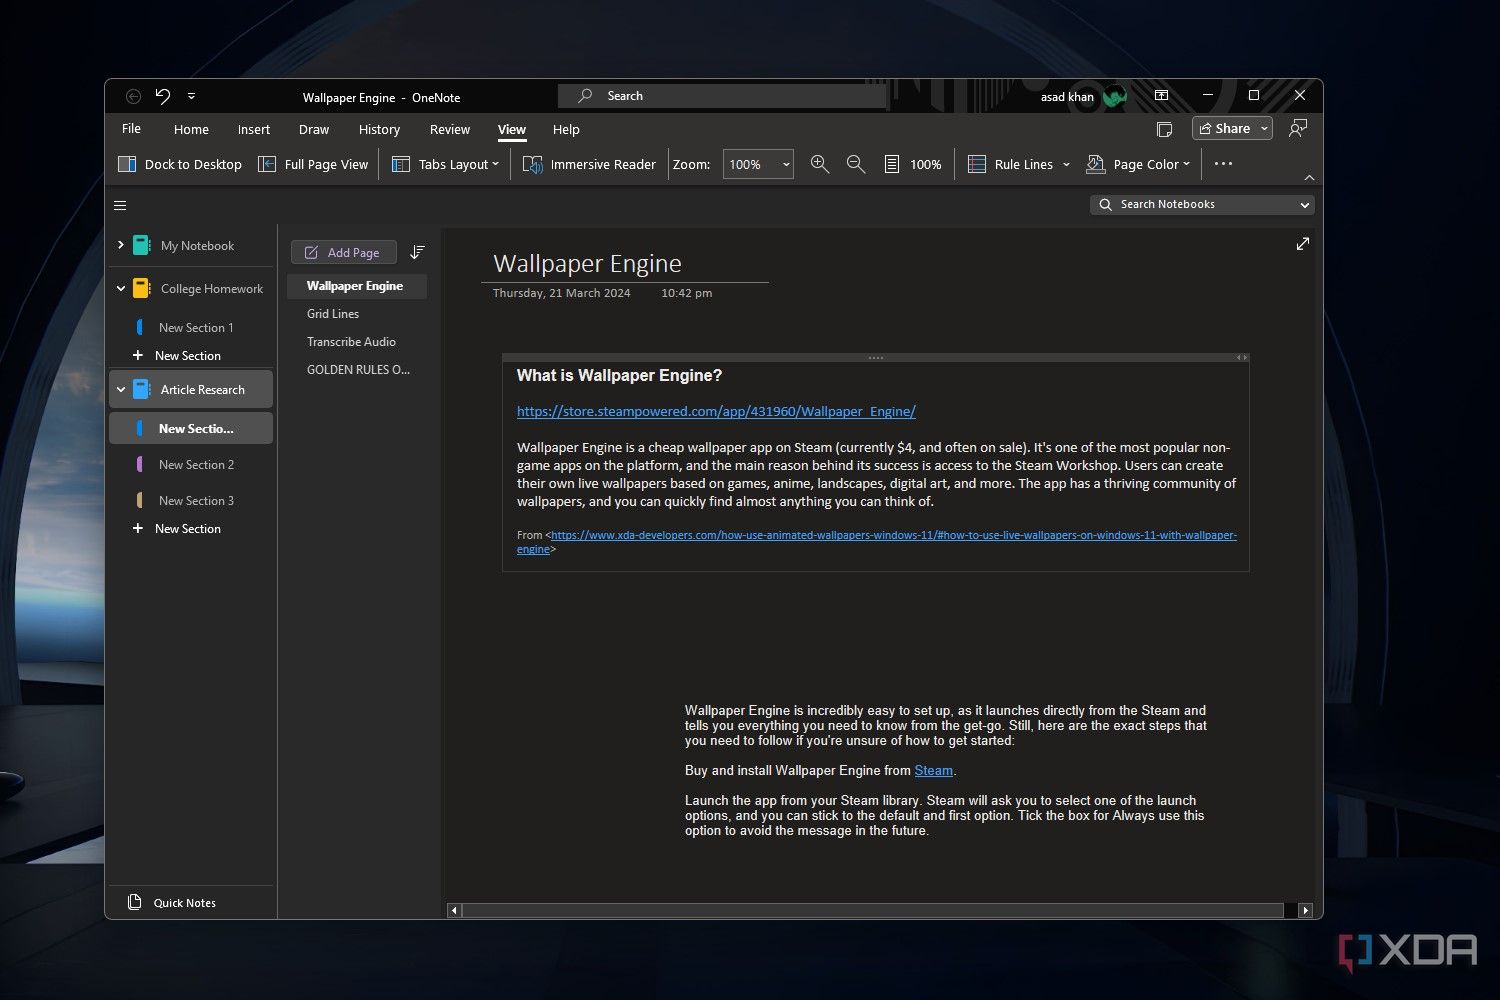
Instead of dropping you onto a black canvas, OneNote creates a text box by default whenever you start typing. Microsoft calls these Note containers, and they offer a surprising amount of flexibility and functionality. They are useful because they allow you to group related information and move them around the page freely. These containers can hold text, images, videos, or even audio recordings.
Here are some tips to use note containers effectively:
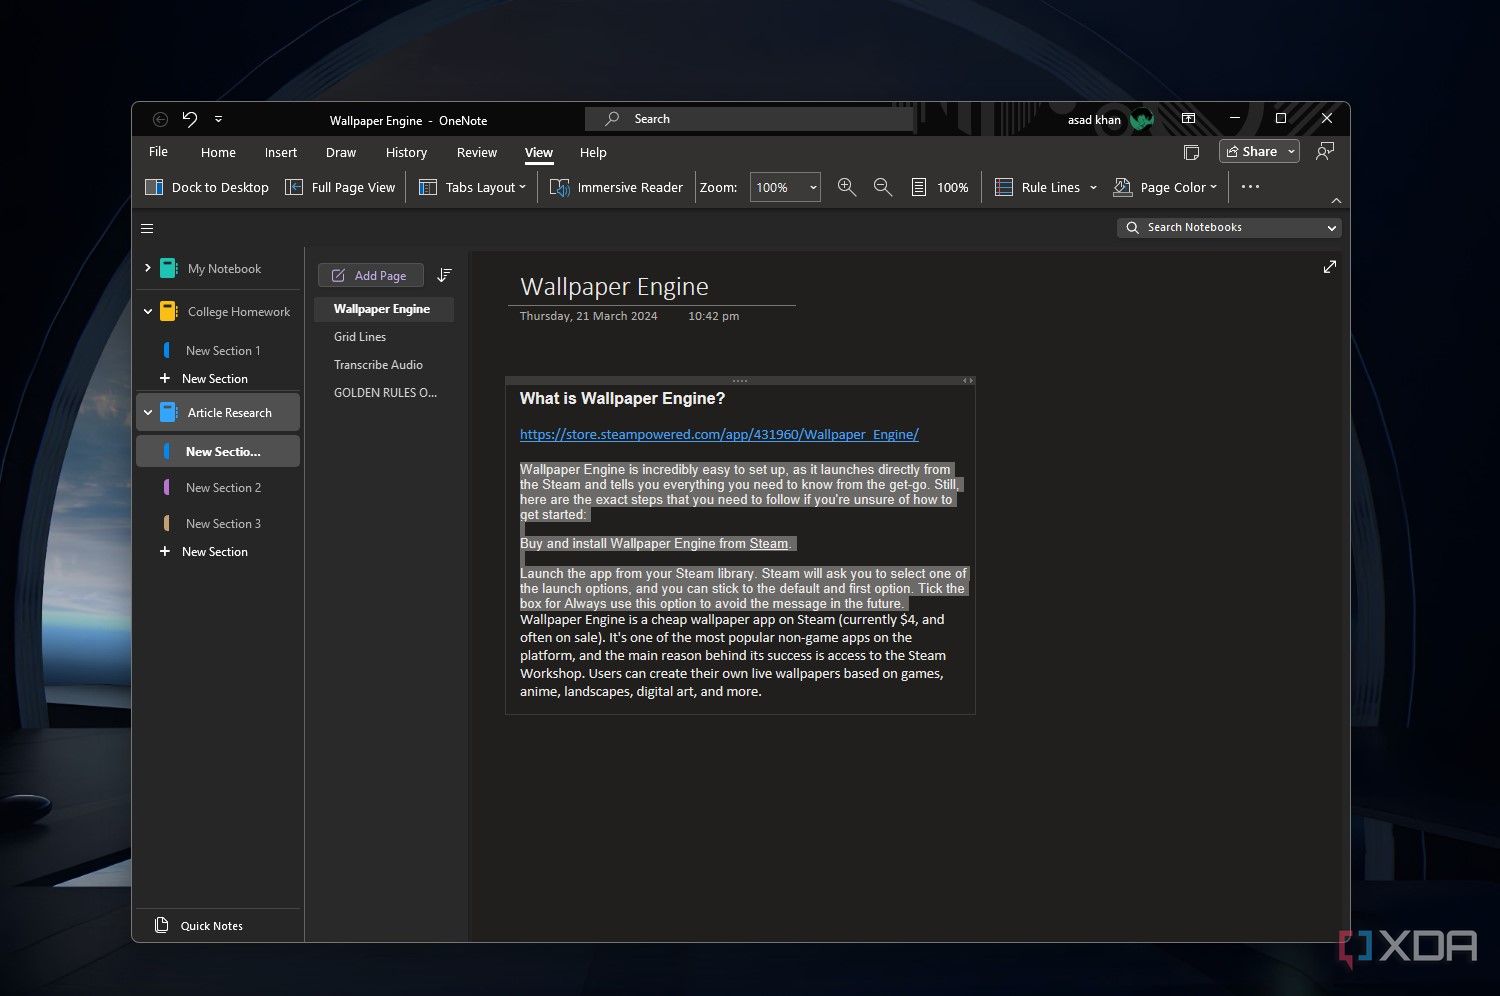
- Moving containers: To highlight the boundaries of a note container, click or hover over the text within it. If you hover over the four dots in the top right corner of the container (when highlighted), your cursor will change to a four-headed arrow. This indicates you can click, drag, and move the entire container to a new location on the page.
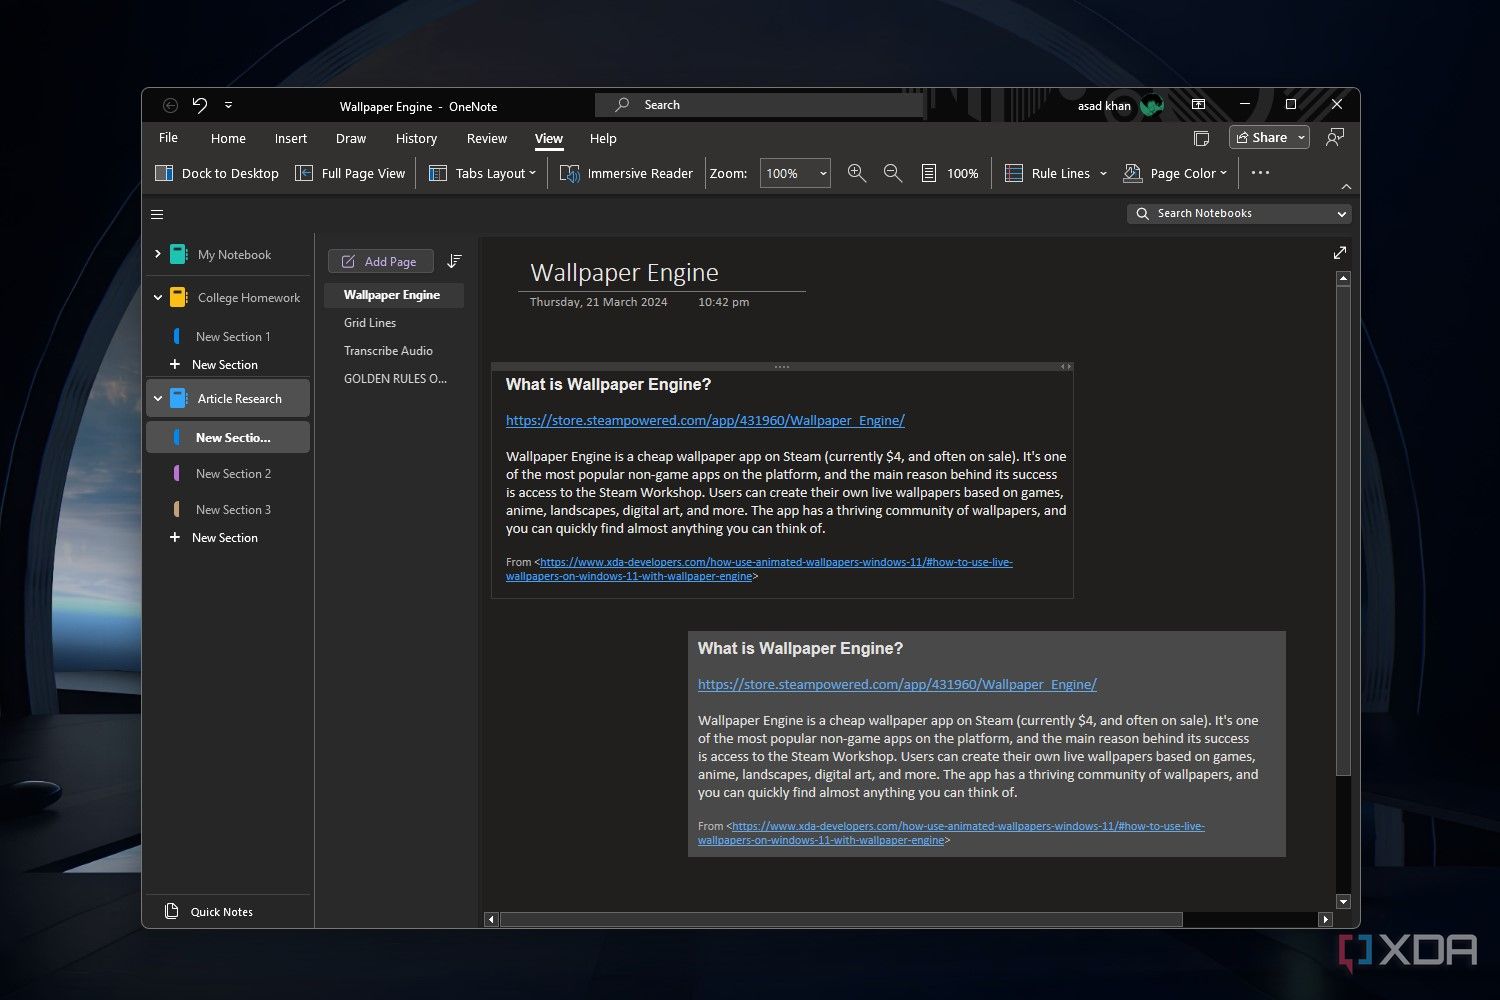

- Resizing containers: If you want to enlarge the container, hover over the right side of its boundary, and your cursor will change to a double-headed arrow. Click and drag the border to the right or left to resize the container.

- Merging containers: Hover over the top of a note container until you see the four-headed arrow. Hold down the Shift key on your keyboard, and drag the container over to any other container on the same page. Let go of the Shift key and the mouse button, and click within the new container to merge and save it.

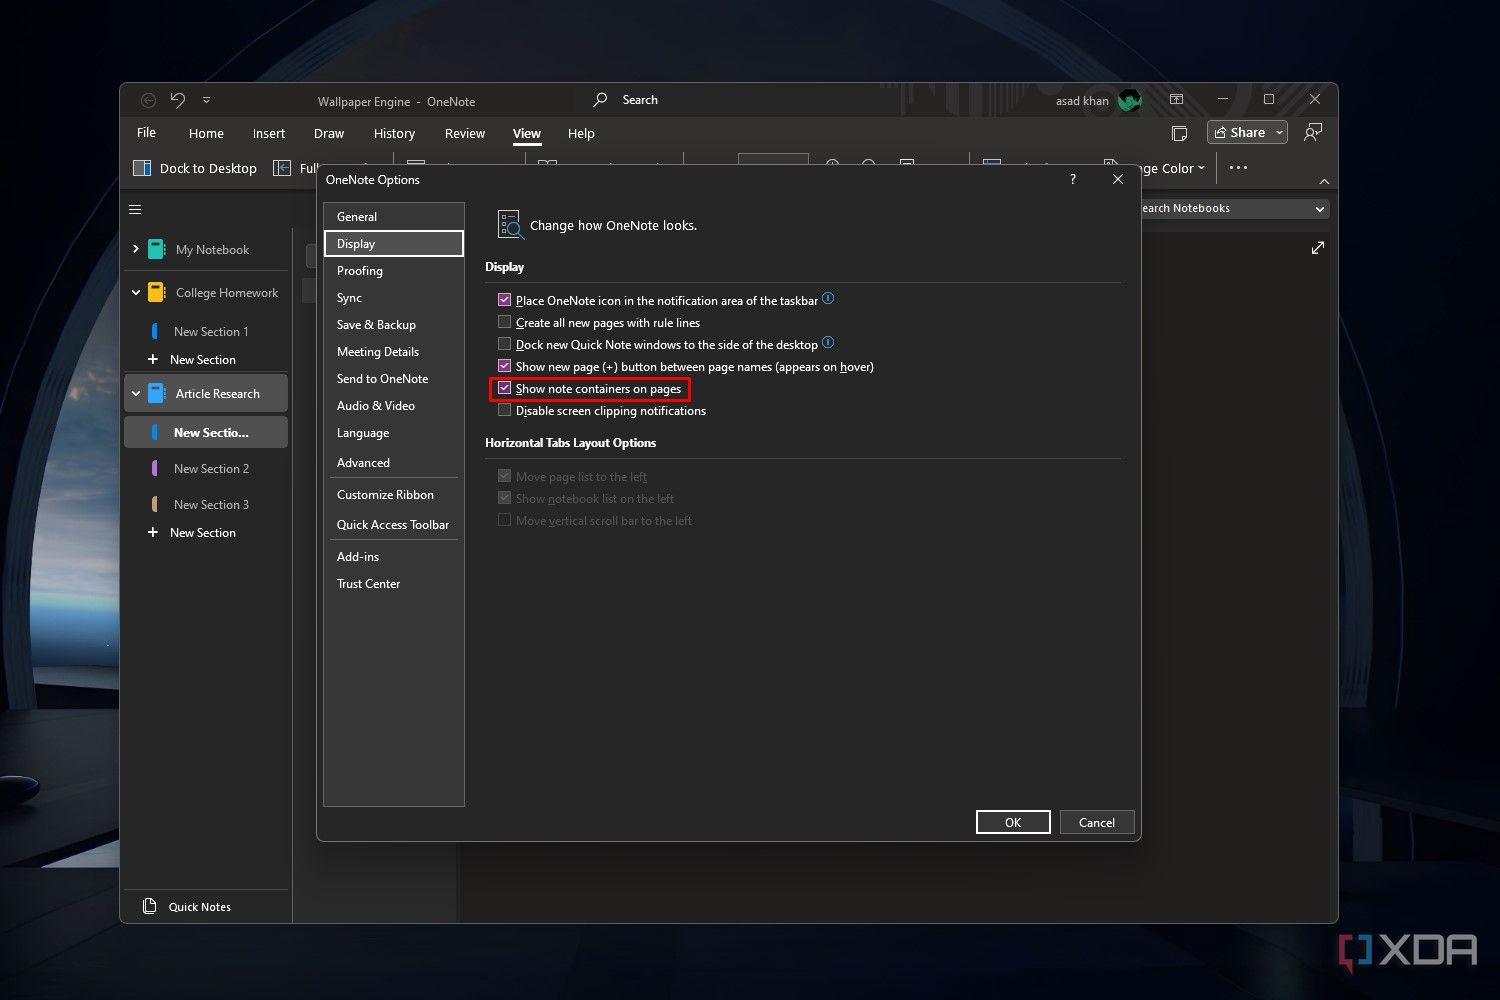
Disabling note containers
While note containers are useful, some might consider them to be a hassle, especially when coming from other note-taking apps. If you want your text to be more free-flowing and don’t want to deal with container borders, you can disable the Note container feature.
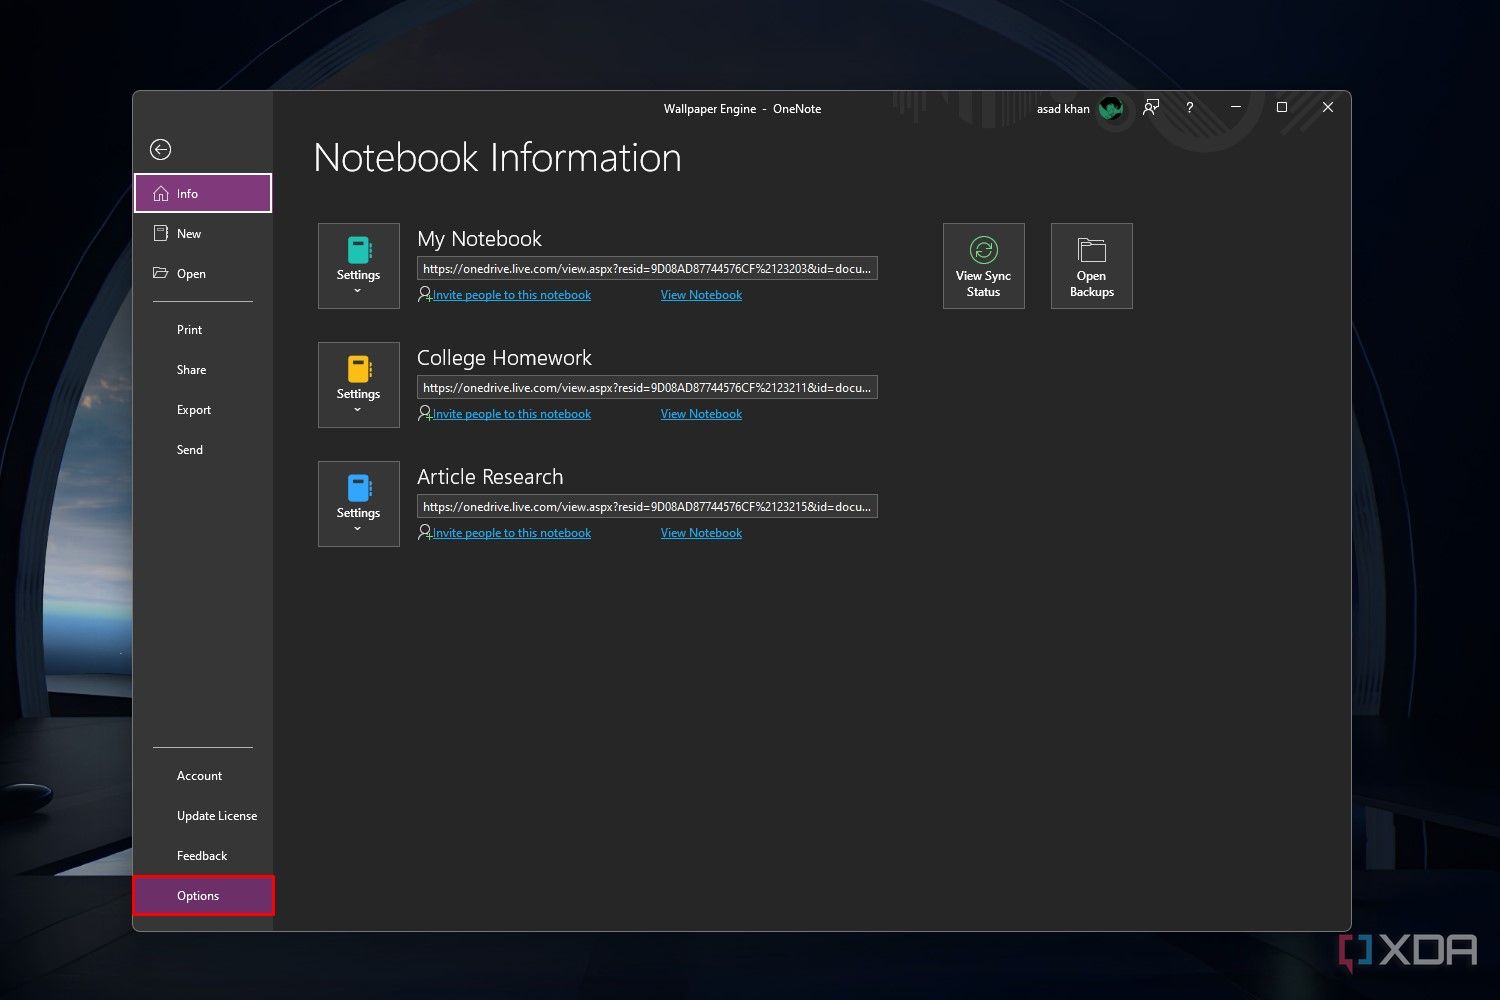
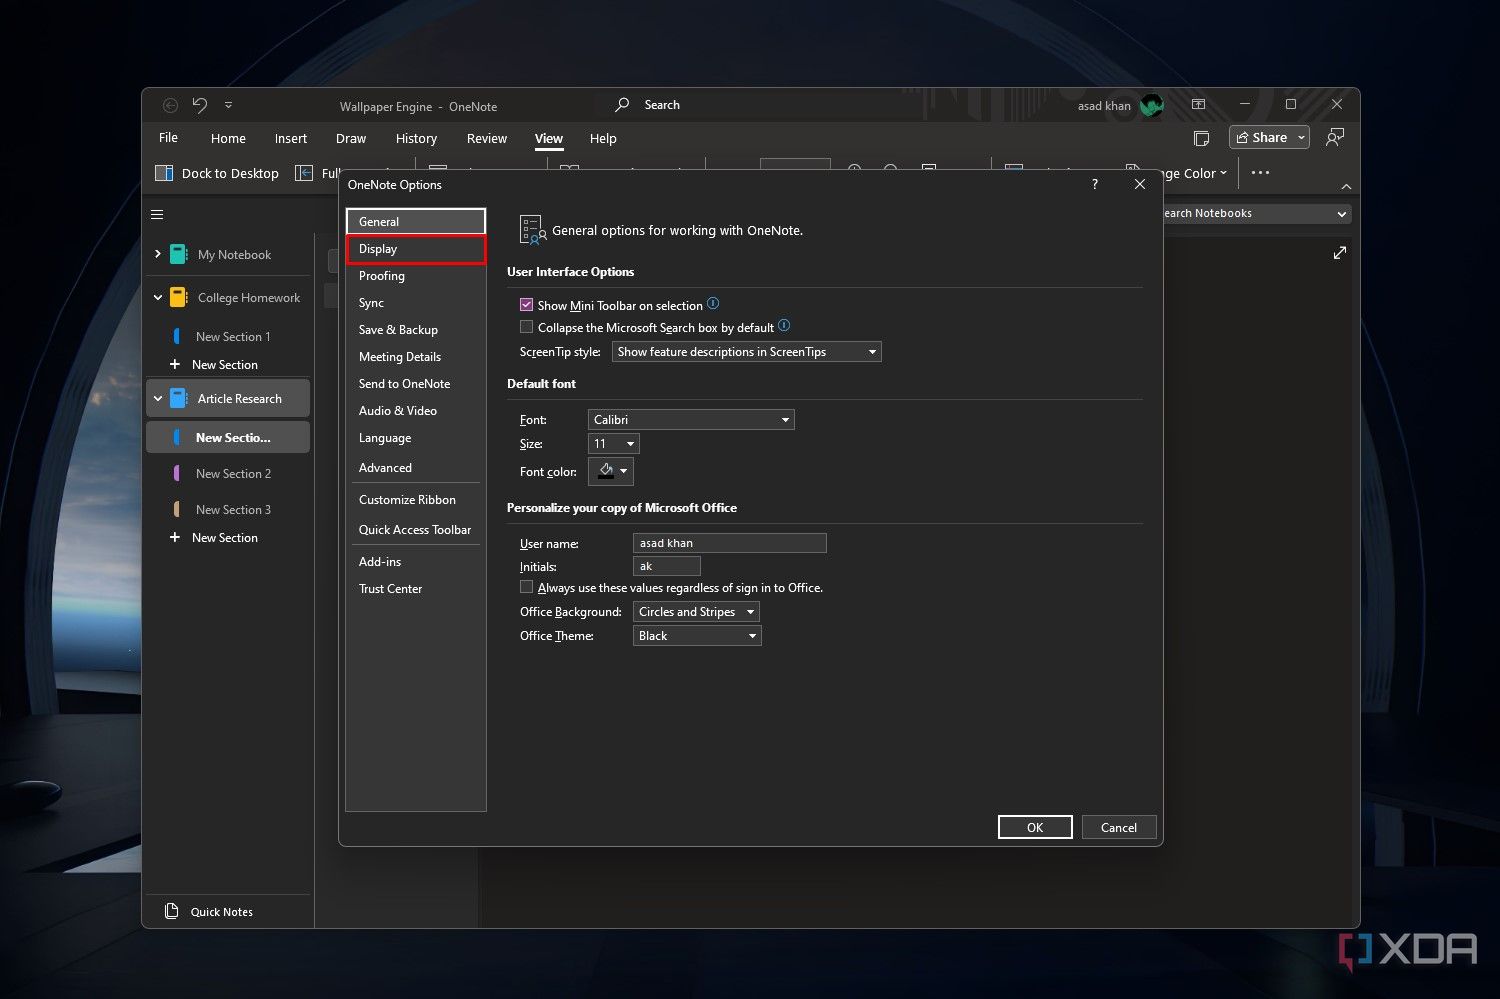
- Click the File tab in the top-left corner of an open OneNote window.
- From the left sidebar of the File menu window, select Options.
- Select Display from the left sidebar.
- Find the option labeled Show note containers on pages and uncheck the box next to it. Click OK to apply and save the changes.


4 Paper style
Grid and rule lines for easier writing
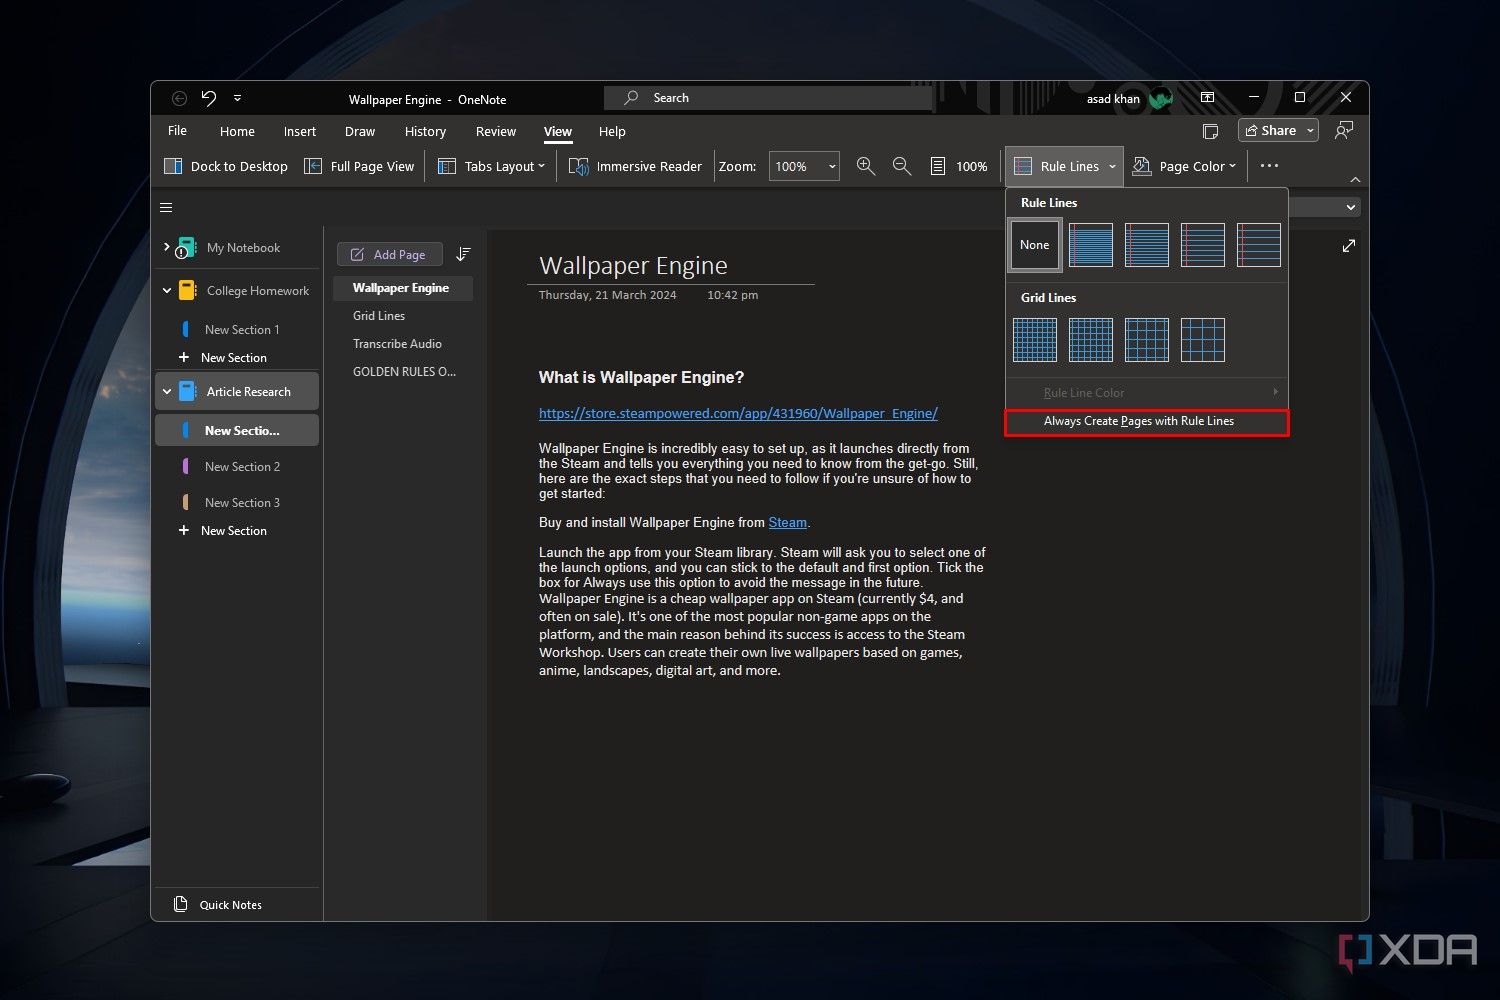
Whenever you create a new section or page, OneNote will open it as a blank sheet. However, you can make some changes to the page layout to make it feel more personal. You can personalize OneNote pages with grids or rule lines to provide a familiar writing experience. This feature is incredibly helpful if you want to use a stylus. Speaking of which, you can use almost any stylus in OneNote as it supports USI pens on any device with a touchscreen.
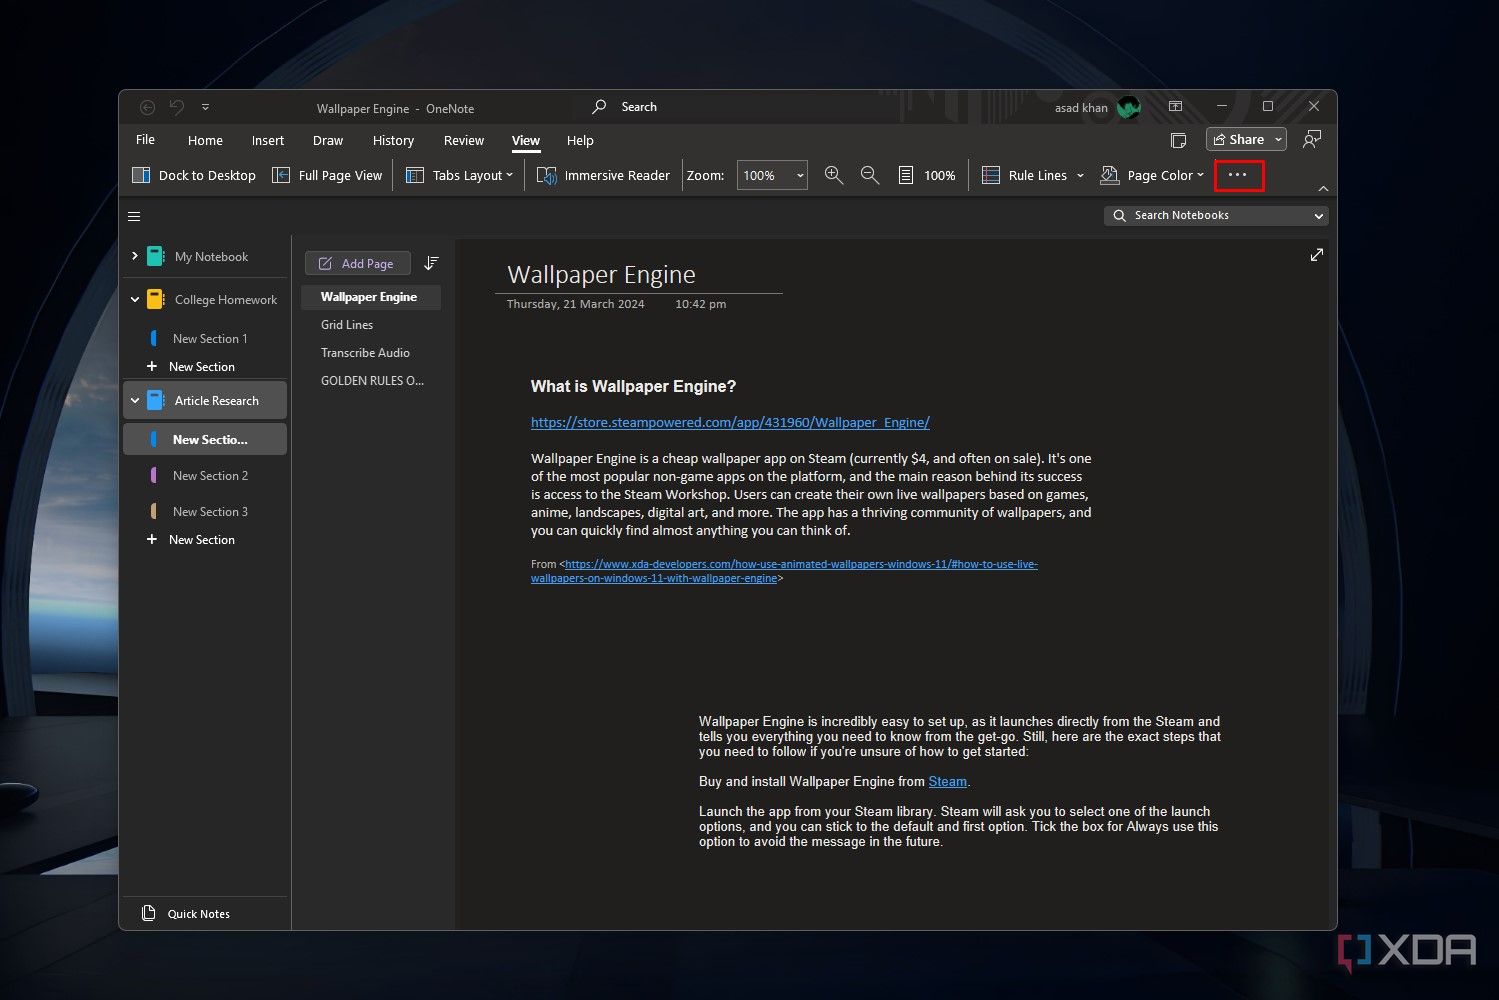
- Open a new page in OneNote, and click the View tab at the top.
- Click the arrow next to the Rule Lines tab to choose from the many rule and grid line options.
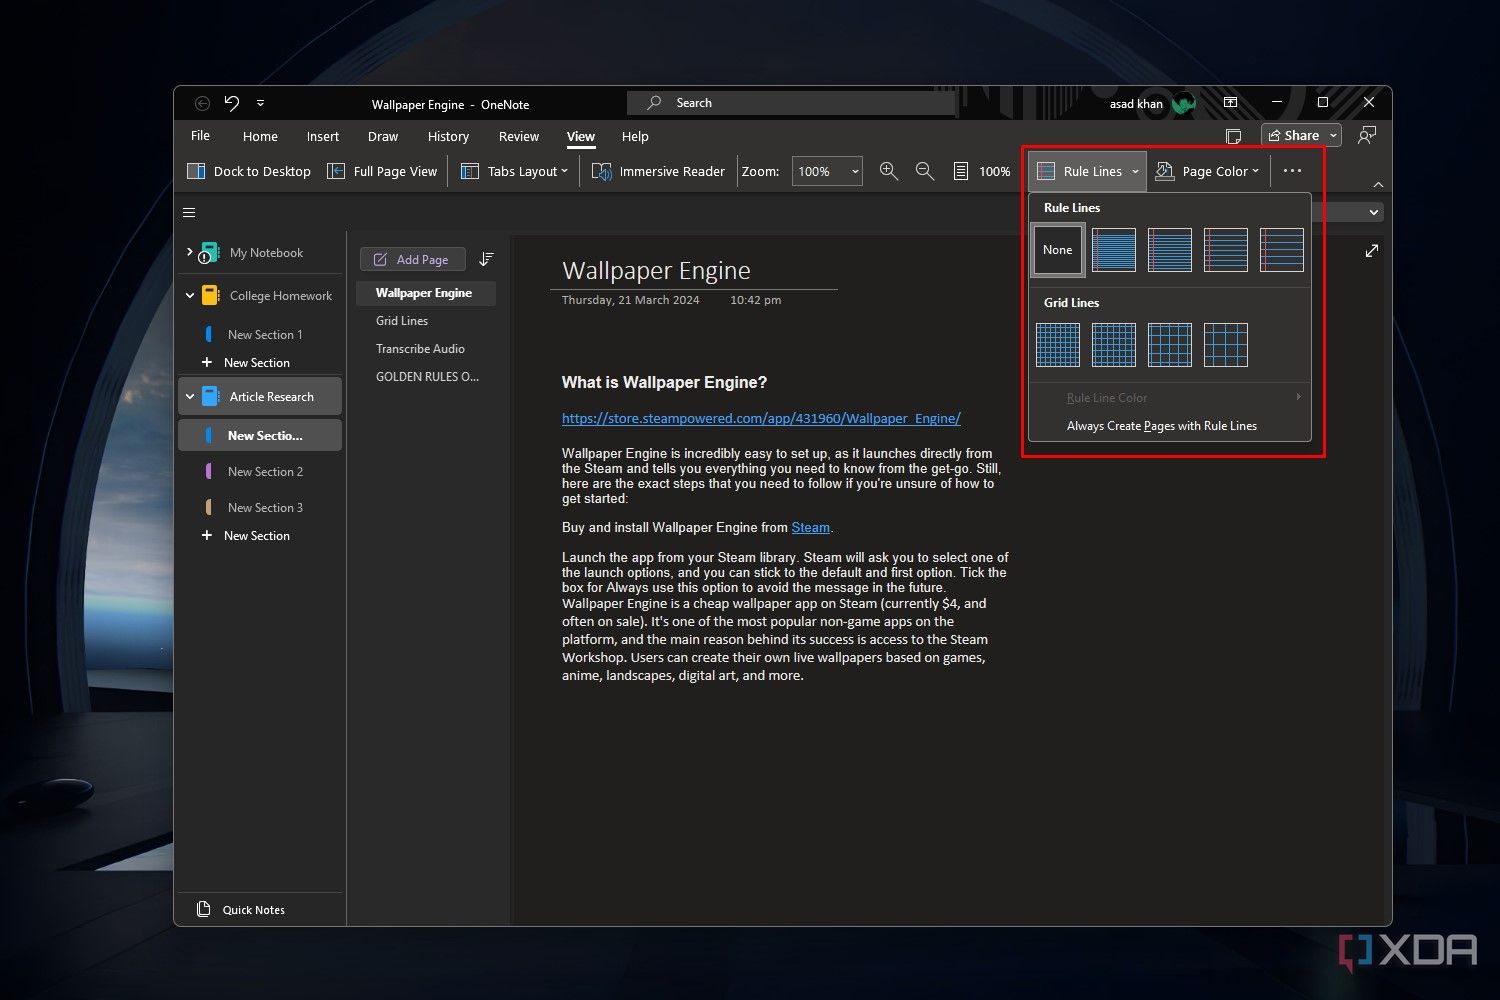
- If you want rule or grid lines to be enabled by default, click Always Create Pages with Rule Lines.


Best pens for Microsoft Surface devices in 2023
Looking to draw on your Microsoft Surface device? You can get an official pen from Microsoft, but only a limited number of third-party pens will work.
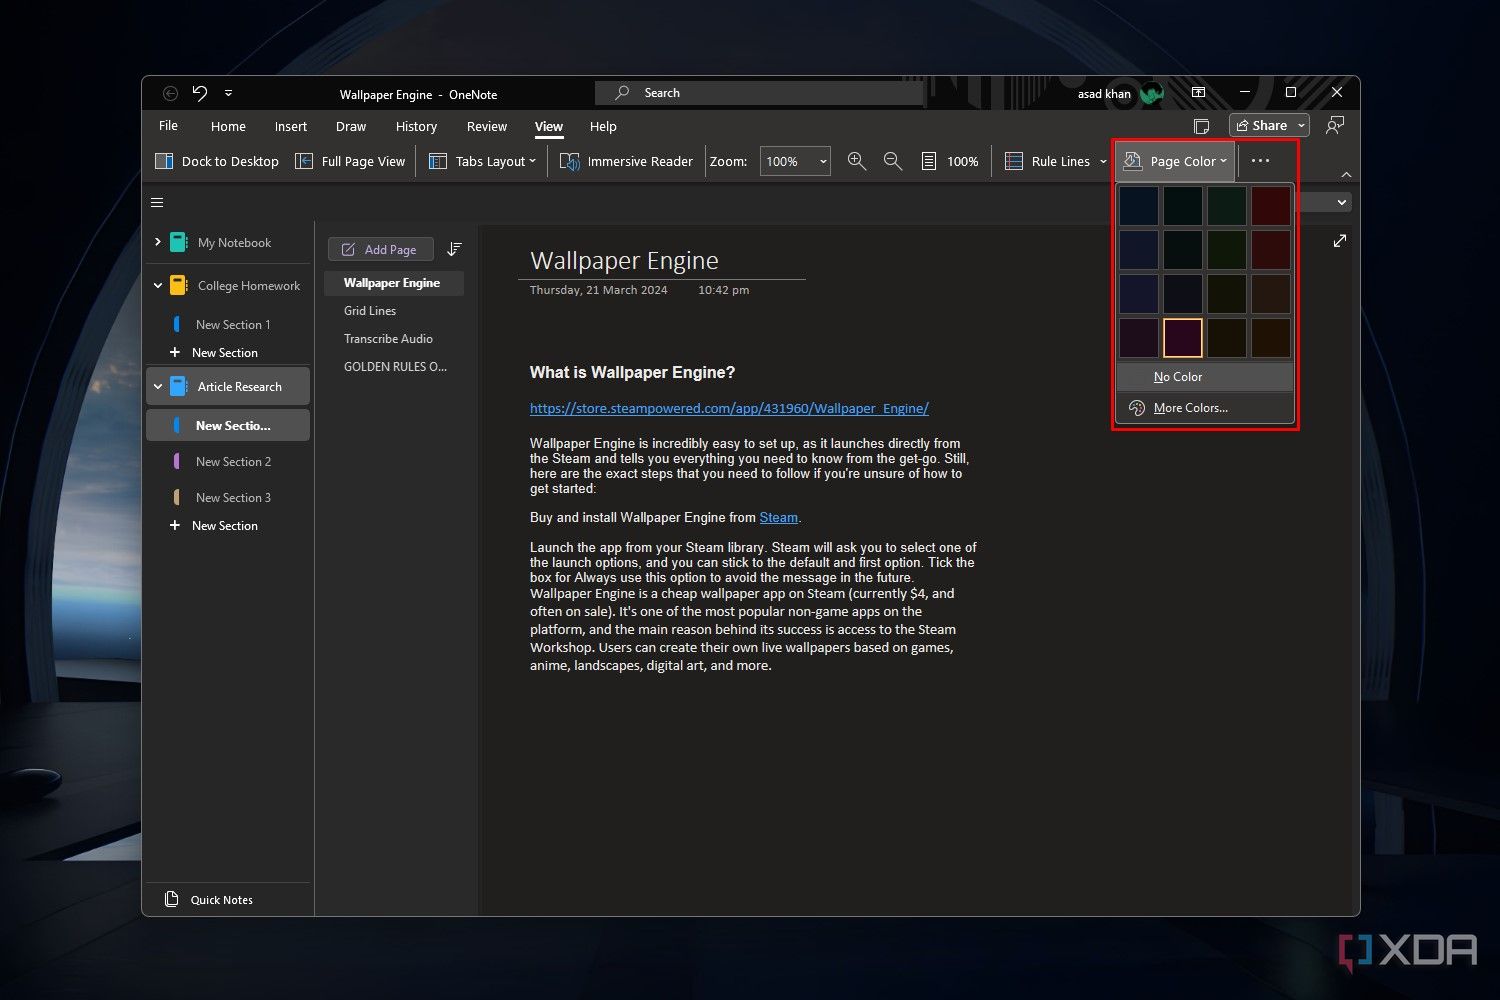
Changing the page color
Another easy thing you can do to change the paper style is to alter the page color.
- Open the page that you want to change the background for, and click View from the toolbar at the top.
- Select Page Color from the View menu, and choose a color from the available options.
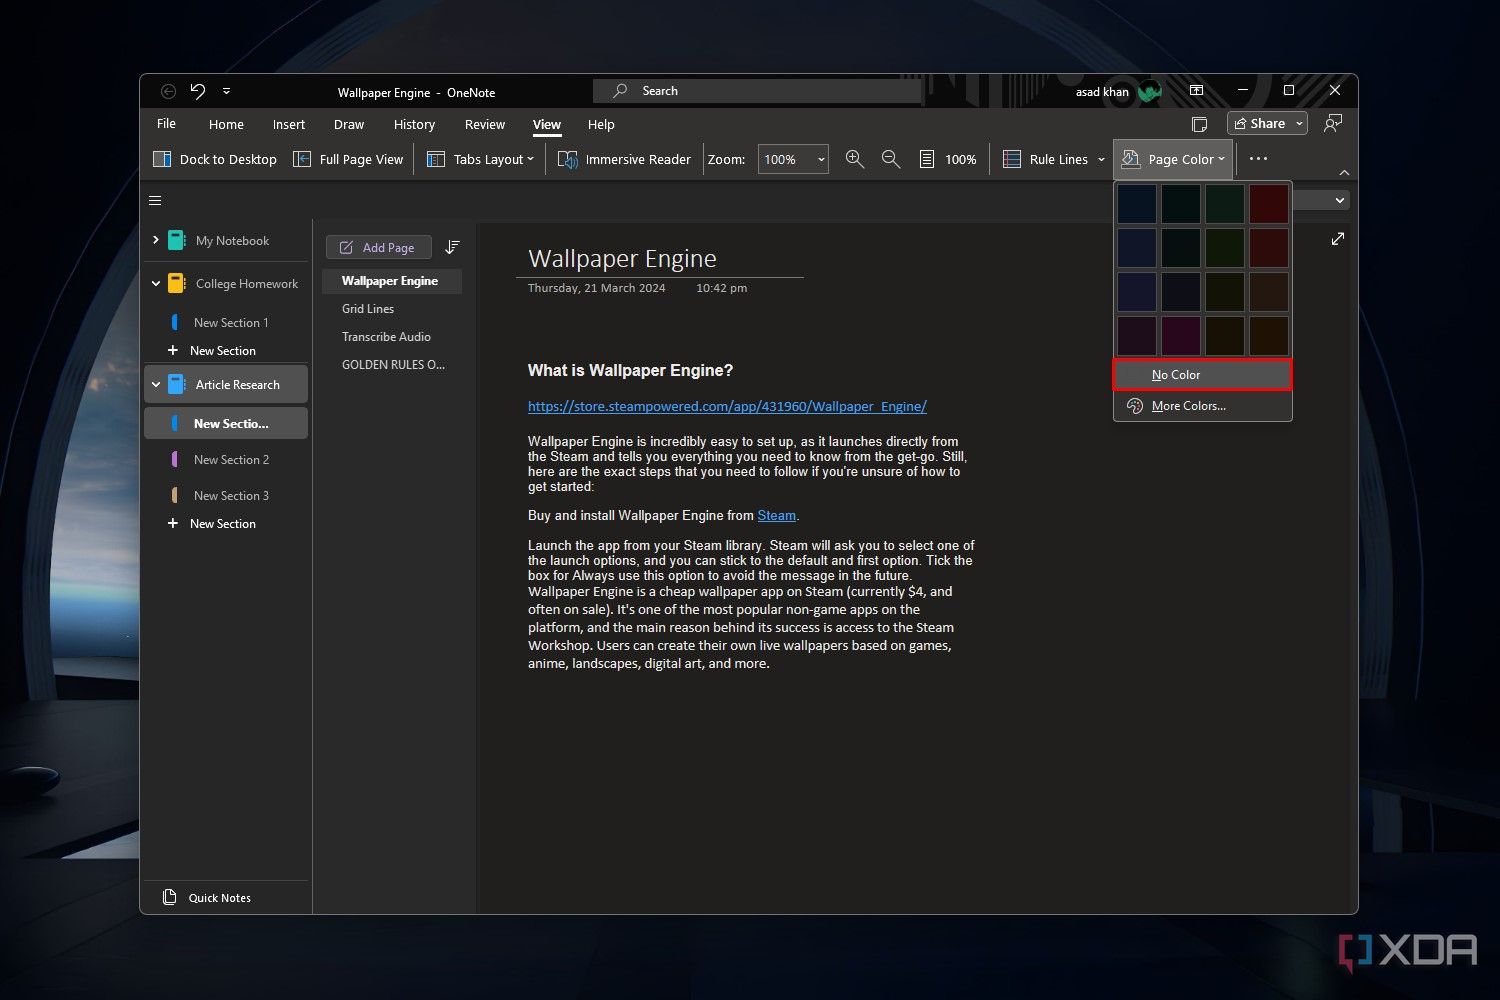
- If you don’t like the color you picked, go back to the Page Color menu, and select No Color to reset it.


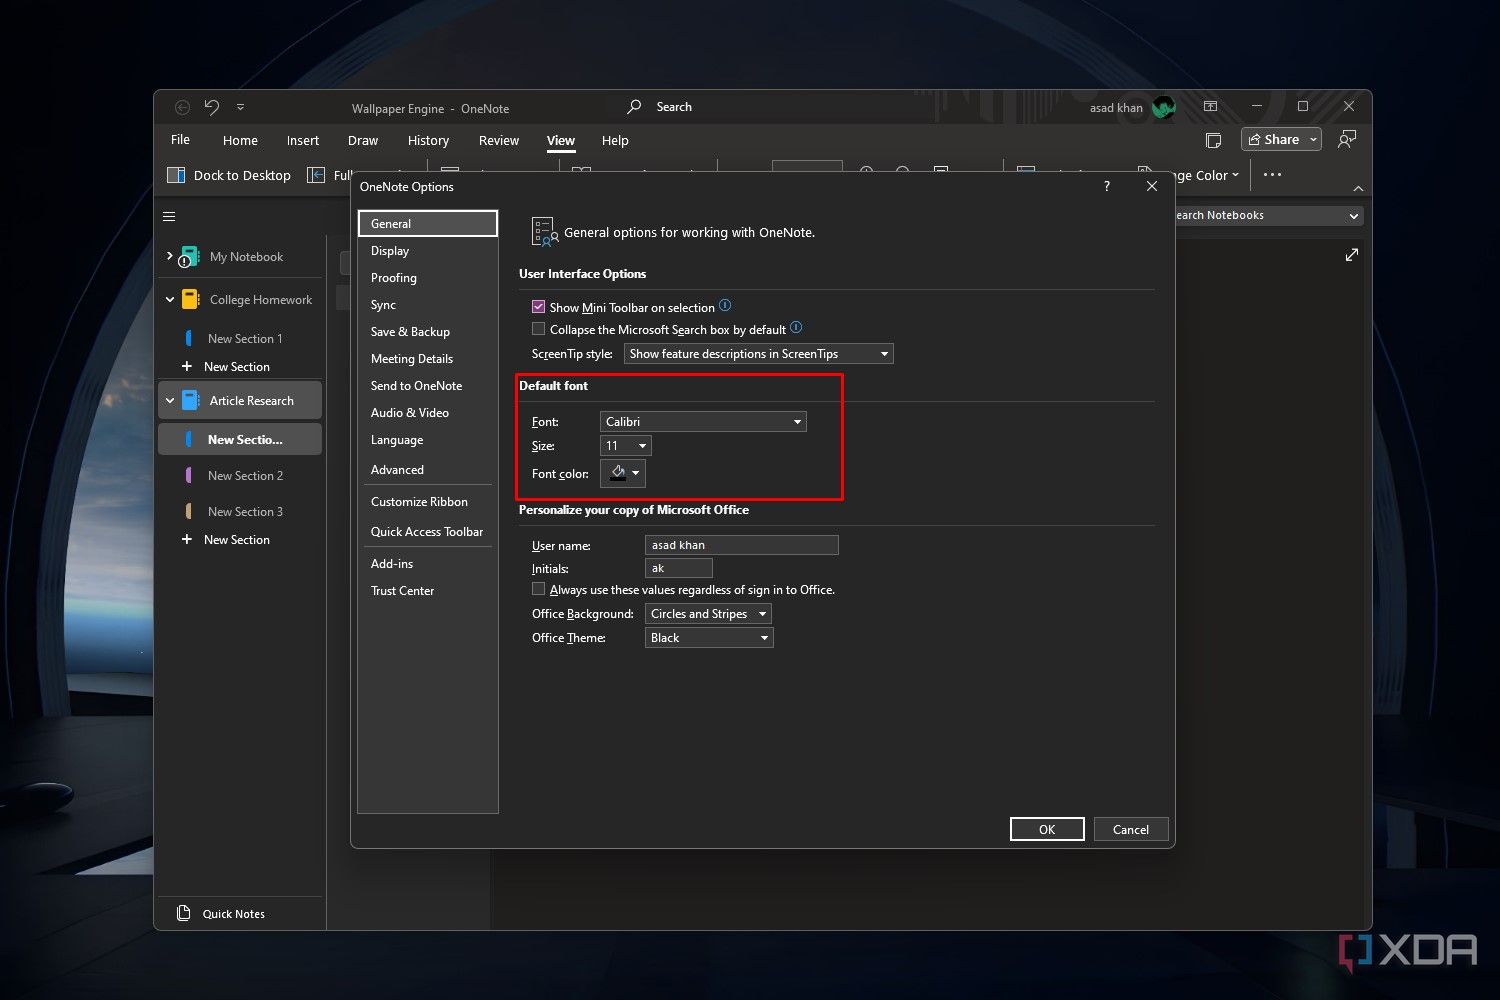
3 Change the default font
By default, OneNote uses Calibri as its primary font. If you’re not a fan of Calibri, OneNote offers a variety of fonts to personalize your notes and improve readability. Here’s how you can change the default font, its size, and even the color.
- Open OneNote and click the File tab in the top-left corner.
- From the File menu window, select Options from the left sidebar.
- Under Default font, choose your font, set the size, and change the font color to your liking. Click OK to apply the settings.

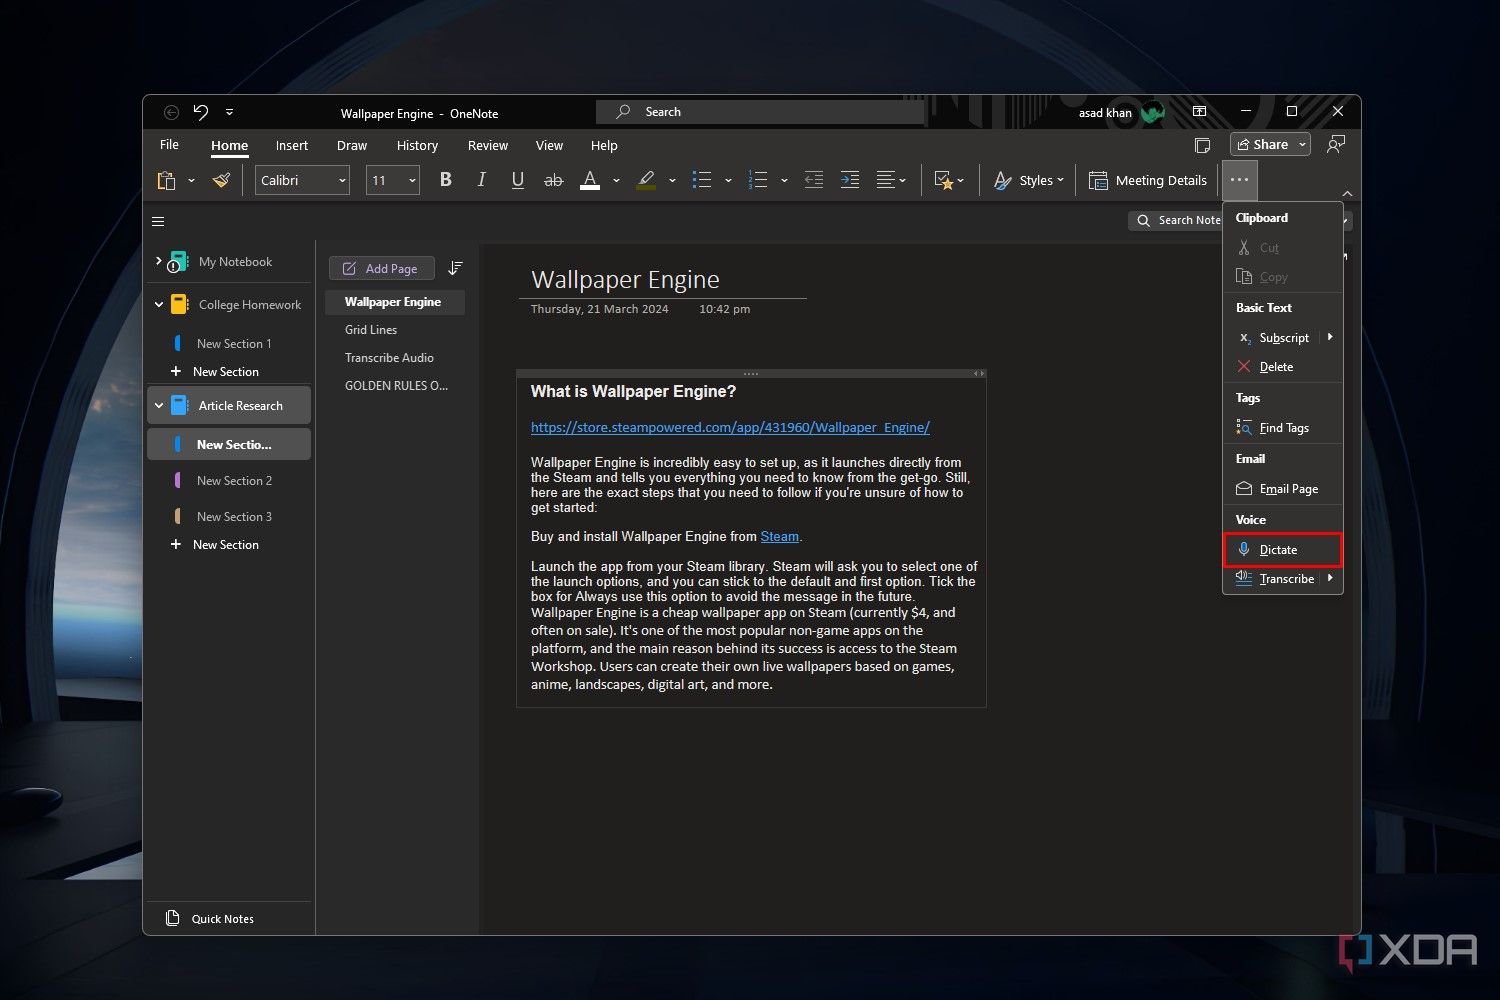
2 Dictation
Hands-free note-taking
Note-taking doesn’t always need to be about typing. If you’re a student in class or attending a presentation at work, you can use the Dictate feature to record audio and convert it into text. Here’s how it works:
- In an open OneNote window, click the Home tab in the toolbar.
- Next, click the three dots in the very corner of the screen.
- From the drop-down menu, select Dictate. You can now start speaking into the microphone, and OneNote will convert your audio to text.


If you find an interesting picture somewhere that can help as important research for your notes, OneNote can help you extract the text from that image. This saves you the effort of typing the text from that image manually.
- Find the picture that you want to extract the text from, copy it, and paste it onto a OneNote page.
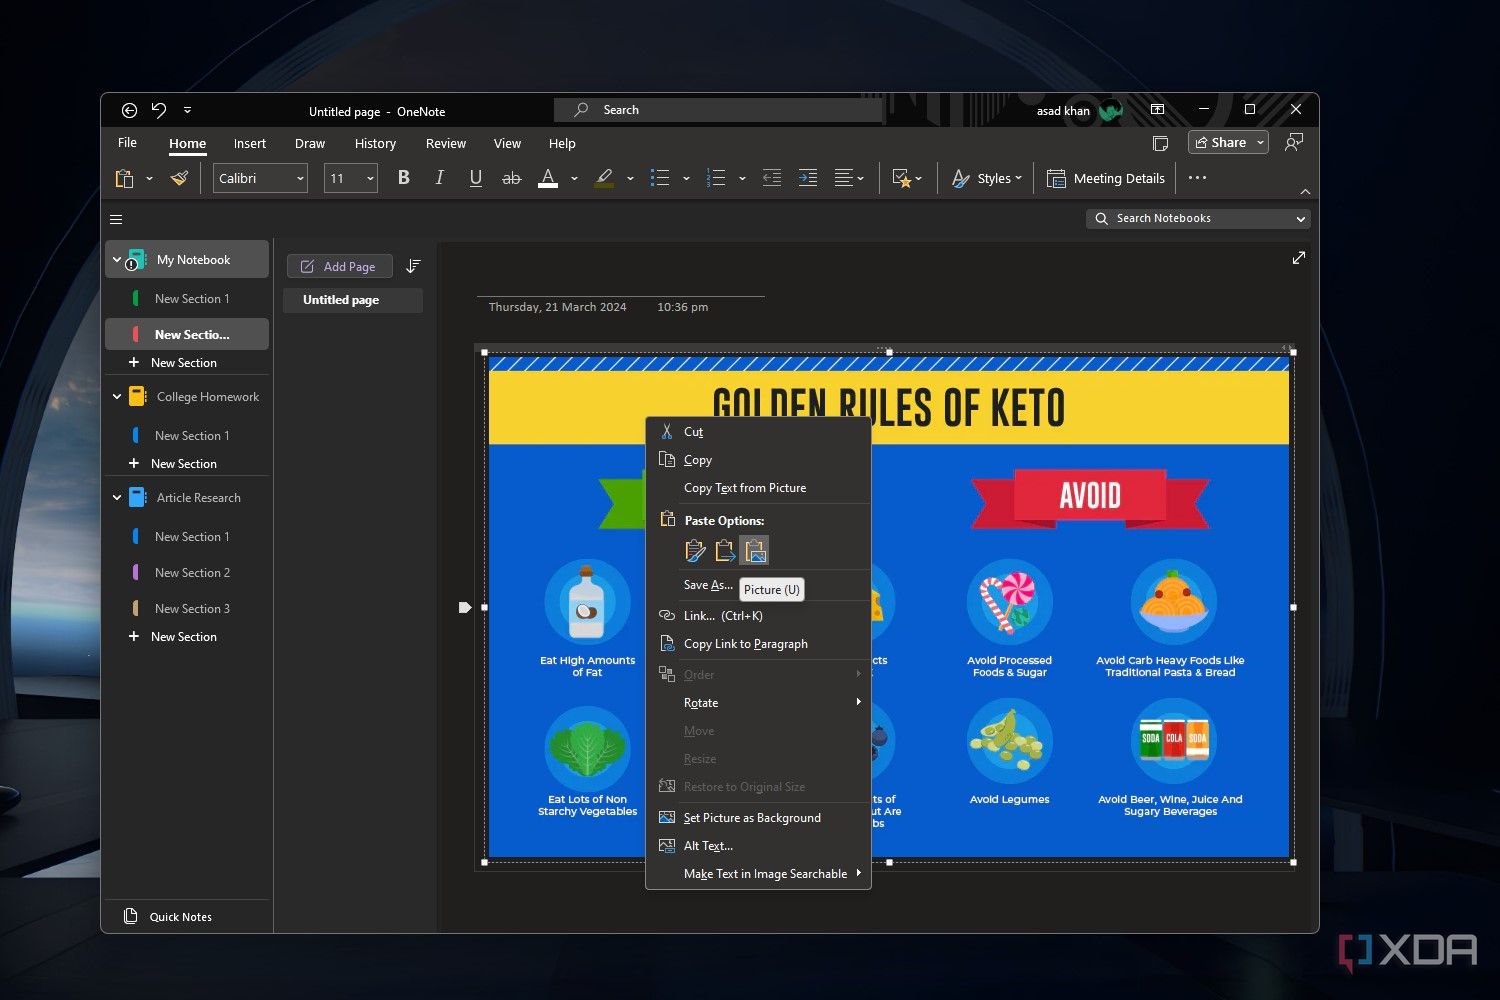
- After inserting the image, right-click it, and select Copy Text from Picture from the menu.
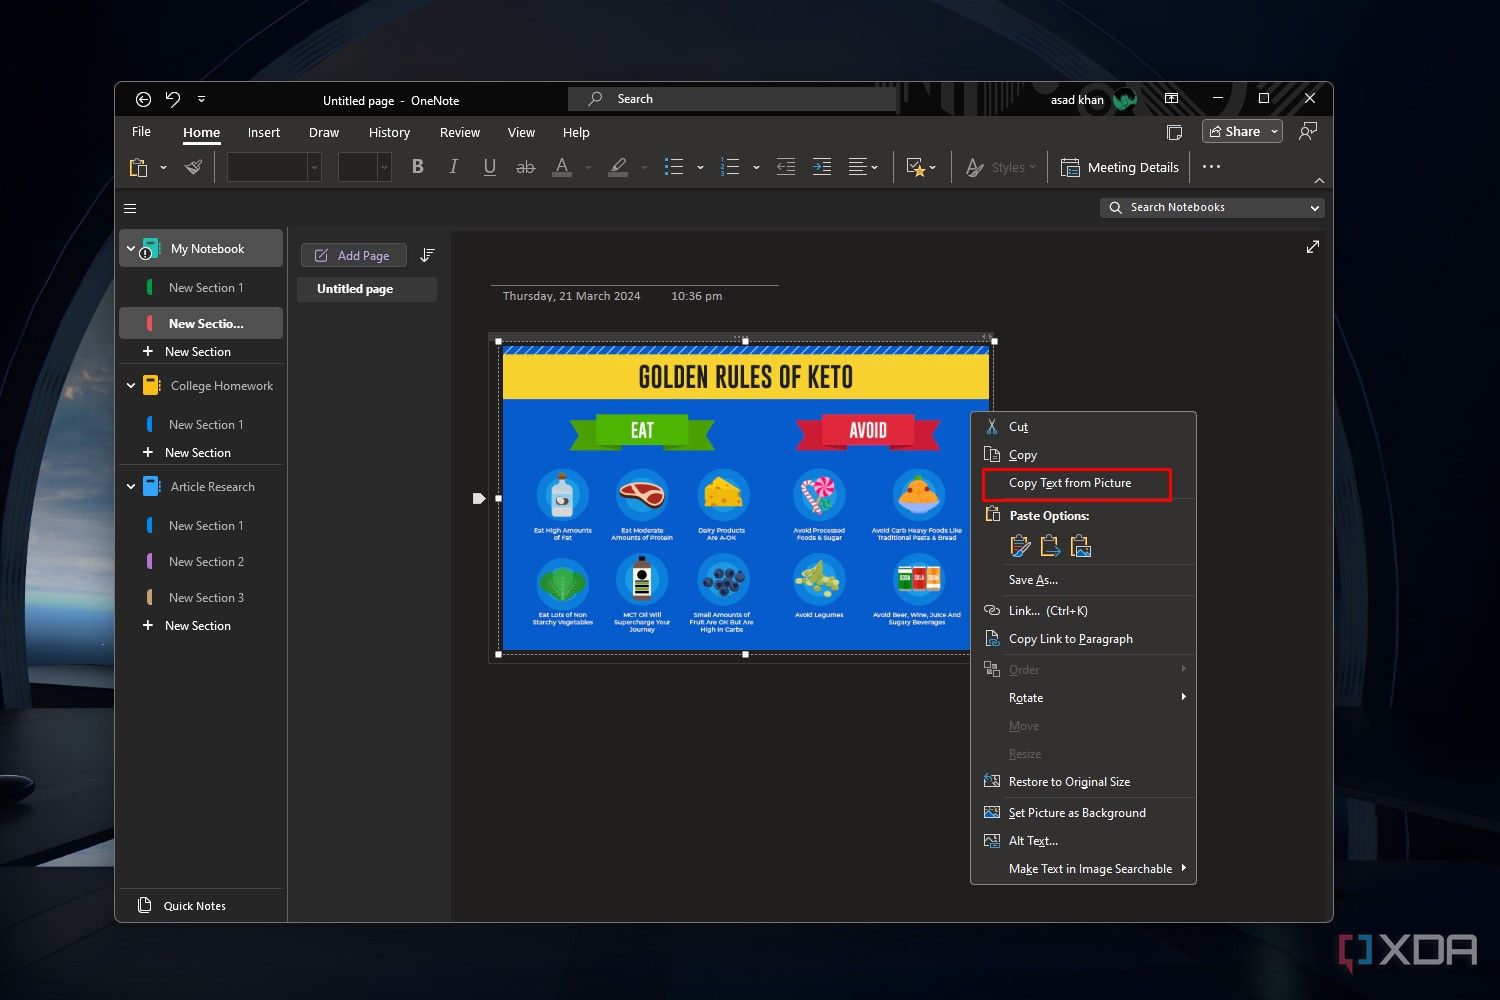
- Click anywhere on the page, and press Ctrl + V on your keyboard to paste the text.

- Format the text according to your preference.
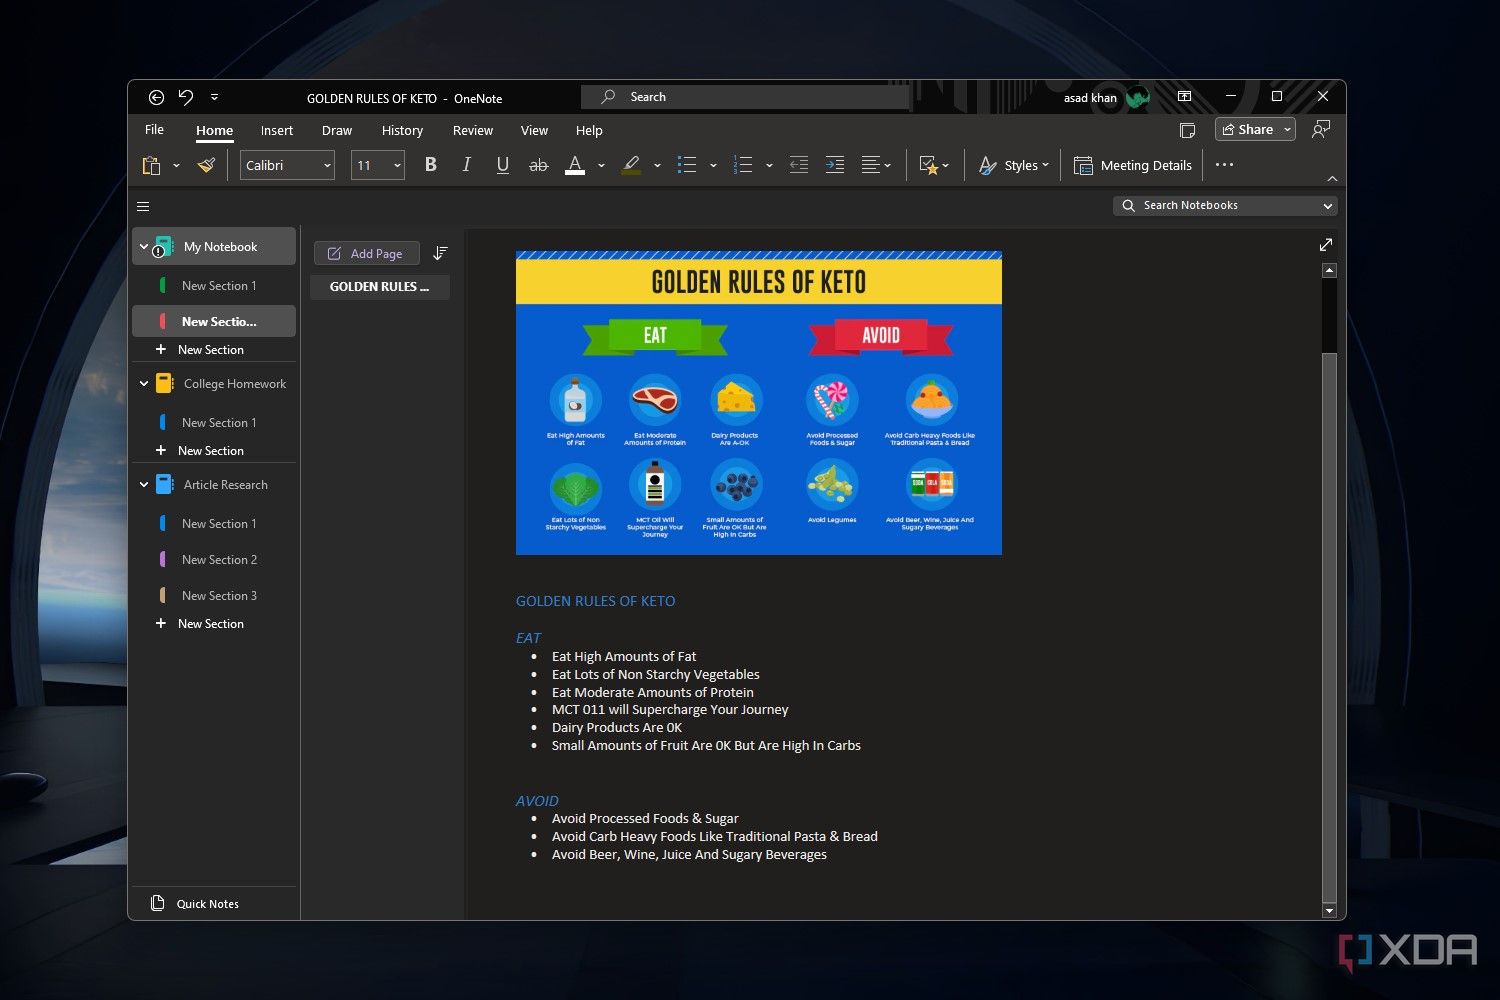


If you know how to use Google Lens and have dealt with it in the past, you know how helpful features like this can be. The iPhone has a similar feature called Live Text, and it’s nice to see that desktop apps are also starting to take advantage of these advanced features.
Making the most of Microsoft OneNote
Most of the tips discussed in this guide relate to the native OneNote app that’s available in the Microsoft Store. The app is a bit better than using the OneNote web app, as the online version has limitations regarding co-authoring and managing shared notebooks. Another final (and obvious) tip that we have is pinning the app to the taskbar for easy access. All these tips and tricks will quickly make you a OneNote power user, even if you’re not subscribed to the premium plan.

Microsoft OneNote
OneNote is one of the most versatile note-taking apps out there. It’s free, cross-platform, and integrates seamlessly with other Microsoft 365 apps. It’s an excellent app for almost any Windows user.
[ad_2]


